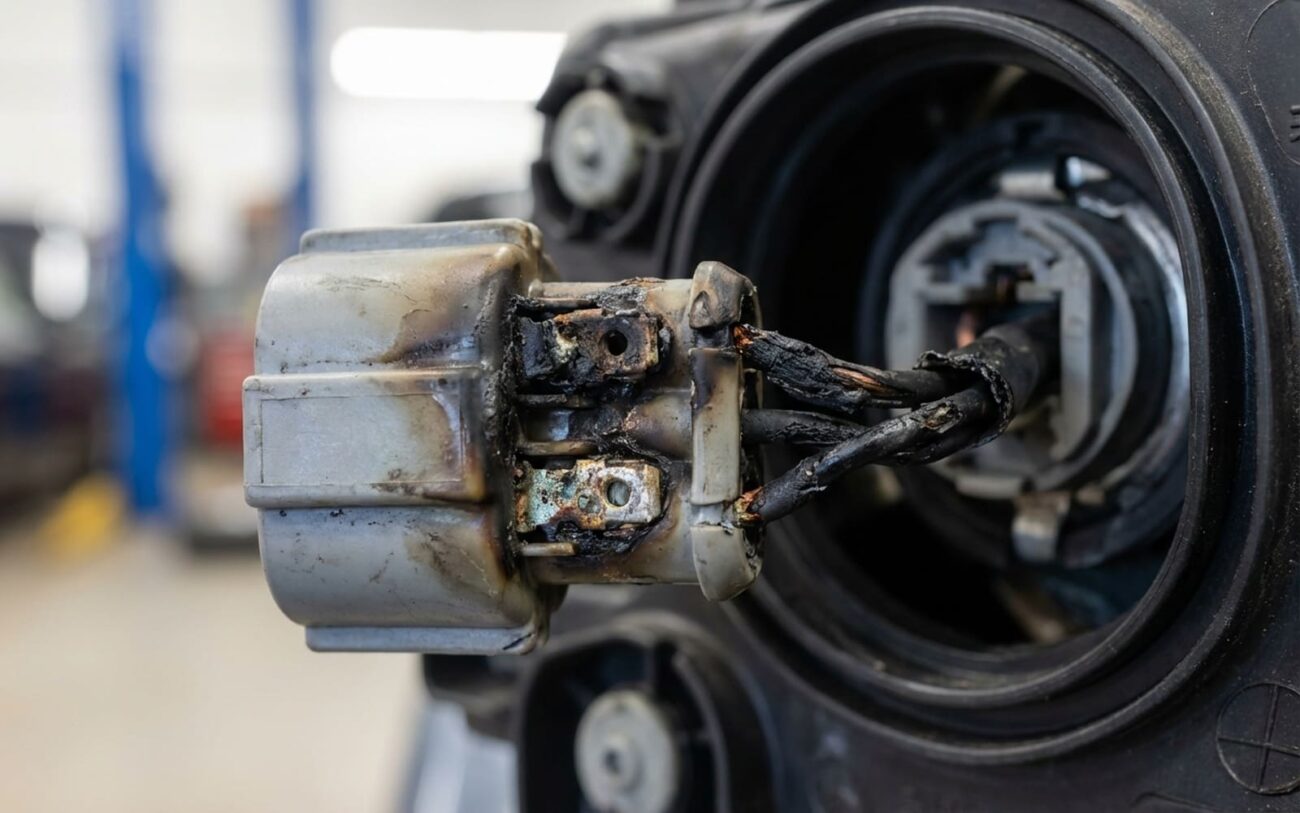
You pop the hood to swap a headlight bulb and find the connector looks like it went through a toaster. Plastic bubbled, terminals blackened, maybe even a bit of smoke smell. I’ve seen this more times than I can count—especially on older trucks and SUVs where owners want “brighter” lights and think slapping in a bigger bulb is the answer. It’s not. That melted connector is a red flag: your wiring is being cooked from the inside out by too much current. And if you don’t fix it right, you’re one overheated wire away from a fire.
What Actually Melts the Connector — And Why It’s Not Just “Bad Luck”
Let’s cut through the noise: headlight connectors don’t melt because they’re “cheap.” They melt because they’re being asked to carry more current than they were engineered for. Period.
OEM headlight circuits are designed for 55–65 watt halogen bulbs. That’s about 4.5 to 5.5 amps per side. The terminals, wire gauge (usually 16–18 AWG), and plastic housing (typically Nylon 6,6) are all spec’d for that load. But plug in a 100-watt “upgraded” halogen, or even some poorly designed LED kits, and suddenly you’re pushing 8+ amps through the same tiny terminals. That extra current creates heat at the point of contact—especially if there’s any resistance.
And here’s where it gets worse: heat increases resistance, which increases heat. That’s thermal runaway. The terminal oxidizes, the plastic softens, the spring tension drops, and the connection gets looser. More arcing. More heat. Eventually, the housing deforms, the wires pull out, and the headlight quits.
I’ve torn down connectors that were pulling over 8.5 amps—on a circuit rated for 5. The insulation was brittle, the wire discolored two inches back. That’s not a bulb issue. That’s a fire waiting to happen.
How to Diagnose: Find the Real Culprit
You can’t just replace the connector and walk away. If the root cause isn’t fixed, it’ll fail again—faster. Here’s how I break it down in the shop.
| Symptom | Most Likely Cause | What Else Could It Be? | How to Test |
|---|---|---|---|
| Plastic housing warped or discolored | Sustained overheating from high current or high resistance | External heat (exhaust, engine bay), short circuit nearby |
Voltage drop test: With high beams on, measure between the harness-side wire and the socket-side terminal. Over 0.1V? You’ve got resistance. |
| Terminals blackened or pitted | I²R heating from poor contact—loose, corroded, or under-sprung | Bulb not seated, internal bulb short, relay stuck closed |
Disconnect battery. Check resistance across mated pins. Over 50 milliohms? Bad connection. Also inspect bulb base—arcing there mimics connector failure. |
| Headlight flickers or doesn’t work | Terminal deformed, losing contact | Blown fuse, bad ground, failed bulb |
Test for power and ground at connector (circuit live). If both present but no output to bulb, fault is in connector. |
And don’t forget the ground. I’ve seen more than one case where the ground at the headlight housing was corroded, forcing current to find alternate paths. That increases resistance on the supply side too. Clean the ground point down to bare metal, apply dielectric grease, and torque it properly.
How to Fix It — For Real
There’s no one-size-fits-all repair. The fix depends on how far the damage has spread. Misjudge it, and you’ll be doing it again in six months.
Surface Damage — Rebuild It Right
DIY-Feasible
Harness Damage — Don’t Half-Ass It
Professional Only
Terminals Fried — Replace the Pigtail
Non-Repairable → Replace
Emergency Fix — Only If You’re Stranded
Temporary
Test It Like a Pro — Or It’ll Fail Again
You’re not done when the light turns on. You’re done when you’ve proven the connection is solid under load.
Here’s my test: run the high beams for 10–15 minutes. Then do a voltage drop test across the connector—same as during diagnosis. If you’re seeing more than 0.1V, the resistance is still too high. Find out why.
Also, check temperature. A warm connector is normal. Too hot to touch? That’s over 85°C (185°F)—way too hot. I use an infrared thermometer on every repair. And don’t forget the ground side: test voltage drop from the bulb ground to the chassis. Over 0.1V there? Clean the ground.
For full harness repairs, a shop should also test insulation resistance—use a megohmmeter to check for shorts. You want over 10 MΩ between any wire and ground. Moisture or cracked insulation can hide for months before failing.
What It’ll Cost — And When to Walk Away
Connector rebuild (parts only)
DIY cost with quality terminals and heat shrink
Shop repair (connector level)
Labor for rebuild or pigtail replacement
Success rate (proper repair)
For connector-level fixes done right
Risks if botched
Common with poor crimps or no dielectric grease
Full harness section replacement
Parts usually bundled in labor
Harness repair (shop)
Labor-intensive, especially with bumper removal
Success rate (harness level)
When done with proper materials and sealing
Failure risks
Moisture and vibration kill bad splices fast
On older cars, run the numbers. If the repair costs more than 30% of the car’s value, it might not make sense. In that case, your best move is to go back to OEM-spec bulbs and do the minimal safe repair—just enough to stop the overload. That eliminates the root cause and keeps you safe.
Stop It From Coming Back — For Good
Prevention isn’t hard. It just takes discipline.
First: use the right bulb. If your truck came with 55-watt halogens, use 55-watt halogens. That “100-watt” bulb might look brighter in the parking lot, but it’s cooking your wiring. And no, “it’s just for night driving” isn’t an excuse. I’ve seen too many dash fires start this way.
If you need more light—towing, night work, rural roads—install a relay harness. This is the single best upgrade you can make. The factory switch and connector only carry the signal current (less than 1 amp). The real power comes straight from the battery through 12 or 14 AWG wire and a relay. You can safely run 100-watt bulbs, LEDs, even off-road lights. I’ve installed these on everything from Tacomas to Ram 2500s. Most take under an hour.
And if you’re switching to LEDs: don’t just plug and pray. Some LED bulbs draw less current but can still cause issues if they don’t have proper CANbus compatibility or if they backfeed. Use kits that include a relay harness and proper drivers. Yes, they cost more. But so does replacing a melted connector—again.
Final tip: check your connectors every oil change. Look for discoloration, smell for burning, feel for heat after a drive. Catch it early, and you’ll save time, money, and maybe your truck.
