“Powertrain Fault” After Overheating? Here’s What I Look For.
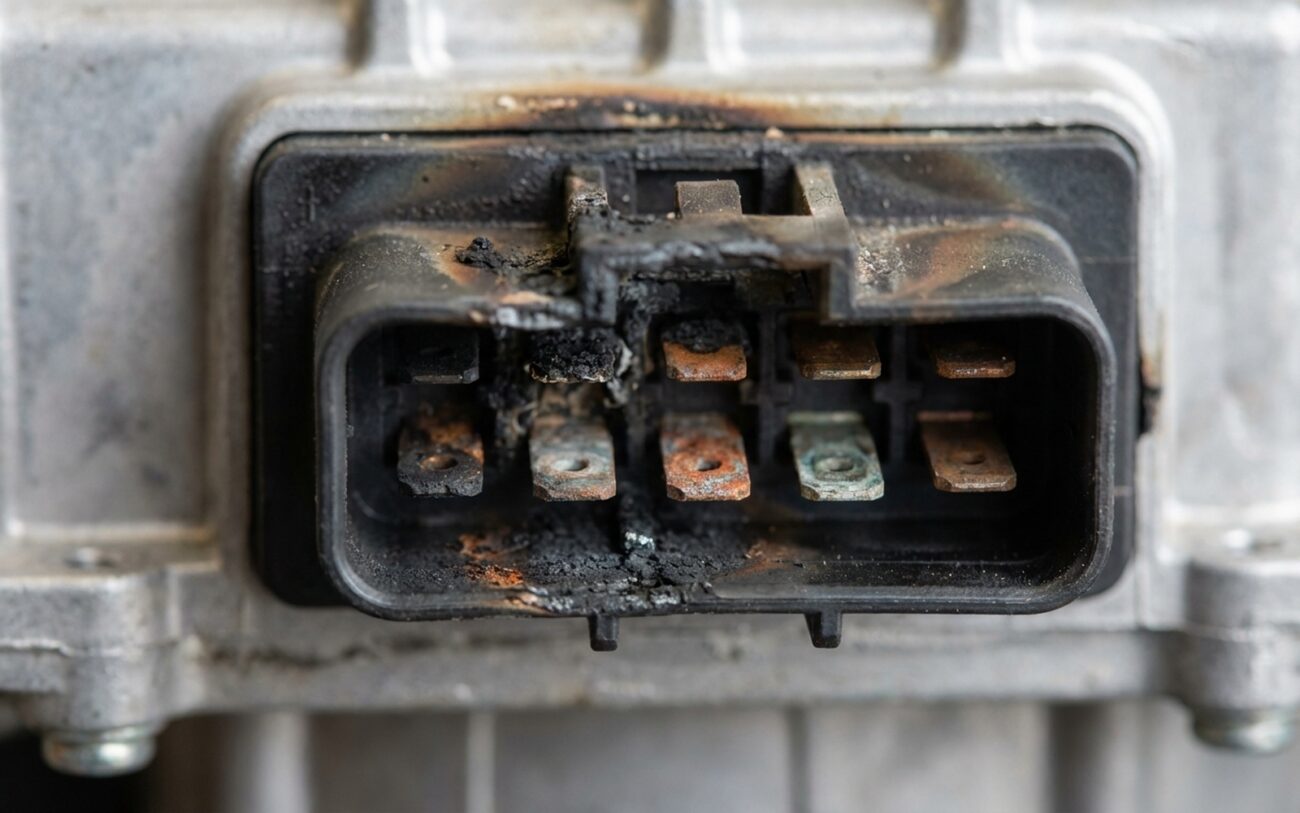
Alright, so a customer rolls in, EV’s been hot, and now it’s throwing a “Powertrain Fault.” I’ve seen this a thousand times. It’s never just a coincidence – that thermal stress has almost certainly triggered a protective shutdown in the high-voltage system. And yeah, the traction motor, the heart of the electric drive, is usually right in the middle of it.
But here’s the real trick: is it a temporary fault, something the system can bounce back from once it cools? Or are we looking at permanent internal damage? My job, and yours, isn’t just to clear the code and send ’em out the door. It’s to figure out if that motor is truly compromised. Let’s dig into how I approach that with confidence.
Spotting Real Internal Motor Damage
Modern EVs are smart; they’re designed to protect themselves. When temperatures climb, the control module will usually cut torque or even initiate a full thermal shutdown to prevent damage. A lot of times, after the car cools down, it’ll go back to normal. But repeated or severe overheating? That’s when you start seeing irreversible damage. Knowing the difference between a temporary limp mode and a genuine mechanical or electrical failure is absolutely critical.
First thing I look for are persistent insulation resistance DTCs. We’re talking codes typically in the P0C2000–P0C2999 range. These codes tell me the vehicle’s detected current leaking from the motor windings to ground. If those codes keep coming back after the system has completely cooled, that’s a huge red flag. It usually means the enamel insulation on the copper windings has degraded from all that heat cycling. This isn’t just a warning; it’s a sign of material breakdown inside the stator.
Next up is excessive torque derating that just doesn’t resolve. I’ve had cars come in feeling sluggish even at low speeds, with no improvement even after sitting overnight. That often points to partial demagnetization of the rotor’s rare-earth magnets. See, unlike a gas engine where power loss might be a sensor or fuel delivery issue, in an EV, this symptom often traces right back to the motor’s core performance. Once those magnets lose their strength from heat, they don’t get it back.
And then there’s noise. A healthy traction motor should have a smooth, high-pitched whine. But if you hear grinding, scraping, or a metallic resonance under load, you’ve got mechanical failure. Think bearing degradation or rotor warpage. Ignoring those sounds is a recipe for disaster. A seized bearing can lock up the rotor, and that short circuit can take out the inverter, turning what might have been a motor repair into a full powertrain replacement. I’ve seen it happen.
Is It the Motor, or Just the Cooling System? (Don’t Guess!)
This is probably the most common misdiagnosis I see in EV repair: assuming the motor is toast when the real problem is the cooling system. Remember, an overheating motor is a symptom, not always the root cause. The fault could be a failed coolant pump, a clogged radiator, or a stuck thermostat – all external to the motor itself. Jumping straight to a motor replacement without verifying the source is a costly mistake, both for you and the customer.
Here’s how I break down the common symptoms and what tests truly differentiate between internal motor damage and an external cooling system issue:
| Symptom | Likely Internal Motor Damage | Common External Mimics | My Definitive Test |
|---|---|---|---|
| Persistent Insulation Fault DTCs | Thermal degradation of stator winding insulation, leading to ground faults. | Contaminated, damaged, or pinched HV cables between inverter and motor. |
Perform a Dielectric Withstand Test (Hi-Pot) with the motor isolated. If it fails below 500V DC, you’ve got internal breakdown. |
| Excessive Torque Derating | Partial demagnetization of rotor magnets due to exceeding Curie temperature. | Faulty current sensors in the inverter or inaccurate motor temperature sensors. |
Command low-RPM rotation via scan tool; compare actual vs. commanded torque. A significant deficit confirms magnet loss. |
| Abnormal Grinding Noise | Bearing failure from lubricant breakdown due to prolonged overheating. | Worn gears or bearings in the reduction gearbox or differential. |
Use a stethoscope to isolate the noise. Run the motor in service mode with the axles disconnected to rule out the gearbox. |
How Overheating Kills a Traction Motor (and Why You Can’t Fix It)
It’s important to understand why these motors fail when they get too hot. It helps explain to customers why a simple “fix” isn’t an option. A traction motor is a sealed, precision unit. When it overheats, several internal components degrade in ways that just can’t be repaired in the field. Here’s what I typically see:
-
Insulation breakdown is the most common electrical failure. That thin enamel coating on the stator windings is tough, but repeated thermal cycling causes micro-cracks. Once that insulation fails, current arcs to the housing, and the safety systems shut everything down.
-
Magnet demagnetization is a silent killer. Neodymium magnets lose their field strength if they get too hot, typically beyond their Curie point (around 150–220°C). Once they’re weakened, you can’t re-magnetize them on the vehicle. Even a 20% loss in flux means a noticeable drop in power.
-
Physical warpage happens when thermal stress distorts the rotor or stator laminations. A warped rotor can start rubbing against the stator, which generates metal shavings, increases drag, and eventually leads to a seizure.
-
Bearing failure is pretty predictable. Heat breaks down the specialized high-temperature grease, leading to metal-on-metal contact, cage deformation, and eventually, a lockup.
Critical Insight:
While these are internal motor failures, the cause is almost always external. A failed coolant pump, low coolant level, or a clogged radiator can all lead to the same outcome. Fixing the cooling system is essential to prevent recurrence, but it won’t undo the damage already done to the motor. You can’t un-cook an egg, and you can’t un-demagnetize a magnet.
So, What Can You Actually Do to Fix It?
This is Professional Territory. No Shortcuts.
Once you’ve confirmed internal damage, your options are pretty limited – and they’re definitely not cheap. There are no quick fixes or temporary patches for a compromised traction motor. Anyone telling you otherwise is selling snake oil.
Electrical Failure (Insulation, Windings) Non-Repairable in the Field
Mechanical Failure (Bearings, Rotor Warpage) Replacement or Specialized Rebuild
And don’t forget: even something as “simple” as a leaking coolant jacket seal on the motor requires full disassembly. There are no user-serviceable parts on a sealed traction motor. As for “cool it down and keep driving”? That’s a dangerous gamble. External cooling won’t restore insulation or magnet strength. At best, it just delays the inevitable. At worst, you risk a full short circuit or taking out the inverter, which just makes things a whole lot more expensive.
Proving the Fix: Post-Repair Validation
Replacing or rebuilding isn’t the end of the job – it’s just the beginning of validation. You can’t just clear codes and call it a day. For a full motor assembly replacement, I always use a factory-level scan tool to perform post-installation diagnostics. The acceptance criteria should be clear: no HV or motor-related DTCs after three complete drive cycles, a successful insulation resistance test (I’m looking for >500 Megohms, minimum), and a torque verification test within 5% of commanded values.
If you’ve done a rebuild involving disassembly, the validation is even more critical on the mechanical side. Run the motor under no-load conditions – wheels off the ground, in service mode – from idle to maximum RPM. Listen carefully. Any grinding, scraping, or rhythmic noise means you’ve got a problem. A truly professional shop will also perform a vibration analysis, checking for abnormal frequency peaks that indicate imbalance or bearing issues. Don’t skip these steps.
The Hard Numbers: Is This Repair Even Worth It?
This is where the rubber meets the road for the customer. Here’s what I typically see for costs:
| Repair Type | DIY Cost (Parts Only) | Shop Cost (Installed) | My Expected Success Rate |
|---|---|---|---|
| Complete Motor Assembly Replacement | $4,000 – $8,000 | $6,500 – $12,000 | 98% (Certified Reman) |
| Professional Bearing Replacement | N/A (Specialized) | $2,500 – $4,500 | 70 – 85% (Depends heavily on shop skill) |
My rule of thumb? If the repair cost starts creeping past 50% of the vehicle’s current market value – especially if the high-voltage battery is also getting old – it’s time to have a serious talk about economic feasibility. Pouring $10,000 into a single component on an $18,000 car rarely makes financial sense for the owner. Sometimes, the best repair is a different car.
Stopping This From Happening Again
My Proactive Maintenance Tips
Prevention starts with the thermal management system. The traction motor and inverter rely on a dedicated coolant loop with specialized dielectric fluid – this isn’t your daddy’s regular antifreeze. It’s designed to insulate electricity, not just transfer heat.
-
Always follow OEM intervals for coolant replacement. Fluids like Tesla G-48 or Honda HCF-2 are engineered for electrical insulation and specific thermal properties. Don’t cheap out here.
-
Tell your customers to monitor their energy consumption. A gradual increase in kWh/mile can be an early warning sign of rising motor inefficiency – possibly from early bearing drag or even demagnetization.
-
Advise adjusting driving habits in extreme heat. Repeated full-power acceleration, especially right after a DC fast charge, stacks thermal load like crazy. Give the system a chance to cool down.
