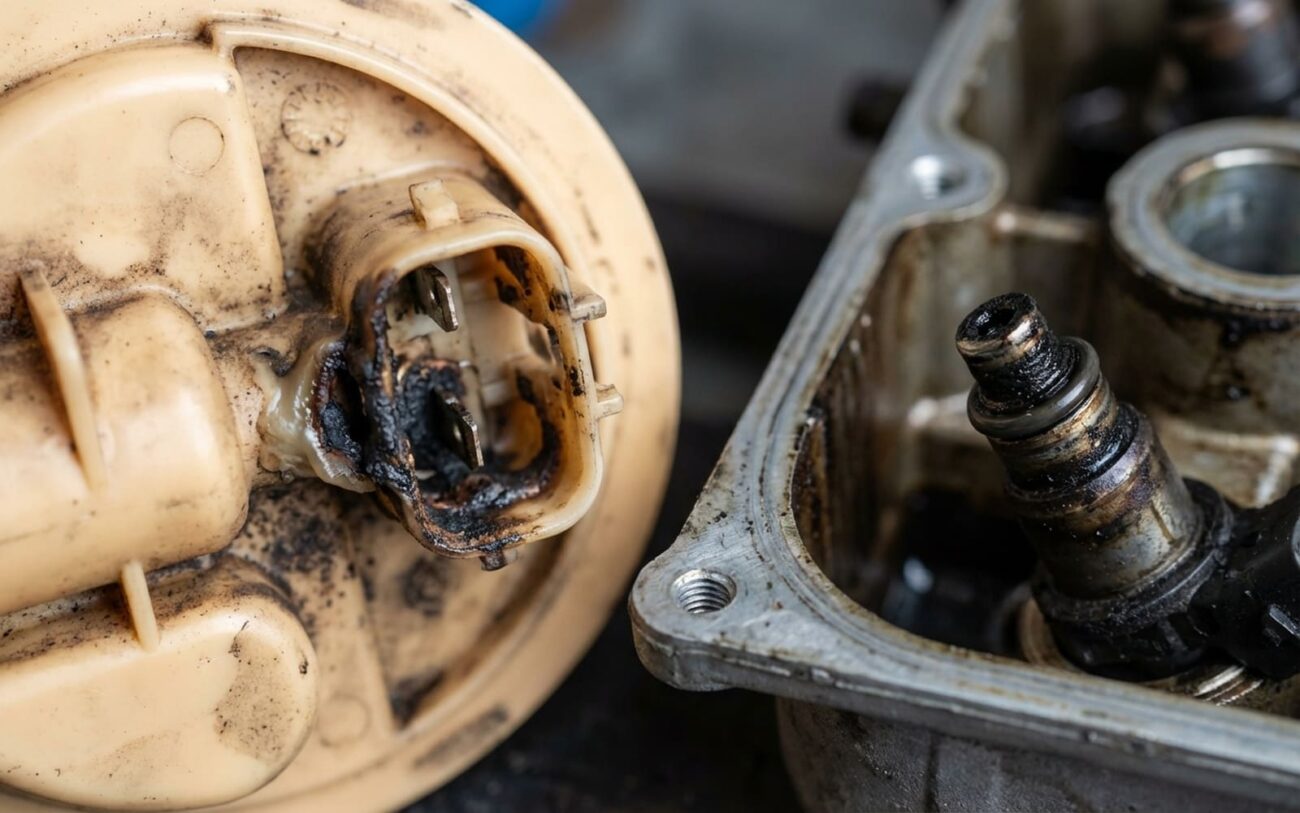
The Tell-Tale Signs of a Dying Fuel Pump
After 25 years in this business, when a customer complains about their engine stumbling or hesitating only when they really lean on the throttle—especially going uphill or with a heavy load—my first thought, almost every time, is the fuel pump. It’s a classic “high load misfire” scenario, and it points directly to a fuel delivery problem.
Here’s what’s happening under the hood: when you accelerate hard, the engine’s demand for fuel skyrockets. A weak fuel pump just can’t keep up. It can’t maintain the right pressure or volume, and that starves the engine, creating a lean air-fuel mixture. When the engine runs lean, combustion gets unstable, and cylinders start to misfire.
Now, your check engine light will probably come on, logging generic random misfire codes like P0300, or even specific cylinder misfires (P0301–P0308). But these codes don’t tell you why it’s misfiring; they just tell you where. The real problem is often upstream, right there in the fuel delivery system.
Other Symptoms I Look For:
- Long Hot Starts: Ever notice your car cranks for what feels like forever when it’s hot, but starts fine when cold? We call that “hot start hesitation.” After you shut the engine off, residual heat soaks into the fuel system. A worn pump struggles to re-establish proper pressure when it’s hot, leading to those extended cranks.
- Surging or Hesitation at Steady Speeds: If you’re cruising down the highway, especially on an incline, and the car feels like it’s momentarily losing power or surging, that’s another red flag. This erratic behavior often means the pump’s motor or internal components are failing, causing inconsistent fuel delivery.
Don’t Guess, Test: Proving It’s the Pump
Look, plenty of things can mimic a failing fuel pump, so jumping to conclusions is a great way to waste time and money. Ignition coils, for example, frequently fail under load and cause almost identical symptoms. A clogged catalytic converter or some other exhaust restriction can also choke power and trigger lean conditions. Even low compression or a sneaky vacuum leak can show up as misfires under acceleration. The key is always testing, not guessing.
To confirm if the fuel pump is the real culprit, you’ll need the right tools: a mechanical fuel pressure gauge with the correct adapter for your vehicle’s test port, a digital multimeter, and, ideally, a good scan tool that can monitor live data. These aren’t optional; they let you see what’s happening in real-time under operating conditions, which is absolutely essential for an accurate diagnosis.
| Symptom | Why It Points to the Fuel Pump | Common Mimics | How I Confirm It |
|---|---|---|---|
| Misfire under load only | Pump can’t keep up with high fuel demand, leading to lean conditions. | Weak ignition coil, restricted exhaust, vacuum leak, low compression. |
Connect a pressure gauge. Perform a wide-open throttle (WOT) pull. If pressure drops more than 10% below spec, you’ve found your problem. Always follow up with a volume test. |
| Long hot starts | Worn pump motor or a failed internal check valve lets fuel drain back into the tank, losing prime. | Leaking fuel pressure regulator, faulty check valve (can be separate), leaking injector, weak fuel pump relay. |
With the engine off, monitor how quickly fuel pressure drops over 5–10 minutes. Then, measure fuel pressure during cranking when the engine is hot. It should build quickly. |
| Surging at steady load | Erratic fuel delivery due to worn motor brushes or a failing impeller. | Intermittent wiring, failing fuel pump control module (FPCM), or sensor faults affecting fuel trim. |
Observe the pressure gauge needle during a surge. If the voltage supply to the pump is steady but pressure fluctuates, the pump itself is faulty. |
A good scan tool is your best friend here. Watch your long-term fuel trims (LTFT), especially under load. If LTFT is consistently high (I mean, above +10%), the engine computer is desperately adding fuel to compensate for a lean condition. That’s strong evidence of inadequate fuel delivery. Also, keep an eye on short-term trims (STFT) during acceleration; sudden spikes can indicate momentary fuel starvation.
And don’t overlook the electrical side. Modern fuel pumps often rely on complex CAN bus signals between the ECU and a dedicated fuel pump driver module. If you’re seeing intermittent fuel delivery and erratic data, it might be worth checking for CAN bus communication errors. I’ve chased my tail on a few of those.
What Actually Fails Inside the Pump
The in-tank fuel pump isn’t just a simple motor; it’s a precision component, submerged in fuel, and designed to last for well over 100,000 miles. But like anything mechanical, it eventually wears out. Most internal failures come down to the electric motor itself or the hydraulic components.
- Worn Carbon Brushes: The electric motor uses carbon brushes to transfer current to the rotating commutator. Over time, these brushes wear down. That increases electrical resistance, slows the motor, and reduces the speed of the impeller (or turbine). A slower impeller means less pressure and less flow. This wear is usually gradual, which is why symptoms often show up first under high load when the demand simply exceeds the pump’s diminished capacity.
- Degraded Impeller: The impeller itself—often made of plastic or a composite—can degrade. It might warp, crack, or lose blade efficiency because of fuel contaminants or prolonged operation at high temperatures. When this happens, the pump struggles to generate adequate fuel volume, even if the pressure seems okay at idle.
- Failed Check Valve: Another common failure point is the internal check valve. This small one-way valve is supposed to maintain residual pressure in the fuel lines after you shut the engine off. If it fails, fuel drains back into the tank, leading to those annoying long cranks and difficulty restarting, especially when the engine is hot. It’s worth noting that a failed check valve doesn’t always mean the entire pump motor is bad—it’s just one part of the module.
Manufacturer Insights:
Manufacturers are well aware of these wear patterns. For example, on some 3.6L Pentastar engines, there are documented issues with fuel pump brush wear leading specifically to hot-start problems. While specific service bulletins exist for certain model years, the underlying failure mode—brush wear causing reduced voltage delivery and poor hot performance—is a common theme across many different vehicle platforms. It’s not just one brand; it’s how these things are built.
It’s crucial to differentiate between a truly failing pump and other fuel system faults. A clogged fuel filter, a corroded electrical connector, or a failing fuel pump relay can all cause nearly identical symptoms. That’s why I always test the entire circuit—including voltage drop and amperage draw—before I condemn the pump itself. I’ve replaced plenty of relays and connectors that were initially misdiagnosed as bad pumps, and that’s just wasted money.
Getting It Fixed: Your Options
The right repair depends entirely on what your testing reveals. Don’t just assume you need a full pump replacement; sometimes the fix is simpler and a lot less expensive.
Strainer Cleaning/Replacement DIY-FEASIBLE with caution
Complete Fuel Pump Module Replacement DIY-FEASIBLE for competent DIYer
When to Call a Pro:
On some models, you have to drop the entire fuel tank to get to the pump. And if that means removing exhaust components, driveshafts, or suspension parts, then the job quickly becomes PROFESSIONAL-ONLY. There’s too much complexity and too many safety concerns for the average DIYer. Don’t risk it.
The Critical Last Step: Post-Repair Validation
Replacing a fuel pump isn’t the end of the job; verification is. Just bolting in a new pump without testing leaves too much room for error. You need to confirm three things: that you have proper pressure, stable flow under load, and reliable hot restarts.
Static Pressure Test
High-Load Simulation
Hot Restart Validation
These steps confirm not just that the pump is working, but that the entire fuel delivery system is functioning exactly as it should. Skipping them is a gamble that risks missing an underlying issue, and that’ll just lead to repeat misfires and a frustrated customer (or yourself).
The Bottom Line: Costs and Tough Choices
Fuel pump repairs can vary quite a bit in cost, depending on your vehicle’s design and how accessible the pump is. Here’s what I typically see in terms of realistic cost ranges and outcomes:
| Repair Type | DIY Cost (Parts) | Shop Cost (Est.) | Success Rate | Secondary Risk if Failed |
|---|---|---|---|---|
| Strainer Replacement | $20 – $50 | $200 – $400 | High (if clog was the sole issue) | Low. Poor reinstallation could introduce debris or cause a fuel leak. |
| Complete Pump Module Replacement | $150 – $500 (OEM) | $600 – $1200+ | Very High | Moderate. Faulty wiring, improper seal installation, or debris in tank could lead to leaks or early failure. |
| Using “fix-in-a-bottle” cleaner | $10 – $20 | N/A | Very Low for mechanical wear | High. May delay necessary repair, leading to lean misfire, engine damage, or breakdown. |
The 40% Economic Rule
Here’s a rule I follow in the shop, and it’s a tough conversation I have with customers all the time: if the estimated repair cost exceeds about 40% of the vehicle’s fair market value—that’s the price of a comparable, running car—it’s time to seriously evaluate long-term ownership. For example, spending $1,000 to fix a fuel pump on a car that’s only worth $2,500 is a significant investment. You have to consider future repairs, overall reliability, and whether the car is still worth the risk. I’ve seen too many owners pour money into aging vehicles only to face another major failure weeks or months later. Sometimes, it’s just time to move on.
Prevention and Monitoring: Keeping Your Next Pump Healthy
Fuel pumps aren’t immortal, but you can definitely maximize their lifespan with a few smart habits. These are things I tell all my customers:
-
Keep your fuel tank above a quarter full whenever possible. Gasoline actually cools and lubricates the pump. Running on fumes regularly causes the pump to run hotter, which accelerates wear on the motor and its brushes. It’s a simple thing, but it makes a big difference.
-
Use Top Tier detergent gasoline. These fuels contain higher concentrations of deposit-control additives that help prevent varnish buildup on the pump internals, injectors, and that all-important inlet strainer.
-
Listen to your car. When you turn the key to “on,” the fuel pump should make a brief, smooth whirring sound for 1–2 seconds as it primes. If it starts to whine, buzz, or sound strained, that’s often an early warning sign that something’s not right.
-
Use a basic OBD2 scanner to monitor long-term fuel trims (LTFT) during steady highway driving. If LTFT starts creeping above +10%, especially under light load, it means the ECU is compensating for reduced fuel delivery. That’s your cue to investigate before a misfire even happens.
-
If your vehicle has a fuel pump driver module (FPDM) or fuel pump control module, ensure its electrical connections are clean and secure. Voltage drop tests can reveal resistance issues in the wiring before they cause any noticeable symptoms.
