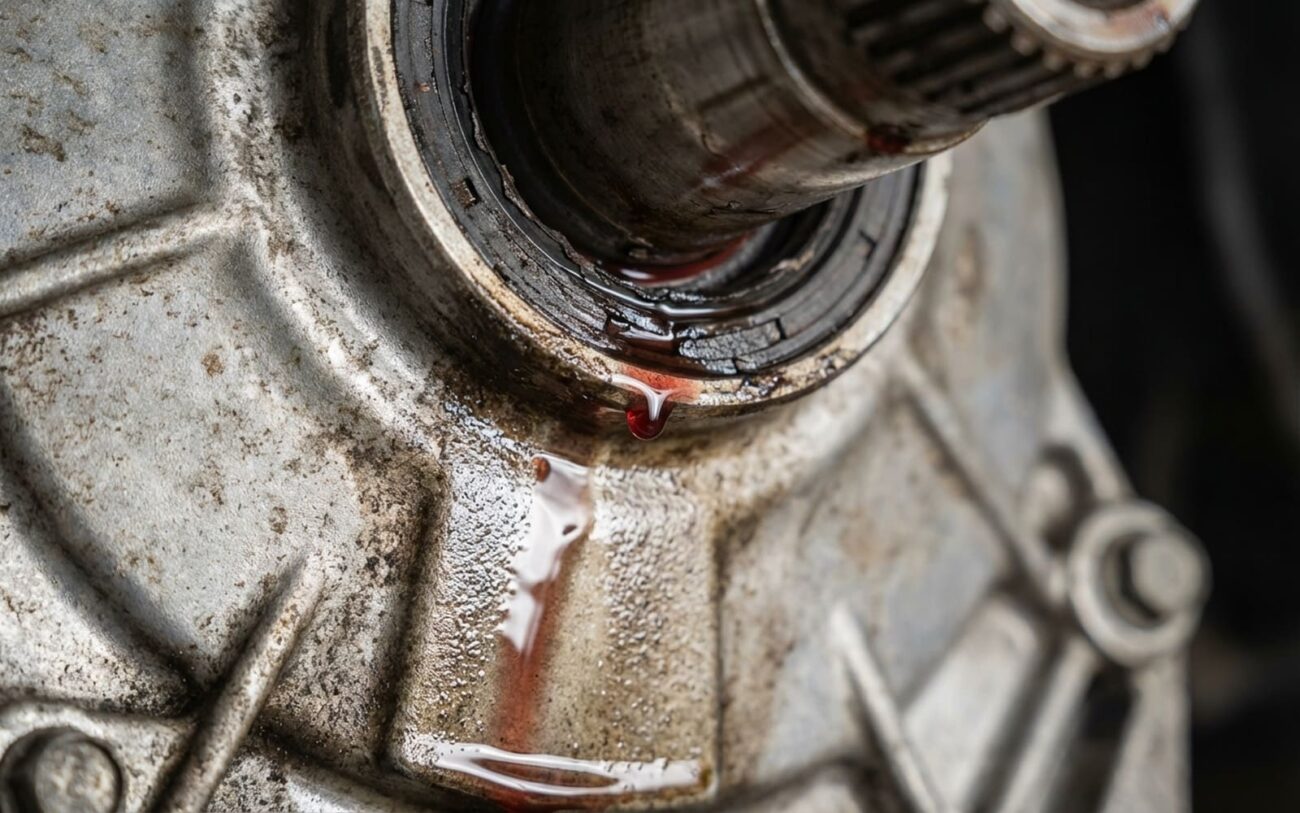
The Drip: What a Leaking Transmission Output Shaft Seal Really Means
If you’re seeing that tell-tale red or brown fluid dripping from the rear of your transmission—right where the driveshaft connects—you’re probably looking at a failing output shaft seal. It’s a small part, just a precision-fitted ring of rubber and metal, but it’s critical for keeping the fluid inside where it belongs.
Now, that drip isn’t just annoying; it’s a warning sign. What starts as a slow seep quickly adds up. I’ve seen too many transmissions ruined not by the seal itself, but by drivers who ignored the symptoms and kept going. That low fluid level leads to overheating, and that’s where the real trouble begins.
TRANS MONITOR
Status: 235°F
Don’t Guess: Confirming the Leak Source
Before you even think about grabbing a wrench, you need to be absolutely sure that red or brown puddle is coming from the output shaft seal. The rear of the transmission is a crowded area, and a lot of things can leak fluid that ends up in the same spot. Trust me, misdiagnosis here leads to wasted time and money, and I’ve had guys replace a perfectly good output shaft seal only to find the leak was actually from a pinion seal they didn’t check.
Important Distinction: And don’t confuse this with a rear main engine seal leak. That’s engine oil, usually darker, leaking from the back of the engine, near the bellhousing—not the rear of the transmission. Also, sometimes an overfilled transmission will just force fluid out its vent tube, which can look like a leak but isn’t a seal failure.
Here’s what I typically see, and how to tell the difference:
| Observed Symptom | Likely Root Cause | Common Mimics | Definitive Test Method |
|---|---|---|---|
| Red or brown fluid dripping at driveshaft-to-transmission interface | Fluid weeping concentrically around the output shaft, typically at the seal lip. | Extension housing gasket, speed sensor O-ring, pinion seal (on the differential, if RWD), cooler line leak. |
Clean the entire area thoroughly with brake cleaner. Add UV dye to the ATF or apply aerosol foot powder. Drive for 15-20 minutes, then inspect under UV light. The dye will glow brightly at the exact source. |
Why Seals Fail: Root Causes I See
So, once you’ve confirmed it’s the output seal, why did it fail? Most of the time, it’s just plain old age and thermal degradation. The rubber lip of that seal eventually hardens, loses its flexibility, and can’t maintain a tight seal against the spinning shaft anymore. This happens faster in vehicles that work hard—towing, frequent stop-and-go traffic, or just hot climates. Those heat cycles are brutal on rubber.
But sometimes, you’ve got bigger fish to fry. If the output shaft itself has a groove or a polished spot where the seal rides, a new seal isn’t going to hold for long. That wear can come from contaminated fluid, or even slight shaft misalignment over time. I’ve seen service bulletins for certain Ford and GM models that specifically mention increased output shaft seal degradation under severe use, so it’s worth checking for those if you’re working on a common platform.
The Fix: Repair Options and What I Recommend
Safety First, Always
Before you even start, make sure that transmission is safely supported with a proper jack. And pay close attention to torque specs, especially for the driveshaft flange nut. On many RWD trucks, that’s a hefty 180 to 220 ft-lbs. Don’t guess on that one.
Alright, you’ve diagnosed it. Now, what’s the fix? It really depends on the condition of the shaft itself.
Replace the Seal Only DIY Friendly
Install a Wear Sleeve Precision Required
Full Shaft or Transmission Replacement Professional Only
Stop-Leak Additives: My Honest Opinion
I don’t recommend them. Period. They’re a temporary band-aid at best, and at worst, they can swell internal seals, clog tiny valve body passages, or gum up solenoids. They do nothing for a mechanically worn shaft and often lead to bigger, more expensive problems down the road. Just fix it right the first time.
Validating the Repair: How I Confirm Success
You’ve done the work, but don’t pat yourself on the back just yet. The job isn’t done until you’ve confirmed it’s actually fixed. That means verifying both the external sealing and the internal function of the transmission.
My Post-Repair Checklist:
-
Perform an external leak test. I always add UV dye to the ATF and run the vehicle through at least three full heat cycles. Then I get it back on the lift and check with a UV light. No glow, no leak.
-
Check the ATF level. This is critical. Engine running, transmission in park (or neutral for some models), on level ground, at operating temperature. Consult the service manual for the exact procedure for your specific vehicle.
-
Monitor Transmission Fluid Temperature (TFT) via OBD-II. It should stabilize between 175–220°F (80-105°C) during normal driving. If it’s consistently higher, you might have other issues or residual damage from the low fluid.
Cost, Risk, and What to Tell the Customer
Let’s talk brass tacks. The cost varies, but here’s a general idea of what you’re looking at:
Seal Replacement
This is a shop estimate including labor. If you’re doing it yourself, the part is usually only $20–$80.
Seal + Wear Sleeve
This is required if the shaft has physical wear or grooving. The sleeve itself is usually under $50.
Full Rebuild/Unit
If internal damage occurred due to prolonged low fluid, this is the reality. At this point, you really need to consider the vehicle’s market value before authorizing the repair.
Prevention and My “10-Second Rule”
Preventing an output shaft seal leak starts with proper maintenance, plain and simple. Always use the automatic transmission fluid specified by the manufacturer—don’t deviate. If you tow, haul, or drive in heavy stop-and-go traffic frequently, follow the “severe service” maintenance schedule. That usually means changing the ATF every 30,000 to 50,000 miles, not the “lifetime fluid” nonsense some manufacturers push.
My “10-Second Rule”
Every time you’re under the car—whether it’s for an oil change, a tire rotation, or just checking something out—take an extra 10 seconds to look at the back of the transmission. Just a quick visual inspection. Catching a seep early means a cheap, straightforward repair. Ignoring it can easily lead to complete transmission failure and a repair bill that might make you question if the car is even worth fixing.
