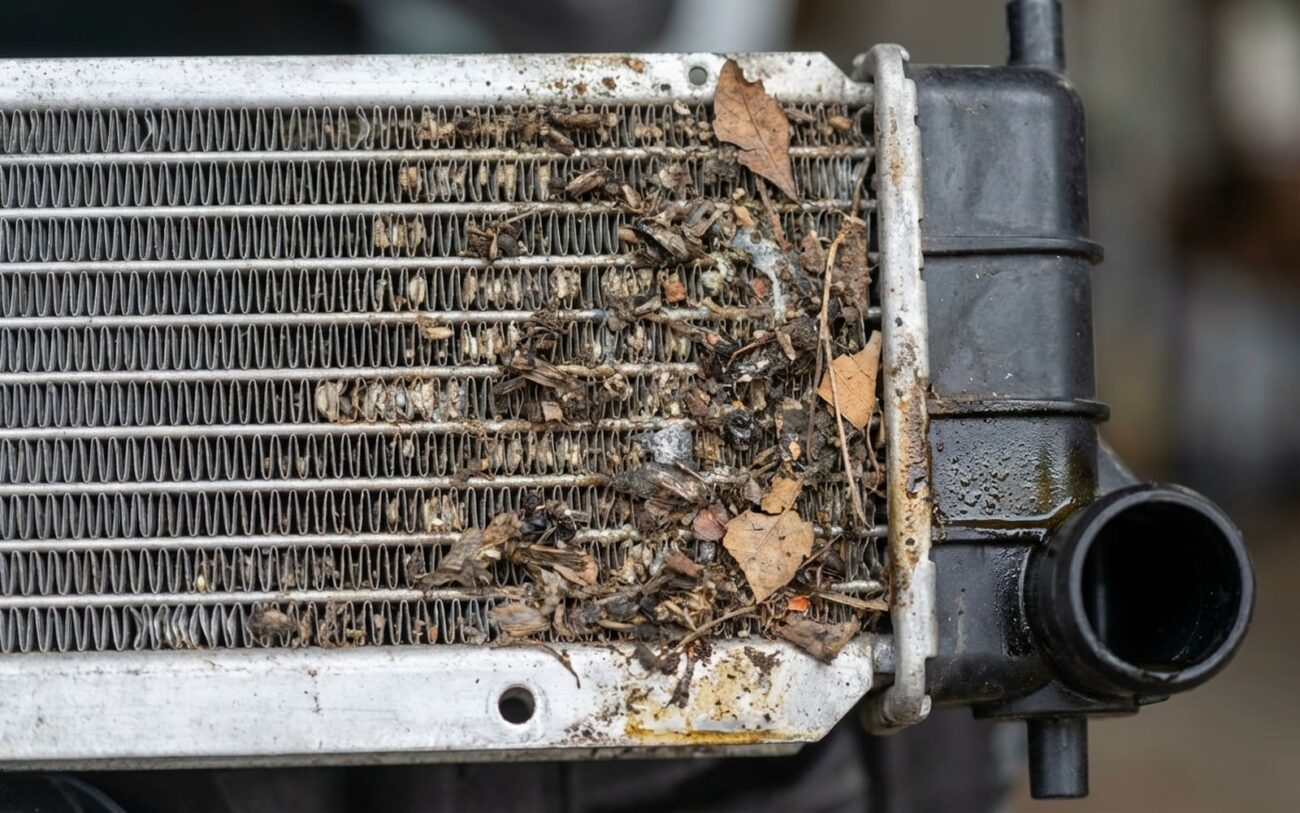
Your Engine Overheats in Traffic, But Not on the Highway? Here’s What I See.
This is one of the most common cooling complaints that walks into my shop, especially when the weather heats up. The pattern is unmistakable: your temperature gauge starts to climb when you’re stuck in stop-and-go traffic or idling, but it drops right back to normal as soon as you get some speed on the highway. I’ve seen this a thousand times, and usually, it points to an airflow problem at low speeds.
Now, a clogged radiator is absolutely a prime suspect here. Your cooling system needs air moving across the radiator fins to pull heat out of the coolant. When you’re cruising down the highway, the car’s forward motion forces a ton of air through that radiator core—we call that the ram-air effect. That natural, high-speed airflow can often compensate for a radiator that’s partially blocked, making you think everything’s fine.
The Core Problem: No Airflow Without Speed
When you’re stopped or moving slowly, that ram-air effect disappears. That’s when your electric cooling fans are supposed to kick in and pull air through the radiator. But if the radiator fins, or the condenser in front of it, are packed solid with bugs, leaves, road grime, or even just bent fins, those fans can’t move enough air. The heat builds up, and your engine starts to cook until you can get moving again. It’s that simple.
My Diagnostic Playbook: Pinpointing the Real Cause
When it comes to overheating, the symptom pattern tells you a lot. Overheating only in traffic screams “airflow problem.” If it’s overheating at all speeds, especially when you’re pushing the engine hard, then I’m usually looking at a coolant flow issue inside the system. Here’s how I break it down in the shop:
| What You See | What It Usually Means | Common Red Herrings | How I Confirm It |
|---|---|---|---|
| Overheats only in traffic, cools down at speed. | Severe external blockage of radiator or A/C condenser. | Electric fan failure, low coolant level, debris blocking the fan shroud. |
Visually inspect the radiator and condenser fins from both the front and engine side with a good flashlight. Also, confirm electric fans activate when the engine gets hot or A/C is on. |
| Overheats at all speeds, especially under load (e.g., uphill, towing). | Internal radiator tube blockage or restricted coolant flow. | Stuck-closed thermostat, failing water pump, collapsed lower radiator hose. |
After the engine is fully warmed up, use an infrared thermometer to scan the entire surface of the radiator. Look for significant “cold spots” which indicate no coolant flow. Also, check for a soft, collapsing lower hose when the engine is revved. |
Why a Dirty Radiator is a Big Deal
The physics here are pretty straightforward. A radiator is designed to transfer heat from the hot coolant inside its tubes to the cooler air moving over its thousands of tiny fins. The more surface area those fins expose to airflow, the better the heat transfer. When those fins get packed with leaves, dirt, bugs, or even mud, that crucial surface area drops dramatically—sometimes by 50% or more. It’s like trying to cool a pot of boiling water with the lid on, as the old saying goes.
The Concept
“It’s like trying to cool a pot of boiling water with the lid on.”
And it’s not just debris. Bent or crushed fins also restrict airflow and reduce efficiency. Even slight damage can disrupt the smooth, laminar airflow the system needs. Manufacturers know this is an issue. I’ve seen service bulletins for certain truck models, especially those used off-road or in dusty environments, that specifically recommend regular inspection and cleaning of the radiator and condenser assembly. These vehicles are just more prone to it, similar to how some modern transmissions, like certain DCTs, struggle with heat in heavy traffic.
My Approach to Fixing It Right
Once you’ve confirmed the issue, the fix depends on what you find. Here’s how I tackle it, from easiest to most involved:
External Cleaning DIY-FEASIBLE
Deep Cleaning or Removal Professional Only
Internal Clog REPLACE ONLY
Don’t Guess, Verify: Confirming the Repair
After you’ve cleaned or replaced the radiator, your job isn’t done. You absolutely have to validate the repair under real-world conditions. The goal isn’t just to keep the needle out of the red; it’s to ensure your cooling system is working efficiently and consistently, just like it should.
My Post-Repair Checklist
-
Use an OBD-II scan tool to monitor live Engine Coolant Temperature (ECT) data. The dash gauge is often buffered and not accurate enough for diagnostics.
-
Perform a thorough test drive that includes extended idling with the A/C on. This puts a load on the cooling system and forces the fans to work.
-
Ensure the ECT stabilizes below 220°F (104°C) under normal operating conditions and load. What’s “normal” can vary by vehicle, so know your car’s typical range.
-
Confirm that the cooling fans cycle on and off normally. They shouldn’t be running continuously without dropping the temperature. If they are, something is still off.
