Alright, let’s talk about one of the most frustrating things in the shop: you just put in a new radiator—or paid good money for someone else to—and now you’re seeing coolant on the ground again. It’s enough to make you pull your hair out, I know. Did the new part fail? Did the tech mess up? Or is something else entirely going on? After 25 years turning wrenches, I’ve seen this play out dozens of times. The good news is, it’s almost always fixable. The bad news? Jumping to conclusions can cost you a lot of time, a lot of money, and maybe even your engine. So let’s get down to brass tacks and figure out what’s really happening.
First Things First: Is It Even the Radiator?
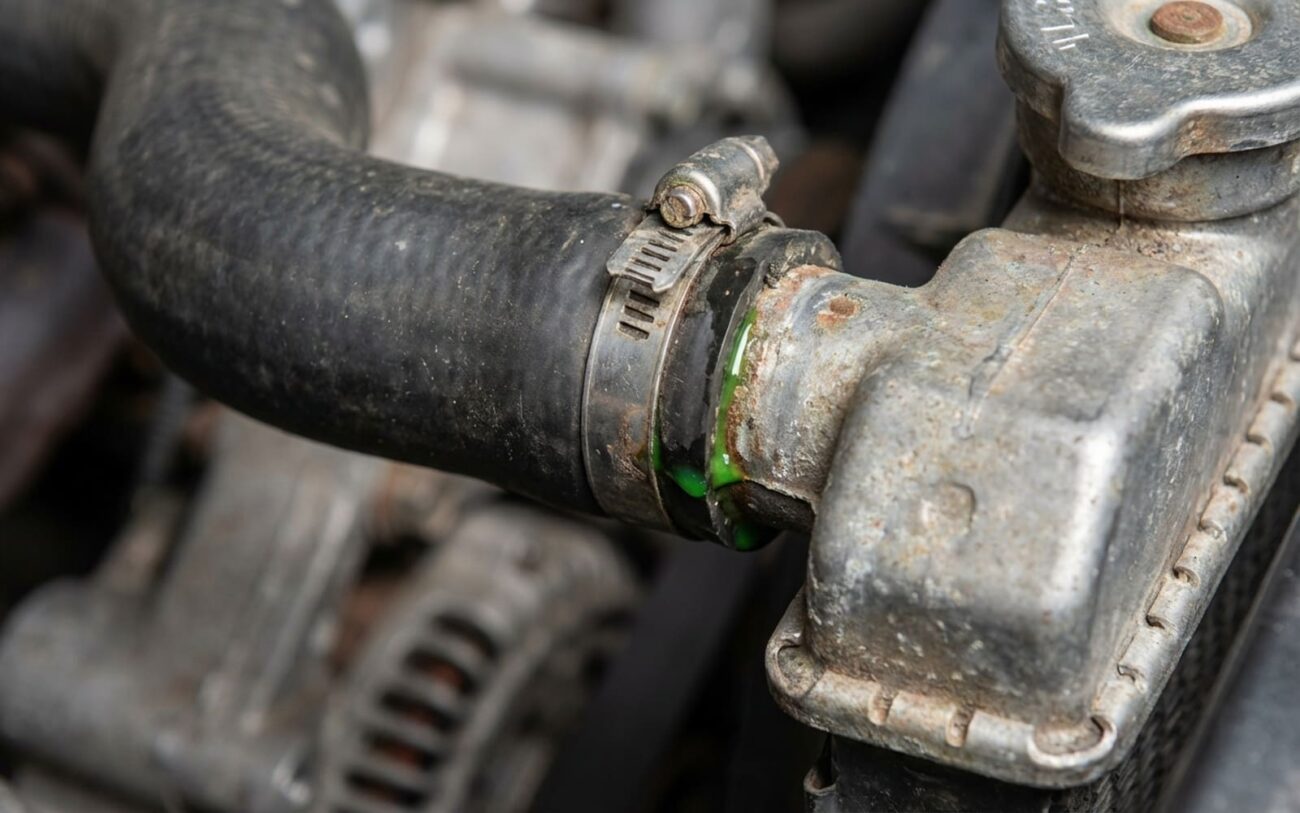
Before you even think about blaming that shiny new radiator, you’ve got to confirm the leak is actually coming from it. I can’t tell you how many times I’ve had a customer swear up and down their new radiator was bad, only to find the real culprit was something else entirely. Coolant travels, pools, and drips in incredibly misleading ways. What looks like a radiator leak might be a loose hose clamp, a failing water pump, or even a cracked coolant reservoir.
Here’s what I typically see:
- Hoses and Clamps: This is probably the most common. A new radiator means new connections. If a hose clamp isn’t tight enough, or if the hose itself is old and hardened, it’ll leak. I’ve seen plenty of folks overtighten clamps too, which can actually damage the hose or the radiator’s plastic nipple.
- Other Cooling System Components: Don’t forget the thermostat housing, the water pump (check that weep hole!), the heater core hoses, or even the coolant reservoir and its overflow tube. Any of these can spring a leak right after a radiator replacement, often because the system was disturbed or refilled.
- The Dreaded Head Gasket: This is the worst-case scenario, but it happens. A failing head gasket can push combustion gases into the cooling system, over-pressurizing it and forcing coolant out of the cap or any weak point. It can look a lot like a radiator leak, but it’s a much bigger problem. If you’re seeing persistent bubbles in the overflow tank or constantly losing coolant with no visible external leak, that’s a red flag.
My rule of thumb: If you see steam, smell coolant, or your temperature gauge starts climbing, shut that engine off immediately. Don’t try to limp it home. A tow bill is cheap compared to a new engine. Trust me, I’ve seen the aftermath.
Pinpointing the Leak: Where Radiators Fail
Okay, so you’ve ruled out the usual suspects. Now, let’s look at the radiator itself. New radiators typically fail in three main spots:
1. The Core (The Fins and Tubes)
If you’re seeing coolant seeping from the aluminum core, especially between those thin cooling fins or tubes, that’s a core leak. On a new radiator, this almost always points to a manufacturing defect like porous casting, thin-wall tubing, or, less commonly, damage during shipping. I’ve seen a few cases where a rock or road debris got kicked up right after installation and punctured a tube, but that’s usually pretty obvious.
To check: Clean the area thoroughly with some brake cleaner. Pressurize the system to the cap’s rating (usually 16-18 psi). Look closely for any wet spots forming on the core. A bright flashlight and a mirror can be your best friends here. Sometimes, a borescope can help peek into tight spots, especially if you suspect an internal flaw.
2. The Tank-to-Core Crimp Joint
Most modern radiators have plastic end tanks crimped onto an aluminum core. A leak along this seam is pretty common. It can be a genuine factory defect—maybe the crimping wasn’t done right, or the O-ring seal failed prematurely. But often, and I mean often, this is caused by installation stress. If the radiator was forced into its mounts, or if the mounting brackets were bent or misaligned, that stress can crack the plastic tank or break the seal right at the crimp. On some older Ford Explorers and certain GM trucks, this was a known issue with the factory radiators, but it can happen to new aftermarket units too if they’re not handled right.
To check: Again, clean everything up. Pressurize the system. Use your flashlight and mirror. Look for a leak originating right from that seam. Try to gently wiggle the radiator in its mounts (if it’s not under pressure, of course) to see if it’s sitting correctly. If you see a crack in the plastic tank near a mounting point, that’s a dead giveaway for installation damage.
3. Threaded Fittings (Drain Petcock, Transmission Cooler Lines)
Leaks from threaded fittings—like the drain petcock, or the connections for your automatic transmission cooler lines—are frequently mistaken for radiator defects. But many times, the problem isn’t the radiator itself. It could be cross-threading, a loose connection, or a damaged O-ring on the hose or line side. I’ve seen countless DIYers (and even some less experienced pros) overtighten these, especially plastic petcocks, cracking them instantly.
To check: Disconnect the hose or line from the fitting. Inspect the radiator’s threads for any damage. If the threads look good, the problem is likely external. Reinstall with the proper sealant (PTFE tape for NPT threads, or new O-rings for quick-connect lines) and torque correctly. Then, re-test under pressure. If it still leaks directly from the radiator’s threads after a careful reinstallation, then you’ve got a defective part.
The most reliable diagnostic tool you own for this job is a cooling system pressure tester. You can rent one from most auto parts stores. Attach it to the radiator or surge tank, pump it up to the pressure marked on your radiator cap, and just watch the gauge for 20-30 minutes. Any drop means a leak. Combine that with a good visual inspection, maybe even some UV dye if it’s a slow seep, and you’ll find it.
Why a Brand-New Radiator Can Fail: Defect vs. Damage
So, yes, new radiators can be defective. It’s not super common with OEM parts or top-tier aftermarket brands, but it absolutely happens, especially with budget-friendly units or if there’s a known design flaw for a particular model year. I’ve seen these issues:
- Thin or uneven plastic tank walls that just can’t handle the normal system pressure.
- Inconsistent crimping at the tank-to-core joint, leaving weak spots that blow out.
- Porosity in the aluminum tubes or tanks from poor casting quality.
- Cracked or poorly threaded fittings from machining errors.
For example, I remember a run of aluminum radiators on certain GM trucks in the early 2000s that had documented issues with inadequate sealant at the crimp joint. That wasn’t user error; that was a parts problem. It’s always worth a quick search for technical service bulletins (TSBs) for your vehicle’s make and model to see if there are any known radiator issues.
But—and this is a big “but”—many, many “defective radiator” cases I’ve seen are actually installation errors. It’s easy to make a mistake, especially if you’re rushing or don’t have the right tools. If that radiator isn’t seated perfectly in its mounts, or if the support brackets are bent even slightly, it can twist the unit and put incredible stress on those plastic tanks. That stress leads to cracks or broken seals. I’ve pulled radiators that looked like they failed internally, only to realize the mounting points were misaligned, torquing the housing sideways. The part was fine; the installation wasn’t.
Another thing to watch out for: coolant. Using the wrong type of coolant (like mixing OAT with IAT) can cause gelling, corrosion, and accelerate wear inside the radiator. While this won’t cause an immediate leak, reusing old, contaminated coolant during a replacement can kickstart electrolytic corrosion that shows up pretty quickly in thin-walled aluminum cores. Always use the manufacturer-specified coolant, and always use distilled water if you’re mixing concentrate.
The Fix: Repair or Replace?
Professional Territory Only
Look, I’m all for DIY, but a cooling system under pressure is no joke. If you’re not confident, or if the leak is anything more than a simple fitting, get it to a professional. You don’t want to risk your engine over a few bucks.
Leaking Threaded Fitting (Drain Petcock, Transmission Line): DIY-FEASIBLE
Leak from Core or Tank Seam: NON-REPAIRABLE → REPLACE
Temporary Fixes—Use With Extreme Caution: TEMPORARY / LAST-RESORT
Proving the Repair is Solid
You never assume a repair worked just because you don’t see a puddle. Validation is absolutely critical. I’ve seen too many folks skip this step and end up back in the shop a week later with an overheated engine.
If you resealed a fitting, the test is simple: pressurize the cold system to the cap’s rated pressure (usually 16-18 psi) and hold it for at least 30 minutes. No pressure drop, no visible leak? You’re good. If it was a tricky one, use UV dye to confirm.
If you replaced the radiator, the process is a bit more involved. First, do that same cold pressure test. Then, refill the system and properly “burp” it. Trapped air is a killer; it causes localized overheating, can mimic a leak, and will drive you crazy. Some cars are notoriously hard to burp—think older Honda Civics or certain GM V8s. You might need to raise the front end, squeeze hoses, or cycle the heater controls. Run the engine to full operating temperature. Watch the coolant reservoir for continuous bubbles (that could be a head gasket). Confirm the heater blows hot air—that tells you coolant is circulating through the heater core. I like to use an infrared thermometer to check for even temperature distribution across the radiator face; if one side is significantly cooler, you’ve got restricted flow. Finally, make sure the cooling fans cycle on and off normally.
And if you’re still chasing a persistent issue, grab an OBD2 scanner. A P0128 code (coolant thermostat rationality), for example, could mean the thermostat isn’t opening, or you still have an air pocket preventing proper flow. Don’t overlook the electronics.
Cost, Warranty, and Long-Term Outlook
Alright, let’s talk about the money. Nobody likes unexpected repairs, but knowing what to expect helps.
Fitting Reseal/Repair
DIY Cost (Parts). Shop cost: $150–$300 for diagnosis and labor. High success rate if threads are undamaged.
Radiator Replacement (Warranty)
If it’s a genuine manufacturing defect, the part and labor should be covered. 100% success if installed correctly.
Radiator Replacement (Out of Warranty)
DIY (parts only): $100–$400. Shop (parts & labor): $500–$1,200, depending on the vehicle. 100% success if installed correctly.
Here’s a rule I always share with customers: if the repair cost starts to creep up past, say, 35% of your car’s private-party value (check Kelley Blue Book or NADA), and the vehicle has other aging components—like a transmission that’s seen better days or significant rust—it’s worth having a serious talk about whether the repair makes financial sense. A radiator replacement is essential, but not if it’s just throwing good money after bad on a car that’s nearing the end of its useful life.
Cost-Saving Tip
Independent shops often offer radiator replacement services at competitive rates. Always get multiple quotes and verify the shop’s experience with cooling systems. A qualified independent mechanic can save you money compared to a dealership, especially if you’re out of warranty. Just make sure they’re using quality parts.
How to Prevent This Next Time
Prevention starts with proper installation and using the right materials. This is where most post-replacement leaks are born.
My Checklist for a Leak-Free Radiator
-
Inspect the New Part: Before you even think about putting it in, take five minutes. Check for visible cracks, bent fins, or loose fittings. It’s rare, but new parts can arrive damaged.
-
Align Carefully: Never, ever force a radiator into place. It should sit naturally and easily in its mounts. Forcing it creates stress, and that stress will lead to cracks or broken seals down the road.
-
Torque Properly: This is huge. Use a torque wrench on hose clamps, especially on plastic fittings. Typical worm-drive clamps only need about 8-15 Nm (6-11 lb-ft). Overtightening is a leading cause of post-replacement leaks and cracked plastic nipples.
-
Use the Correct Coolant: Always, always follow your owner’s manual. Mixing incompatible coolants can cause internal corrosion and gelling, especially in aluminum radiators. And always use the recommended mix ratio—usually 50/50 coolant to distilled water. Tap water has minerals that can cause scaling and corrosion.
-
Pressure Test After Install: Before you even start the engine, pressurize the cold system. It’s the absolute best way to catch leaks early, before they become a problem.
-
Monitor After Repair: For the first few days, check your coolant reservoir level after three full heat cycles (cold start to operating temp and back to cold). A dropping level means you’ve got a slow leak somewhere—find it before it turns into an overheating event.
And if you’re working on a vehicle with known cooling system quirks—like certain models prone to air pockets or heater core issues—research the proper burp procedure. Some cars require raising the front end, cycling the heater controls, or even using a vacuum fill tool to fully purge air. Don’t skip this step; trapped air is a silent killer for cooling systems.
Catching a post-replacement coolant leak early saves you from bigger problems. Take your time, test thoroughly, and don’t assume the part is bad just because it’s new. In my experience, installation errors are just as common as defective radiators—and both are fixable when you know what you’re looking for.
