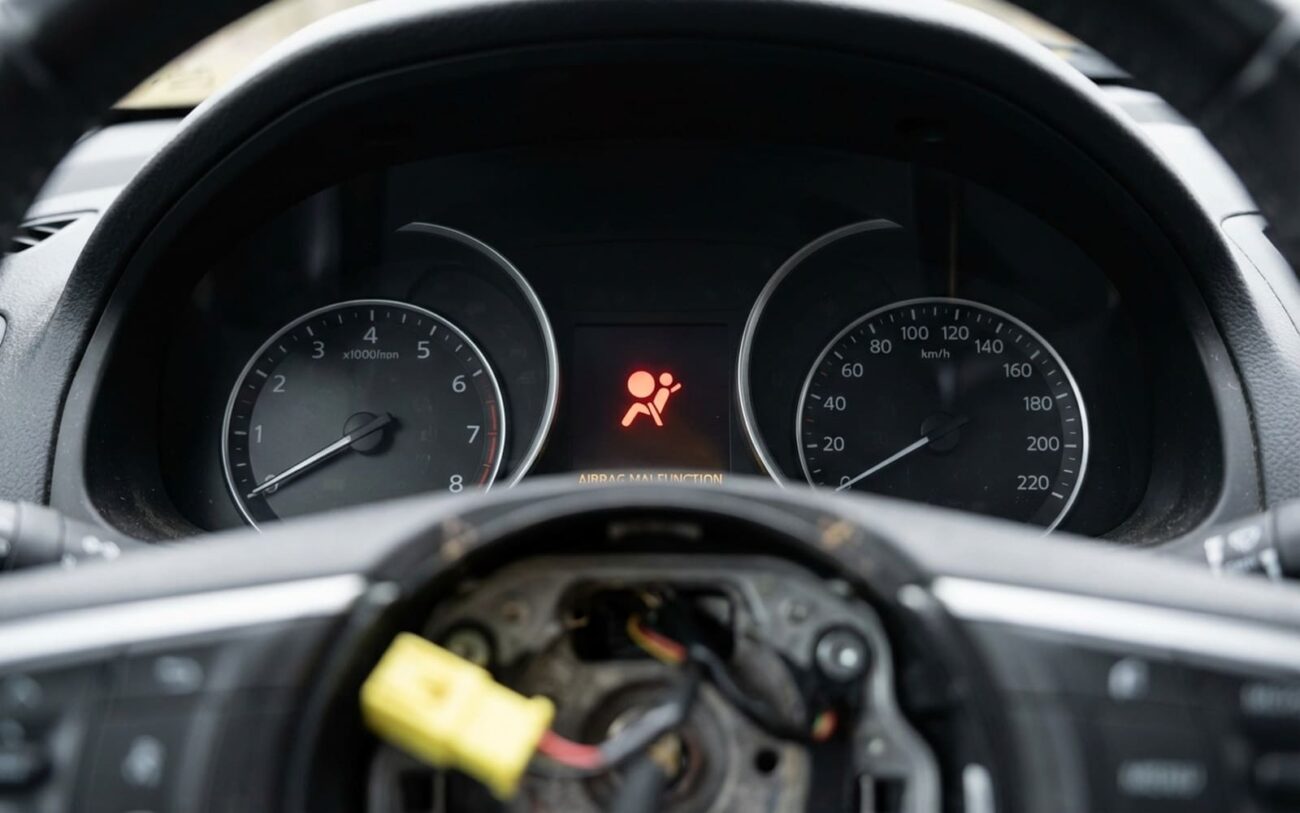
You pull the steering wheel off—maybe to clean behind it, swap to a sport rim, or fix a noisy horn—and now the airbag light is on. That’s not a glitch. It’s your car telling you the driver’s airbag is disabled. I’ve seen this a hundred times in my shop. More than half the time, it’s the clock spring. But before you start throwing parts at it, let’s walk through how I diagnose and fix this—step by step, no guesswork.
What the Airbag Light Actually Means
The SRS light isn’t just a warning—it’s confirmation the system has shut down. On most vehicles, if the driver airbag circuit is open or high-resistance, the ECU disables the entire front airbag circuit. That means in a crash, the bag won’t deploy. Period.
And yes, I’ve pulled airbag control modules off junkyard cars just to verify this—same code, same disable logic. It’s not a scare tactic. It’s how the system is designed.
The clock spring is the usual suspect because it’s the only component that maintains electrical continuity between the stationary column and the rotating wheel. It carries the airbag squib circuit, horn, cruise control, audio buttons—everything on the wheel. If that ribbon cable gets stretched, pinched, or misaligned during reassembly, the circuit breaks.
First: Confirm It’s Not Something Else
Just because the light came on after steering work doesn’t mean the clock spring is toast. I had a 2018 Camry last month where the customer replaced the wheel, and the code pointed to the passenger-side seat belt pretensioner. Totally unrelated. Turned out the SRS module had stored a pre-existing fault—he just noticed it after the battery was disconnected.
So before you pull the wheel again, scan for codes. Not a cheap OBD2 reader. You need a scan tool that accesses the SRS module—Autel, Snap-on, Launch, or factory-level. Anything less is a waste of time.
If you get a B1000 or similar—“Driver Airbag Squib Circuit Open” or “High Resistance”—then yeah, it’s almost certainly the clock spring. But if the code is for a side impact sensor, passenger airbag, or seat occupancy mat, that’s not your fault. Don’t go tearing into the column chasing a ghost.
| Symptom | Points to Clock Spring? | Other Possibilities | How to Confirm |
|---|---|---|---|
| SRS Light On (after wheel reinstall) | Yes—especially if it wasn’t on before | Pre-existing SRS fault, airbag module issue, wiring chafe elsewhere | Scan for DTCs. If it’s B1000-series, check clock spring. If not, stop—diagnose the actual code. |
| Horn or Wheel Buttons Dead | Very likely—accessory circuits run through clock spring | Blown horn fuse, failed control module, broken wire in column | Test for power at clock spring input (use wiring diagram). If power in, no power out? Clock spring is the break. |
Why the Clock Spring Failed (Spoiler: It’s Usually You)
I’m not saying that to blame you. I’ve done it myself—early in my career, on a 2003 Accord. Wheel off, column spun, clock spring overwound. Ribbon cable snapped. Light on. Learned that one the hard way.
The clock spring has mechanical stops—usually about 2.5 turns lock-to-lock from center. If you remove the wheel and the column shaft rotates, you can easily exceed that. Even if you try to “unwind” it by hand, the internal coil may already be damaged.
Toyota and Honda have TSBs on this—specific procedures for centering the clock spring before removal. Some GMs use a locking pin that must be inserted before disconnecting. If you skip that step, you’re gambling.
Other common mistakes:
-
Forcing the connector and breaking the locking tab—those plastic clips are brittle after 5+ years.
-
Reinstalling the wheel with the clock spring slightly off-center—torquing the nut can crush the housing.
-
Not securing the clock spring housing before reassembly—letting it rotate while bolting down the wheel.
How to Fix It (Without Making It Worse)
Safety First: No Exceptions
Disconnect the negative battery terminal. Wait 15–30 minutes. SRS capacitors hold a charge that can deploy the airbag even with the key off. I’ve seen techs get burned—literally—by skipping this. Don’t be that guy.
Re-Center and Reconnect DIY-FEASIBLE WITH CAUTION
Replace the Clock Spring Professional Only
Did It Work? Here’s How to Know
Don’t just turn the key and hope. Here’s my validation routine:
-
Turn key to “ON” (don’t start). SRS light should illuminate for 4–6 seconds, then go out. If it stays on or flashes, there’s still a fault.
-
Test every button on the wheel—horn, cruise, audio, phone. All should work.
-
Turn the wheel lock-to-lock. No dead spots, no intermittent cuts. If the horn cuts out at full lock, the clock spring is likely misaligned.
-
Scan again. Clear any stored codes, then verify no new ones return. This is the only way to be sure.
Prevent This Next Time
-
Always center the clock spring before removing the wheel. Look up the procedure—don’t wing it. There’s a reason manufacturers put alignment marks.
-
Tape the rotor in place once the wheel is off. I’ve done this on BMWs, Toyotas, Fords—same rule everywhere.
-
After reassembly, do the full validation check. Two minutes now beats a tow truck later.
