Posted in

Windshield Washer Not Spraying? Fix Clogged Nozzles or a Bad Pump

Phantom Wiper Activation? Let’s Cut to the Real Problem

I’ve pulled into bays more times than I can count to find a car wiping on dry glass—just one slow swipe, then silence, then another. Owner says, “It’s not raining. Why’s it doing that?” And yeah, it’s annoying. But more than that, it’s wearing out the motor, the transmission, the blades. And most of the time, it’s not the wipers’ fault. It’s the rain sensor behind the mirror playing tricks.

Now, don’t go yanking that sensor out yet. I’ve seen techs replace it three times on the same car because they didn’t diagnose it right. The issue usually isn’t the sensor itself—it’s what’s between the sensor and the glass. Wax, polish residue, even the wrong glass cleaner—stuff you can’t see—can scatter infrared light just like raindrops. And the system thinks it’s raining.

First: Is It the Sensor, or Something Else?

Before touching a tool, do this: turn off the auto-wiper function in the vehicle settings. On most cars, it’s under wiper settings in the instrument cluster or infotainment screen. Switch the stalk to manual intermittent. If the phantom wipes stop, you’re dealing with the sensing system—sensor, wiring, or calibration.

If it still wipes on its own? Then the problem’s deeper—wiper switch, body control module (BCM), or chafed wiring in the column. I’ve seen rodent damage chew through the harness right behind the fuse box on a 2018 Camry. Looked like a sensor fault at first.

And if the wipers work fine in manual mode but won’t kick on in the rain? That’s almost always the sensor. But don’t assume—test it.

Symptom Likely Rain Sensor Cause Common Mimics Definitive Test
Intermittent dry wipes Contaminated lens or degraded photodiode array Faulty wiper switch, BCM software glitch, wiring rub-through

Disable auto mode. If random activation stops, the fault is in the sensing system.
No response in rain Severe contamination or internal failure Blown fuse, dead motor, failed relay

Test all manual wiper functions. If they work, the issue is isolated to the rain sensor circuit.
Erratic speed in rain Dirt, calibration drift, or signal noise Motor resistor pack failure

Clean the windshield and sensor lens. Recalibrate. If it’s still acting up, suspect internal failure.

For real confirmation, plug in a scan tool. Pull up the rain sensor’s moisture PID. On a dry day, it should sit at 0–5%. If it’s jumping to 60%, then back to 2%, you’ve got false triggering. That’s your smoking gun.

What’s Actually Going On Inside That Sensor?

The rain sensor’s an infrared optical unit. It shoots a beam at a shallow angle into the windshield. Dry glass? Most of the light reflects back. Water on the glass? It refracts the beam, less light returns, and the system triggers the wipers.

So when it’s triggering on dry glass, something’s messing with that beam. Wax from a car wash, polish residue from a detail job—even some “streak-free” glass cleaners leave behind silicones. I see this all the time after people use Windex or Rain-X on the inside.

The sensor itself can fail. Infrared LEDs degrade over time, especially in hot climates. I’ve pulled sensors off south-facing cars in Phoenix with cracked lenses from heat cycling. GM and Chrysler have service bulletins for calibration drift after battery disconnects—software updates exist for some models.

And if you see condensation inside the sensor housing? That’s not electronics failing—that’s a seal breach. Needs replacement, not recalibration.

Oh, and aftermarket windshields? Big red flag. Some don’t have the right dielectric properties or tint band. The glass might look fine, but the sensor can’t “see” through it properly. OEM glass only—don’t cut corners here.

How to Fix It—Without Wasting Money

01

Clean the Optical Path (DIY)

Most of the time, this is all you need. But—and this is critical—you have to clean both sides of the glass.

Grab 90%+ isopropyl alcohol and a lint-free cloth. Clean a 6×6 inch area on the outside of the windshield, right behind the mirror. That’s where road film builds up and refracts light through the glass. Then, if your model allows it (some sensors clip out, some are screwed in), remove the cover and wipe the sensor lens gently with alcohol. No scrubbing.

Reinstall, then check your settings. Some cars—like BMWs and newer Toyotas—require a recalibration through the menu. It’s usually under “rain sensor calibration.” Don’t skip it.

02

Replace the Sensor (Shop Job)

If cleaning doesn’t fix it, the sensor’s likely done. These aren’t repairable. But replacement isn’t plug-and-play.

You need the right optical coupling—either a gel or adhesive pad. I’ve seen techs use regular double-sided tape. Bad idea. Signal loss, false triggers, the whole thing starts over. Use OEM-spec material.

After install, you must calibrate. Static calibration with a scan tool first. Some vehicles—like certain Fords and Hondas—also need a drive cycle in light rain or with a spray test to complete the learning. Skip it, and you’ll get a callback.

03

Disable Auto Mode (Temporary Fix)

If you’re not using the feature much anyway, just turn it off. Go into the settings and disable rain sensing. You’ll lose convenience, but you stop the phantom wipes and save wear on the system. I’ve had customers live with this for years—no issues.

Did It Work? Here’s How to Know

After cleaning, drive for a few days. Watch for activation in direct sun, shade, dawn, dusk. It should stay off on dry glass. Pull the moisture PID again—should be steady 0–5%. If it’s spiking, you’ve still got contamination or a calibration drift.

After replacement, test like this:


Validation checklist:

  • Static calibration confirmed via scan tool

  • Water spray test: mist the windshield evenly, watch for proper activation and speed adjustment

  • No DTCs stored after calibration

  • Response matches rain intensity—light mist, moderate, heavy

If it hesitates or overreacts, double-check the optical bond. Air bubbles or misalignment will screw it up every time.

Cost? And Is It Worth It?

Exterior Cleaning

< $100

DIY cost is under $20. Shop labor runs $50–$100. Fixes 70% of cases if contamination is the only issue.

Sensor Replacement

$300 – $600

Parts, labor, calibration. High success rate when done right. But wrong gel or skipped calibration? You’ll be back.

BCM/Wiring Repair

$500+

Needs deep diagnosis. Misdiagnosis here burns cash fast—don’t guess.

Rule of thumb: if the repair costs more than 40% of the car’s value, just disable the feature. I’ve got customers on 10-year-old Accords using manual intermittent just fine.

You hit the washer stalk and nothing happens. Or maybe you get a sad dribble, or hear the pump whirring but see no spray. I’ve diagnosed this a thousand times—on beaters, luxury cars, trucks hauling mud season after season. Most people jump straight to replacing the pump. Bad move. Half the time, that’s not the problem. Let’s fix this right, not fast.

What’s Really Going On? (Spoiler: It’s Not Magic)

The washer system is plumbing with wires. Reservoir → pump → hose → nozzle. Break or block any link, and flow stops. But the symptom tells you exactly where to look. I don’t guess. I follow the evidence.

If no fluid comes out of any nozzle, you’ve got a system-wide failure. Most likely? Dead pump. But before you yank it, check the basics: Is the reservoir full? (Yes, I’ve seen it empty—twice last month.) Is there power at the pump? Blown fuse? Bad switch? On 2012–2016 BMWs, the multifunction switch fails more often than the pump. Don’t assume.

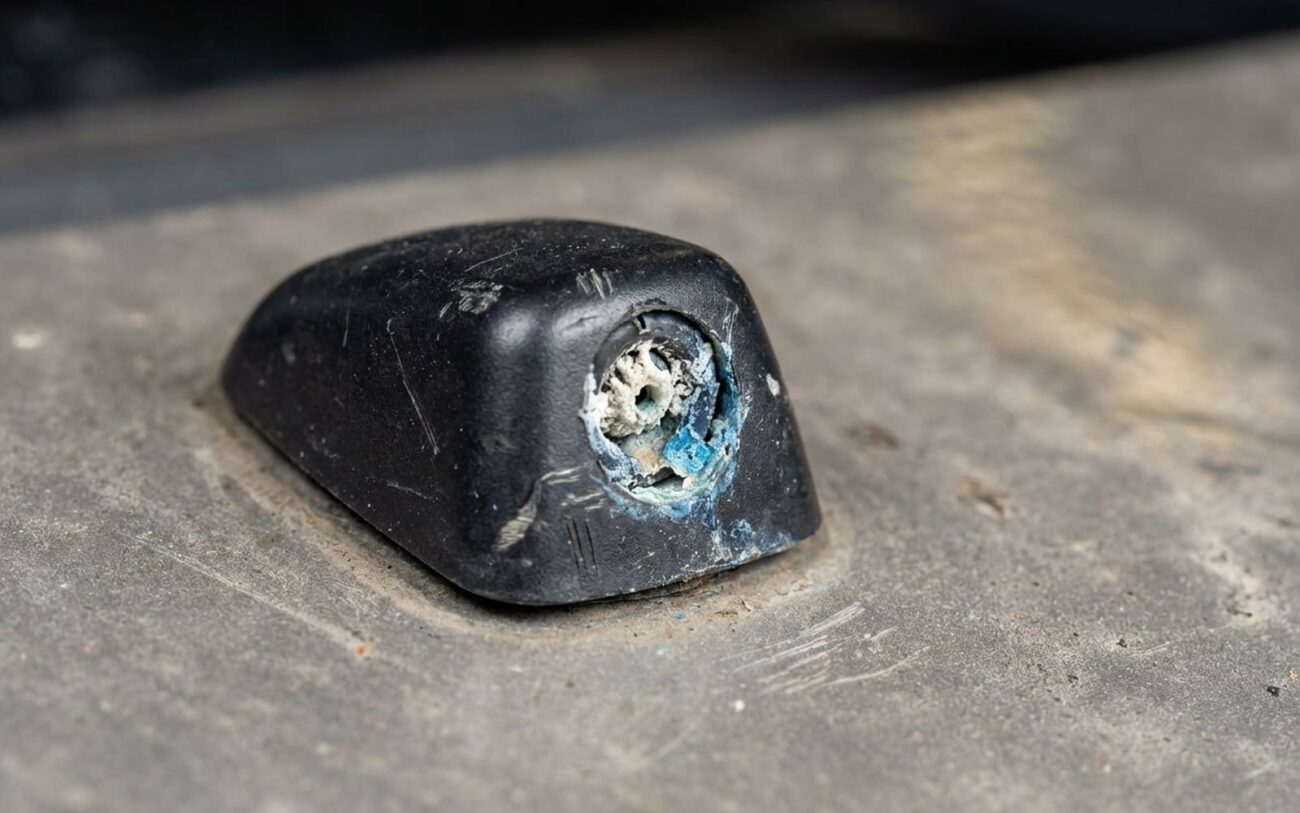
If only one nozzle is dead, it’s local. Clogged? Almost certainly. But don’t stop there. I’ve seen ice crack the housing, road debris pinch the line, or a DIYer kink the hose during an air filter swap. The rest of the system works—so the issue is isolated.

Weak spray from all nozzles? That’s partial restriction. Could be a failing pump, sure. But more often, it’s multiple clogged nozzles or a gunked-up in-tank filter. And don’t forget: cheap washer fluid thickens in cold weather. I had a Subaru last winter with “failed pump” that turned out to be summer fluid in a Minnesota January.

Here’s the one that burns pumps: you hear the motor run but no fluid sprays. That means the impeller isn’t moving fluid. Could be stripped, cracked housing, or blocked inlet. But also—empty tank, disconnected pickup tube, or frozen line. And listen: if the pump hums under load, turn it off. Running dry or against a blockage overheats the motor. That spike in current fries the windings. Seen it happen in under 30 seconds.

How I Diagnose It (Without Throwing Parts at It)

I don’t replace anything until I test. Here’s my flow—symptom first, then test, then fix.

Symptom Most Likely Cause What It’s Not (Common Misdiagnoses) How I Confirm It
No spray, any nozzle Pump failure (electrical or mechanical) Blown fuse, empty tank, bad switch, failed relay

Check for 12V and ground at the pump connector with the switch activated. Power? Pump’s dead. No power? Trace back—fuse first, then relay, then switch.
One nozzle dead Clogged or damaged nozzle Kinked hose, disconnected line, clogged T-fitting

Disconnect the hose at the nozzle. Activate the pump. Flow? Nozzle’s clogged. No flow? Work backward—check the line, splitter, and main hose.
Weak spray, all nozzles Failing pump or multiple clogged nozzles Clogged in-tank filter, collapsed hose, thick fluid

Bypass the reservoir—feed the pump from a clean bottle. If spray improves, the tank or filter is restricted. If not, test outlet pressure (10–25 psi). Low? Pump’s dying.
Pump runs, no fluid Stripped impeller or cracked housing Empty tank, disconnected intake, major leak

Pull the pump. Hold it upright, power it briefly. Motor spins but no fluid moves? Impeller or housing is toast.

Why These Things Actually Fail (Not Just “Age”)

“It just stopped working” isn’t good enough. I want to know why—because that tells me if it’ll happen again.

Nozzles die from three things: mineral gunk, sun damage, or physical abuse. Tap water? Don’t. It leaves calcium that clogs the tiny orifice. Even “all-season” fluid evaporates and leaves residue. UV breaks down the plastic—on my own truck, the driver’s side nozzle cracked after two summers. And people smash them with ice scrapers all the time.

But not every “bad nozzle” needs replacing. Misaligned? Adjust it. Leaking at the base? Often a dried O-ring or worn hose barb. I keep a bag of those little rubber seals in my tech kit—costs pennies.

Pumps fail harder:

  • Electrical burnout: By far the most common. Happens when the impeller is blocked—frozen fluid, clog, or dry run. Motor draws excess current, overheats, and the windings melt. That “whir… then silence” is the sound of a $60 mistake.
  • Seal failure: The shaft seal keeps fluid out of the motor. When it fails, washer fluid creeps in, corrodes the bearings, and locks the impeller. I’ve pulled pumps that looked fine—until I spun the shaft and felt the grit.
  • Impeller wear: The D-shaped drive wears down. Motor spins, impeller doesn’t. No pressure. Common on high-mileage vehicles.
  • Cracked housing: Usually from impact—road debris—or someone overtightening the grommet. I’ve seen it on Jeeps after off-road runs.

And here’s the kicker: a lot of “pump failures” aren’t the pump. Clogged in-tank filter? That’s $5 and 10 minutes. Leaky grommet at the reservoir? That’s a seal, not a pump. Don’t replace the whole unit until you rule those out.

How I Fix It (And What I Tell My Customers)

Clogged Nozzle? Clean It First.

Most clogs are mineral deposits. Vinegar and a pin usually fix it. I keep a 0.4mm guitar string in my pocket—works better than those flimsy tools.

Steps:

  1. Pop the nozzle out (usually clips in). On some Hondas, you’ll need to remove the hood liner.
  2. Soak in white vinegar for 20 minutes. Not longer—vinegar eats metal.
  3. Use the pin to gently clear the orifice. Don’t force it. If it’s stuck, back it out and try again.
  4. Rinse, blow through with compressed air (from the inlet side), reinstall.

If it’s cracked or the threads are stripped? Replace it. OEM or quality aftermarket—don’t waste money on $5 no-name parts. And hand-tighten only. I’ve seen two nozzles crack from over-tightening.

Replacing the Pump? Do It Right.

Most reservoir-mounted pumps are simple. But I’ve seen shops botch it—wrong seal, pinched wire, forgotten ground.

What you need:

  • New pump (with grommet—don’t reuse the old one)
  • Flat-blade screwdriver (for the electrical connector)
  • Pliers (for hose clamps)
  • Shop towels (you’ll spill)

Steps:

  1. Disconnect the negative battery terminal. I don’t care if it’s “low voltage”—safety first.
  2. Siphon or drain the reservoir. Last thing you want is fluid in the footwell.
  3. Unplug the electrical connector (press the tab).
  4. Remove the hose(s). Some use quick-connects—squeeze the tabs. Others have clamps.
  5. Twist and pull the pump out. It’s held by a rubber grommet.
  6. Lube the new grommet with a few drops of washer fluid. Push the new pump in firmly—should seat with a slight pop.
  7. Reconnect hoses and electrical.
  8. Refill, test.

And if you suspect mineral buildup in the whole system? Try a concentrated washer system cleaner. Pour it in, run a few cycles, flush with fresh fluid. But—don’t use it on systems with heated nozzles unless the label says it’s safe. Some solvents eat the heater elements.

Warning: Running the pump dry—even for 10 seconds—can kill it. If you suspect a blockage, disconnect the hose and test flow before powering it. And never use plain water. It freezes, expands, and can crack lines or destroy the pump.

Did It Actually Work? (Test Like a Pro)

Don’t just hit the stalk and walk away. Test it.

For nozzles:

  • Spray pattern should be full and even—no gaps.
  • No leaks at the base or hose.Check it at night if you can—mist shows up better.

For pump replacement:

  • Should activate instantly—no delay.
  • Strong flow for at least 10 seconds.
  • No leaks around the grommet.
  • If you had electrical issues, check voltage at the pump during operation—should stay above 11.5V.

If the spray starts strong but fades? Air in the line or a collapsing hose. Run it a few cycles. If it keeps happening, check the hose for soft spots.

How Much Should This Cost? (And Should You DIY?)

Repair DIY (Parts) Shop (Est.) Success Rate Hidden Risks
Nozzle cleaning $5–$15 $50–$100 High (if clog only) Minimal
Nozzle replacement $15–$50 $75–$150 Very High Scratched paint, broken clips
Pump replacement $30–$80 $125–$250 Very High Leak from bad seal, electrical issue from pinched connector

My take: if the diagnosis is clear, DIY it. Spending $200 at a shop for a $40 part and 30 minutes of labor? That’s not smart. I’ve seen too many wrong pumps installed, bad seals, forgotten grounds. Do it yourself—you control the quality.

Keep It From Happening Again


To Prevent Recurrence

  • Use the right fluid: Winter-rated in cold months. Never plain water—it freezes and wrecks the system.

  • Refill with quality fluid: Look for cleaning agents to reduce mineral buildup.

  • Inspect nozzles every oil change: Clear debris with a pin or air.

  • Listen to the pump: A strained or grinding sound? Diagnose now, not later.

  • Flush the system once a year: Especially in hard water areas.

One last thing: some cars have headlight washers tied to the same pump. If your headlight washer is dead but the windshield works, that’s a separate line or nozzle. Don’t assume the pump’s bad. I see that mistake all the time.

I’m a mechanic and driver with over 15 years of hands-on experience. I’ve diagnosed thousands of vehicles - from stubborn electrical faults to complex drivability issues. Now I write to help car owners and technicians fix cars faster, smarter, and with confidence. No guesswork. Just real-world solutions.