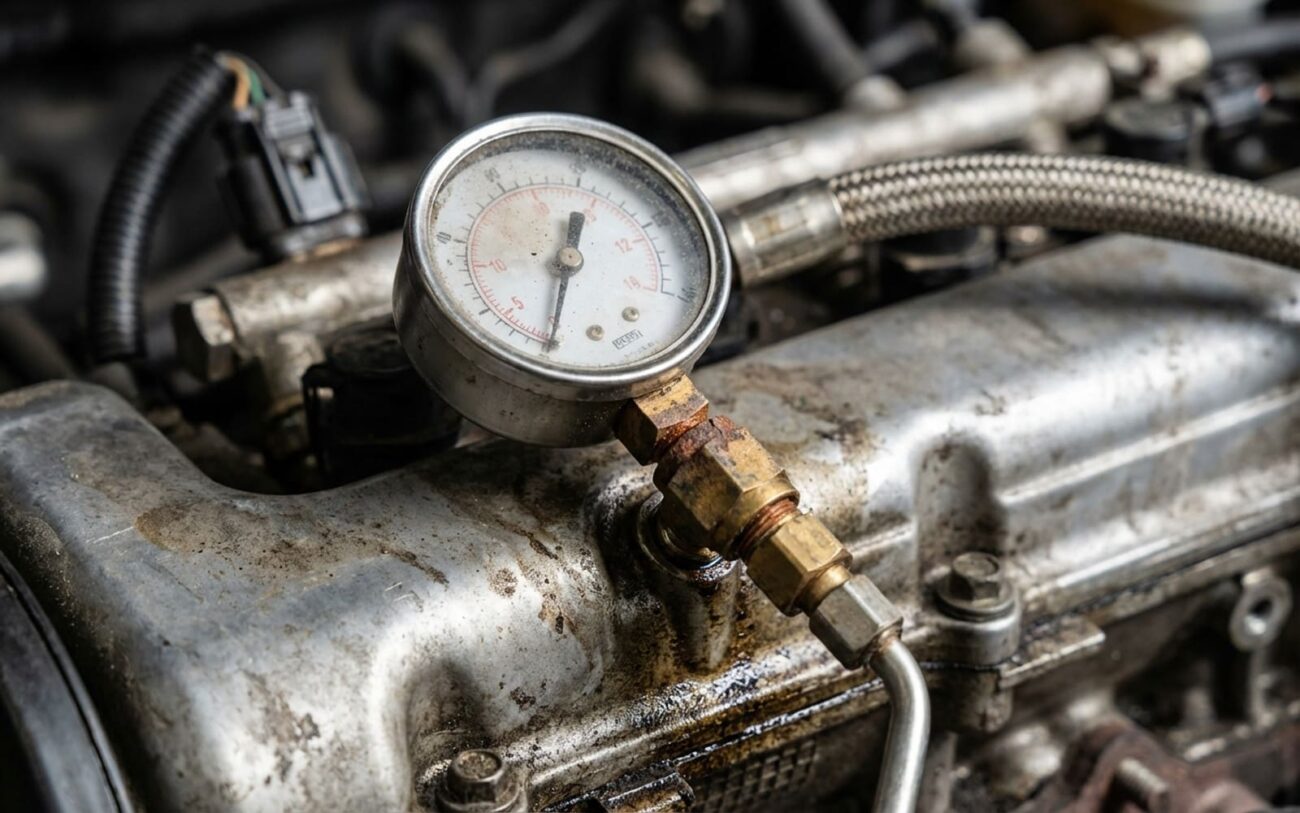
Fuel Pump Trouble: What I Look For First
Alright, let’s talk fuel pumps. After 25 years turning wrenches, I can tell you these things rarely just up and die without a warning. Most of the time, they’ll give you some subtle hints that something’s not right. Catching those early signs? That’s half the battle right there, and it can save you a tow bill or worse.
The classic “no-start” scenario is pretty common. You’ve checked for spark, you’ve got compression, but the engine just cranks and cranks. No raw fuel smell from the exhaust, either. That’s a dead giveaway the fuel delivery system isn’t doing its job. Or maybe the car fires up, but then immediately sputters and dies, especially at idle. That usually means the pump’s too weak to hold proper pressure once the engine actually needs fuel.
But here’s where it gets tricky: a lot of fuel pump issues show up when the engine’s working hard. You’re merging onto the highway, climbing a hill, or just trying to accelerate, and suddenly the engine hesitates, sputters, or just plain loses power. You might even get a Check Engine Light with a lean fuel trim code, like P0171 or P0174. Now, those codes can point to a vacuum leak or a bad O2 sensor, sure, but don’t you dare overlook the fuel pump. A weak pump just can’t keep up with the demand under load, and that leads to a lean condition.
Intermittent problems are the worst to track down. The car stalls, you wait 15-20 minutes, then it starts right back up like nothing happened. That’s a classic sign of a pump overheating internally, shutting down, and then cooling off just enough to work again for a little while. And don’t forget your ears! When you turn the key to “on,” you should hear a consistent, medium-pitched whir from the back of the car for a second or two. If that sound changes—gets louder, grinds, groans, or disappears entirely—your pump is telling you it’s tired.
Now, here’s the catch, and it’s a big one: every single one of those symptoms could also be caused by something else. A bad fuel pump relay, a tripped inertia switch, a blown fuse, a wiring problem, a clogged fuel filter, or even a failing fuel pressure regulator. I see people replace good pumps all the time because they didn’t do their homework. Trust me, you don’t want to drop a tank and spend hundreds on a pump when the real issue was a $10 relay. That’s why testing, not guessing, is non-negotiable.
Diagnosing It Right: What Tools You Need & How I Use Them
Okay, so you’ve got symptoms. Next, we figure out if it’s the pump itself or something else in the system. This is where you separate the pros from the parts-swappers. You’ll need a few key tools in your arsenal:
- A good digital multimeter (DMM) for checking voltage and continuity.
- A mechanical fuel pressure gauge that fits your vehicle’s Schrader valve (it’s usually on the fuel rail, but sometimes you need an adapter).
- A low-amp current clamp meter – this one’s a game-changer for spotting internal pump issues.
- And a scan tool that can read live data, especially short-term and long-term fuel trims.
Here’s how I break down the common scenarios in my shop. Think of this as the condensed version of my personal notebook:
| Symptom | Likely Pump Issue | Common Mimics | My Go-To Test |
|---|---|---|---|
| No-start, no fuel pressure at the rail | Pump motor dead, or internal circuit break. | Bad fuel pump relay, blown fuse, wiring fault, or a tripped inertia switch. |
First, use your DMM to check for 12V+ at the pump’s harness connector. Do this during key-on (the 1-2 second prime) and while cranking. If you’ve got voltage but no pump noise or action, the pump itself is dead. If there’s no voltage, you’ve got an electrical supply problem upstream. |
| Loss of power under load, lean codes (P0171/P0174) | Worn impeller, motor losing volumetric efficiency. | Clogged fuel filter, failing fuel pressure regulator, or a restricted in-tank strainer (the “sock”). |
This is where a fuel volume test comes in. Connect your pressure gauge, then run fuel into a measured container for 15 seconds. A healthy system should deliver about 1 pint (16 oz). If your pressure looks okay but the volume is low, the pump is worn out and can’t keep up. Also, watch your fuel trims on the scan tool; if the long-term trim keeps climbing at higher RPMs, that’s a big red flag for fuel delivery. |
| Intermittent stalling, hard hot restarts, or unusual pump noise | Failing brushes/commutator, internal thermal protector tripping, or worn bearings. | Loose/corroded wiring, failing relay, or a poor ground connection. |
Monitor the pump’s current draw with a low-amp clamp meter while it’s running, especially when the problem occurs. A healthy pump pulls steady current. Spikes, surges, or current draw significantly above spec (say, 150% of what the manual says) points to internal wear or an electrical fault inside the pump. |
Here’s a big one I’ve learned over the years:
A huge number of “pump failures” are actually just electrical supply issues outside the pump. If you find no power at the pump connector, you just saved yourself the headache and cost of dropping a fuel tank. Always, always check the fuel pump fuse, listen for the relay to click, and know where your inertia switch is (especially common on Fords, Lincolns, and Mercurys). Verify the basics before you condemn the pump.
When It’s Definitely the Pump: What Actually Fails Inside
Alright, so you’ve done your diagnostics, and you’re confident the problem is inside the fuel pump assembly itself. Good job isolating it! Now, let’s talk about what typically gives up the ghost in there.
In older vehicles with traditional brushed DC motors, it’s almost always brush wear. Those little carbon brushes that send power to the spinning armature? They wear down over time, and the copper commutator can get pitted or dirty. This leads to intermittent operation, weird noises (a grinding or scraping sound is a dead giveaway), and eventually, total failure.
Modern vehicles, especially performance or turbocharged engines like the Ford 3.5L EcoBoost, often use brushless motors or rely heavily on a separate Fuel Pump Control Module (FPCM). These systems are generally more robust, but they’re not bulletproof. Failures here usually involve the stator windings, rotor magnets, or the FPCM itself. A classic example I’ve seen countless times is corrosion in the FPCM on some 2015-2018 Ford F-150s. It makes the pump shut off unexpectedly, usually at low speeds, mimicking a bad pump perfectly. That’s why checking for power and ground at the pump connector is so critical – it helps you differentiate between a bad FPCM and a bad pump.
Mechanically, the impeller—that little turbine that actually moves the fuel—can wear out or break down. This is especially true if you consistently run your tank near empty. Less fuel in the tank means less cooling and lubrication for the pump, leading to overheating and accelerated wear. A damaged impeller reduces the fuel volume, so you’ll get power loss under load even if your pressure gauge looks okay at idle. Another common internal failure point is the check valve. It’s supposed to maintain residual pressure in the fuel lines after you shut off the engine. If it fails, fuel drains back to the tank, giving you those annoying long crank times, especially on hot restarts.
And don’t forget the in-tank strainer, often called the “sock.” It’s the first line of defense, filtering out large debris before fuel even gets to the pump. If it’s clogged with rust, sediment, or just plain nasty fuel residue, it starves the pump. The pump has to work harder, gets hotter, and wears out faster. Since it’s typically part of the pump assembly, a clogged sock usually means a full pump replacement. Oh, and just to be clear: a leaking fuel pressure regulator on the rail or a cracked fuel line? Those aren’t pump problems, even if they cause similar symptoms. Those are usually much simpler, external fixes.
Fixing It: Your Options & What I Recommend
This Ain’t No Oil Change: Professional Territory
Let me be absolutely clear: you’re working with gasoline vapors and a high-pressure fuel system. This isn’t a job for guesswork. It demands strict safety protocols, specialized tools, and proper training. There are no safe shortcuts here. If you’re not experienced, leave it to the pros.
Okay, with that out of the way, let’s look at your options once you’ve pinpointed the problem:
1. External Electrical Repair DIY-Feasible (With Caution)
If you’re lucky, the issue is just an external electrical problem—a corroded connector, a broken wire, or a bad ground near the tank. These are the best-case scenarios and can be DIY-feasible if you’re comfortable with wiring. You’ll need your DMM, a quality wire repair kit (good crimp connectors, heat shrink), some dielectric grease, and maybe an OEM-style connector if the old one is fried. Fix the wiring, test for continuity and proper voltage, and you’re golden. This is the cheapest and easiest fix, so always hope for this one!
2. Internal Pump Replacement: Under the Seat Professional-Only
If the problem is inside the pump, you’re looking at a full replacement. On some vehicles—many Hondas or Toyotas come to mind—you can access the pump under a panel beneath the rear seat. This is the “easiest” of the internal pump jobs, but it’s still a professional-only repair. You’re still dealing with fuel, and you need the right tools and knowledge.
3. Internal Pump Replacement: Tank Drop or Bed Lift Professional-Only
More often, especially on trucks or many European cars, you’ll have to drop the entire fuel tank or, in some cases (like many pickups), lift the truck bed. This is a much bigger job. You’ll need specialized tools: a fuel pressure gauge to safely relieve system pressure, a sturdy jack and stands, a tank strap wrench, and the correct OEM-style lock ring tool. Never, ever use a hammer and screwdriver to get that lock ring off—you risk damaging the tank or, worse, creating a spark near gasoline vapors. When you install the new pump, always use a new seal and O-ring. Lubricate that new O-ring with clean fuel or manufacturer-approved dielectric grease; petroleum jelly or engine oil can degrade the seal over time. And make sure that lock ring is torqued to spec—around 45 Nm is common, but always check your specific service manual. Rushing this step is asking for a fuel leak.
4. Manual Prime Workaround Temporary / Last-Resort Only
I’ve seen guys, in a pinch, wire a momentary toggle switch to manually prime the pump if the check valve is shot and they just need to get the car to the shop. This bypasses the normal ECU-controlled priming sequence. But let me be crystal clear: this is a temporary, last-ditch workaround, not a fix. It disables critical safety features like the inertia switch, which cuts power in a collision. If your wiring fails or shorts, you’ve just created a serious fire hazard. Use it only to limp to a professional, and then get it fixed properly.
You Replaced It. Now Prove It: Post-Repair Validation
Replacing the pump isn’t the finish line; it’s just the start of proving the repair worked and that the system is safe. For an external wiring fix, validation is pretty straightforward: turn the key to “on,” listen for that 1-2 second pump prime, and use your fuel pressure gauge to confirm it hits spec immediately. That pressure should hold for at least 30-60 minutes after shutdown. If it drops quickly, you’ve still got a leak or a bad check valve (or the new pump’s check valve is faulty, which happens). Also, re-check the current draw with your low-amp clamp meter. A healthy, new pump should draw steady current within 10% of factory specs. Excessive draw means it’s struggling, possibly due to a restriction or contamination you missed.
For a full in-tank replacement, you need to be thorough. I always check:
-
Key-on prime pressure: Should hit the factory spec within 2 seconds.
-
Idle pressure: Stable and within the specified range.
-
Pressure under load: This is critical. Simulate engine load with a scan tool (if it has that function) or by briefly pinching the return line (if your system has one). The pressure absolutely must hold steady at higher RPMs.
-
Fuel volume: Re-run that 15-second volume test. Confirm you’re getting adequate flow, not just pressure.
And for crying out loud—check for leaks! Inspect the tank seal, all fuel line connections, and the pump module gasket. Sniff for fuel odor. I even use a gasoline-safe leak detection solution on fittings; tiny bubbles will reveal even the smallest seep. Recheck after a test drive, and then again the next day. A small leak now can turn into a catastrophic fire hazard later. Don’t skip this step.
What’s This Going to Cost? My Take on Risk vs. Reward
Alright, let’s talk real numbers and the risks involved. Here’s a general idea of what you’re likely to face, based on what I see in the shop:
| Repair Type | DIY Cost (Parts Only) | Shop Cost (Parts & Labor) | Success Rate (If Done Right) | Secondary Risk if Failed |
|---|---|---|---|---|
| External wiring repair | $20–$50 | $150–$250 | 95%+ | Minimal, assuming proper materials and insulation are used. |
| In-tank pump replacement (accessible under seat) | $250–$350 | $700–$1,100 | 98% | Fuel leak or fire if seal not installed correctly; damage to fuel level sender if mishandled. |
| In-tank pump replacement (requires tank drop or bed lift) | $250–$350 | $900–$1,500 | 98% | Same as above, plus risk of damaging brake lines, EVAP hoses, or suspension components during tank removal. |
Here’s my rule of thumb: if your diagnostic confidence is low—meaning you’re just guessing based on symptoms and haven’t actually tested fuel pressure or volume—and the shop quote is more than 40% of what your car is worth, you need to hit the brakes. Invest in more diagnostics first. Some shops, mine included, can use a borescope to inspect the in-tank strainer or wiring through the sender hole. That can confirm contamination or damage without having to drop the whole tank. It’s a small upfront cost that could save you a huge one later.
Keeping Your Pump Alive: Prevention & What to Listen For
My #1 Longevity Tip: Keep It Full!
The absolute best way to keep your fuel pump happy and extend its life? Don’t run your tank near empty all the time. The pump relies on the surrounding fuel for cooling and lubrication. When it’s exposed to air, it runs hotter and wears out much faster. I always tell my customers to refuel when they hit a quarter tank, especially if they do a lot of stop-and-go driving or live in a hot climate. It’s not just about avoiding a breakdown; it’s about pump longevity.
Also, if your vehicle has an in-line fuel filter, follow the manufacturer’s maintenance schedule for it. A clogged filter forces the pump to work against high resistance, which builds up heat and strain. And while modern pumps are built tough, poor fuel quality—with contaminants or too much ethanol—can still accelerate wear on the impeller and motor.
For early detection, just pay attention to your car’s normal behavior. That brief whir when you turn the key to “on”? Get to know it. If it changes—gets louder, softer, or takes longer to prime—that’s a red flag. Same goes for longer crank times, especially when the engine is hot; that usually points to a failing check valve. Catch these things early, and you might just avoid getting stranded on the side of the road.
