Alright, let’s talk head gaskets. After 25 years under the hood, I’ve seen more blown head gaskets than I can count. It’s one of those repairs that scares a lot of folks, but understanding what you’re up against can save you a ton of grief and money. When a car rolls into my shop with a potential head gasket issue, I’m looking for some pretty specific red flags.
What I Look For: The Tell-Tale Signs
Most of the time, you’re dealing with symptoms that tell me combustion pressure is getting where it shouldn’t be – usually into the cooling system or, worse, the oil. Here’s what I’m checking:
- Bubbles in the Coolant: This is probably the most common and telling sign. With the engine running and warm, pop the hood and look into the coolant overflow tank or at the radiator neck (carefully, mind you, it’ll be hot!). If you see a steady stream of bubbles, that’s not just harmless air. That’s exhaust gas being forced into the cooling system from a breach between a cylinder and a coolant passage. And those gases don’t just bubble; they create vapor locks, messing with coolant flow and leading to repeated overheating, even if you don’t have any external leaks.
- Milky Oil: Pull the dipstick. If the oil looks like chocolate milk, or you see a milky, brownish residue around the oil filler cap or under the valve cover, that’s coolant mixing with your engine oil. This emulsion is bad news; it destroys your oil’s lubrication properties, accelerates bearing wear, and can quickly lead to engine failure if you ignore it.
- Sweet-Smelling White Exhaust Smoke: If you’ve got thick, white smoke pouring out of the tailpipe that smells sweet, that’s a strong indicator that coolant is getting into the combustion chamber and burning off. Unlike normal condensation, this smoke won’t clear up once the engine warms. You’ll usually notice your coolant level dropping, too.
- Unexplained Overheating or Coolant Loss: Sometimes, the only symptom is the temperature gauge creeping up, or you’re constantly topping off the coolant, but you can’t find a leak anywhere. This can be caused by those exhaust gases pushing coolant out of the system or creating air pockets that prevent proper cooling.
The Gasket Itself: How It Fails (and What It Isn’t)
A head gasket failure means the gasket has degraded or been damaged enough to lose its seal. Modern gaskets, especially multi-layer steel (MLS) types, are built tough, but they’re not indestructible. Repeated thermal cycling – the engine heating up and cooling down – causes material fatigue, particularly on older composite designs. The most critical part is the combustion seal, usually a raised metal bead or “fire ring” around each cylinder. If that deforms or erodes, those high-pressure, over 1,000°F exhaust gases can blast right into a coolant passage.
The smaller sealing rings for coolant and oil passages, often made of rubber or silicone, can also harden, crack, or extrude under pressure. That’s how you get cross-contamination. This is pretty common in high-mileage engines or any engine that’s had a serious overheating event.
Here’s the critical distinction I make in my shop:
A head gasket failure is NOT the same as a warped cylinder head or a cracked engine block. Those are casting failures, not gasket problems. If you just slap a new gasket on a warped head or cracked block, that new gasket will blow again, usually pretty quickly. I’ve seen this dozens of times: customers replace the gasket, think they’re fixed, and come back weeks later with the exact same symptoms. The root cause wasn’t just the gasket; it was a head that needed resurfacing or outright replacement. Some engines, like certain Ford EcoBoost variants, even had known issues with gasket bead design, requiring updated gaskets and verification of head flatness. Never assume it’s “just” the gasket. Always check those mating surfaces.
My Go-To Test: The CO₂ Block Tester
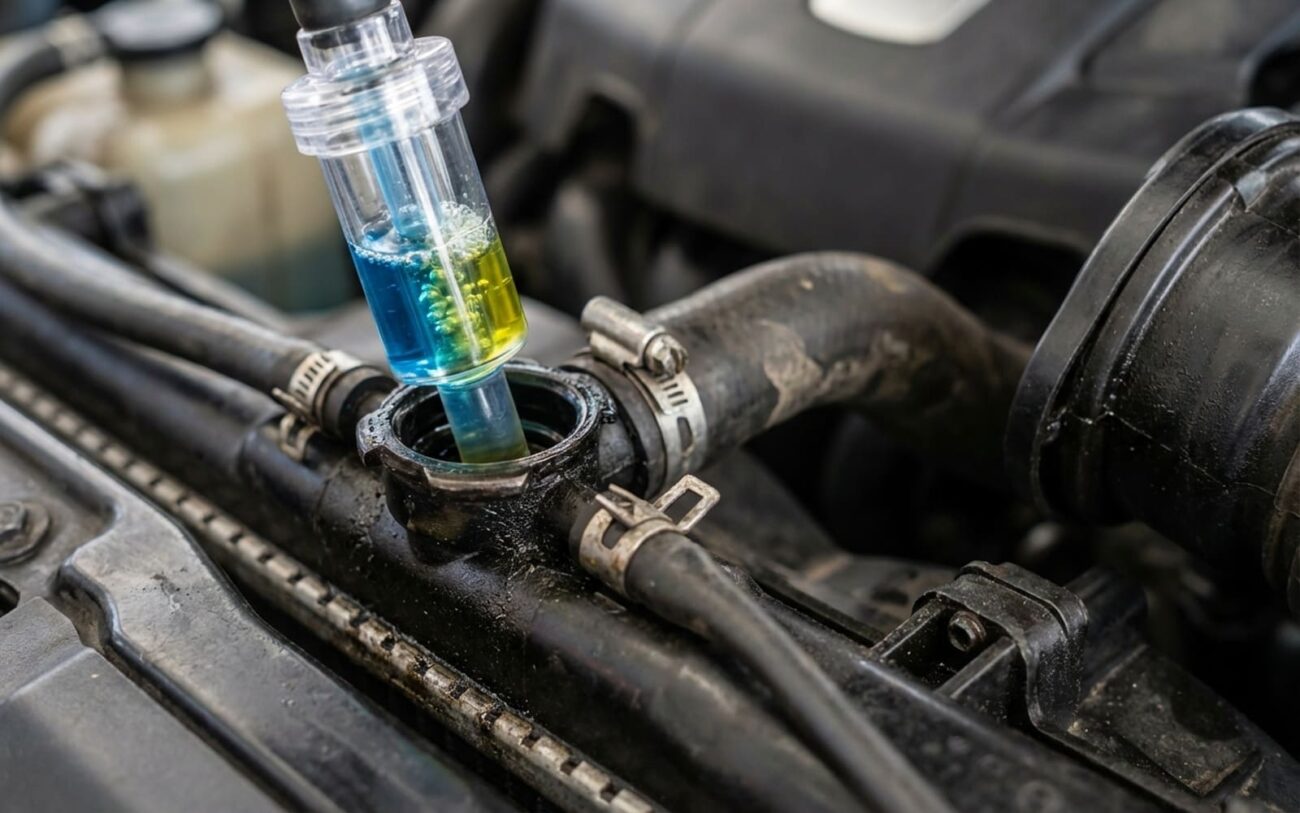
When I suspect a head gasket, the CO₂ combustion gas test is my first move. It’s fast, reliable, and tells me if exhaust gases are actually getting into the coolant. You’ll need a chemical block tester kit – Lisle 75500 or UView are common and good. These kits come with a test chamber, some blue indicator fluid, and a hand bulb to draw vapors.
- Start Cold: Always begin with a cold engine. Safety first, and it gives you a baseline.
- Warm It Up: Run the engine until it hits normal operating temperature. The thermostat needs to be open to ensure coolant is circulating properly.
- Release Pressure: Shut the engine off, let the pressure drop for a minute or two, then carefully remove the radiator cap or the pressurized expansion tank cap.
- Attach Tester: Securely attach the tester’s adapter to the filler neck.
- Add Fluid: Fill the test chamber with the blue indicator fluid up to the marked line.
- Draw Vapors: Squeeze and release the rubber bulb repeatedly. You’re trying to draw vapors from above the coolant, through the fluid in the chamber.
- Watch for Color Change: If combustion gases (specifically CO₂) are present, the blue fluid will change color – first to green, then to yellow. A rapid, complete color change is a definitive positive. A slow, faint shift might indicate minor exhaust gas recirculation (EGR) contamination on some diesels, but it’s rare on gasoline engines.
A few notes from my experience: Heavily contaminated coolant, especially with oil, can sometimes give you a false positive. Also, if your cooling system is severely pressurized at idle, even before the engine is fully hot, that’s another big clue pointing to combustion intrusion. A positive CO₂ test confirms exhaust gases in the coolant, but remember, it doesn’t tell you where the leak is coming from. For that, you’ll need more diagnostics.
Beyond the Gasket: Isolating the True Source
Many cooling and oil contamination issues can mimic a head gasket failure. Jumping to conclusions here can cost you a lot of time and money. A cracked cylinder head, a damaged engine block, or even an internal leak in a coolant-carrying intake manifold gasket can all produce identical symptoms. That’s why testing – not guessing – is absolutely essential once you’ve confirmed combustion gases are present.
| Symptom | Typical Head Gasket Failure Path | Common Non-Gasket Causes | How I Confirm the Source |
|---|---|---|---|
| Combustion gas in coolant | Failure in the combustion seal (fire ring) between cylinder bore and coolant jacket. | Cracked cylinder head or engine block near combustion chamber. |
First, the CO₂ coolant system test (block tester). If positive, follow up with a cylinder leak-down test. This helps pinpoint the leaking cylinder and gives me a good idea if the head or block itself is compromised.
|
| Coolant in oil (milky residue) | Breakdown between coolant passage and oil gallery in the gasket. | Crack in head/block at oil/coolant crossover, failed oil cooler core, or leaking transmission cooler in radiator. |
I pressure test the cooling system with the oil fill cap removed. If coolant seeps into the valve train area, that’s a direct hit. A borescope can also be invaluable for inspecting internal casting cracks.
|
| Overheating with no visible leaks | Gas pockets from combustion intrusion blocking coolant flow. | Collapsed radiator core, failing water pump impeller, stuck thermostat, or air pockets from improper bleeding. |
Perform a cooling system pressure test first – it has to hold pressure. Then, if it holds, do the CO₂ test. A positive CO₂ result here is key. I also confirm thermostat and water pump function, because those are common culprits for overheating.
|
| Unexplained coolant loss | Combustion pressure pushing coolant past the cap or out the overflow. | Internal leak from intake manifold gasket (on engines with coolant passages), failing radiator cap, or porous heater core. |
Pressure test the system cold. If it holds, run the engine to operating temperature and recheck the pressure. A rapid pressure rise suggests combustion gas intrusion. And don’t forget to inspect the radiator cap seal – a weak cap can cause coolant loss without a gasket issue.
|
Every diagnosis in this range demands tool-based verification. Relying on visual cues alone leads to misdiagnosis, and that’s a waste of everyone’s time and money. The CO₂ test is your best first step, but it’s rarely the only step.
The Only Real Fix: Head Gasket Replacement
Once you’ve confirmed a head gasket leak, you really only have one legitimate option: a full head gasket replacement. This is a big job, especially on modern engines with tight clearances and torque-to-yield (TTY) head bolts. It’s not just about swapping parts; you need precision tools: a calibrated torque wrench (with an angle gauge for rotational torque), cam locking tools for OHC engines, and proper gasket sealants if specified by the manufacturer.
The cylinder head has to come off, obviously. Once it’s off, I always inspect it for warpage using a straight edge and a feeler gauge. If it’s warped beyond spec, it goes to a machine shop for resurfacing. Sometimes, if it’s too bad or cracked, it’s a replacement head. Reassembly is critical. You have to follow the OEM torque sequence and angle specs to the letter. Many Honda and Toyota engines, for example, use multi-stage processes like 40 Nm + 90° + 90°. Skipping steps or using incorrect torque will lead to an immediate re-failure – I’ve seen it happen.
The “Fix-in-a-Bottle” Myth
Now, about those chemical sealants like K&W or Bar’s Leaks. I’ve used them exactly twice in 20 years, both times for customers who just needed to get a low-value car to the junkyard. These products work by depositing fibers or particles in small leaks, but they are almost completely ineffective against high-pressure combustion leaks. Worse, they can clog radiator tubes, heater cores, and narrow coolant passages in cylinder heads, leading to overheating and total engine failure down the road. If you try it, understand this: it’s not a repair. It’s a temporary suppression that might buy you a few hundred miles at best, and it often creates more problems than it solves.
Proof It’s Fixed: Post-Repair Validation
Replacing the gasket isn’t the end of the job; it’s the beginning of verification. You need to be sure the repair actually worked and that you haven’t introduced new problems.
- Bleed the System: First, ensure the cooling system is completely bled of air. Air pockets are the enemy here; they create hot spots and can mimic gasket failure symptoms. Use the OEM procedure or a vacuum-filling tool if you have one.
- Pressure Test: Next, perform a cooling system pressure test. The system should hold the manufacturer’s specified pressure – typically 14 to 18 psi – for at least 20 minutes with no noticeable drop.
- Re-test for CO₂: Then, run the engine up to temperature and repeat the CO₂ combustion gas test. This time, the fluid absolutely must stay blue. Any color change means the leak persists, and you’ve got more work to do.
- Operational Test Drive: Finally, I always do an operational test drive. I monitor engine temperature via the gauge or a scan tool over three full heat cycles (cold start to full operating temp and back). There should be no overheating, no coolant loss, and no bubbles in the overflow tank. If everything checks out, then, and only then, are you good to go.
Keeping It From Happening Again: Prevention & Monitoring
The best way to avoid a blown head gasket is simple: prevent overheating. It’s the leading cause of gasket and cylinder head damage. Here’s what I recommend to all my customers:
-
Maintain Your Cooling System Religiously: Use the correct coolant type (OAT, HOAT, or IAT as specified by your manufacturer). Flush it on schedule, and always ensure the system is properly bled after any service. Air pockets create localized hot spots that degrade gasket material over time.
-
Monitor Related Components: A failing water pump can drastically reduce coolant flow and lead to overheating. Check for leaks, bearing play, and impeller erosion. Inspect your hoses regularly for cracks, bulges, or soft spots. Old, brittle hoses can fail suddenly, causing rapid coolant loss and a quick trip to overheating.
-
Regular Checks for Early Detection: Make it a habit to check your coolant reservoir monthly when the engine is cold. Look for unexplained drops in level or any milky film on the coolant surface. On high-mileage engines or models known for gasket issues (like certain Ecotec, VQ, or K-series engines), I even suggest adding a CO₂ block test to your annual maintenance routine. It’s a small expense that can catch a small leak before it becomes a major failure.
The Hard Truth: Cost & When to Walk Away
Here’s the reality: fixing a blown head gasket isn’t cheap. It’s a labor-intensive job, and that’s where most of the cost comes from. The financial decision really depends on your vehicle’s current value, its overall condition, and your long-term plans for it.
| Repair Type | DIY Cost (Parts) | Shop Cost | Success Rate (if done correctly) | Secondary Risk if Failed |
|---|---|---|---|---|
| Full Head Gasket R&R | $300 – $800 (gasket set, head bolts, coolant, sealants) | $1,800 – $3,500+ | 95%+ with proper tools and procedures | Engine damage from improper torque, timing misalignment, or undiagnosed head/block warpage. |
| Temporary Sealant | $20 – $50 | N/A (not a professional repair) | <30% for meaningful combustion leaks | Clogged radiator, heater core, or coolant passages leading to overheating and engine failure. |
I have a rule of thumb I use with my customers: if the repair cost exceeds 50% of the vehicle’s current functional value – what it’s worth to you running reliably, not just some book value – then it’s time to seriously consider alternatives. Putting $3,000 into a car that’s otherwise in great shape and worth $4,000 might make sense. But if that same $3,000 repair is for a car worth $2,000 with high mileage and a bunch of other issues, it’s usually not a wise investment. At that point, a used engine swap or simply replacing the vehicle often makes more financial sense in the long run.
