Alright, let’s talk about power seats. You’ve just swapped out a front seat—maybe it was damaged, maybe you upgraded—and now your memory functions are dead. The easy entry feature? Forget about it. The seat might even slam itself all the way back when you open the door, refusing to move forward until you manually adjust it. Sound familiar?
Look, I’ve seen this scenario play out dozens of times in my 25+ years in the shop. A customer brings in their car, tells me the new seat is “broken.” But here’s the kicker: the manual controls work perfectly fine. You can still slide it forward, back, up, down, recline it. That tells me your motors are good, and it’s getting power. So what’s the deal?
The problem isn’t usually a “bad” seat in the traditional sense. It’s almost always a communication or setup issue. Modern power seats aren’t just mechanical chairs; they’re sophisticated computer modules with their own brains, sensors, and network connections. When you replace one, you’re essentially plugging in a new mini-computer to your car’s network, and it needs to be properly introduced. The Memory Seat Module (MSM)—that’s the control unit built right into the seat—has no clue where it is in space. It doesn’t know its travel limits, its height, or how to sync with your driver profile. Until it learns these things, it can’t safely operate those smart functions. That’s why it defaults to that full rearward, often lowered, position—it’s a system safety fallback when it’s lost its reference points.
How I Diagnose a “Dead” Memory Seat
Before you jump to conclusions about a faulty seat, you’ve got to rule out other possibilities. My first step is always to confirm that manual adjustments work. If they do, great—power and ground are solid, and the motors aren’t seized. That immediately points me away from basic electrical faults like a blown fuse or a dead battery. The problem is almost certainly in the seat’s “brain” or how it talks to the rest of the car.
Here’s how I break down the common symptoms and what they usually mean:
Symptom 1: Memory Buttons Do Nothing, But Manual Adjustments Work
This is the classic sign. You press ‘1’ or ‘2’ on the door, and nothing happens. But grab the manual switch, and the seat moves fine.
What it points to: The MSM isn’t calibrated, or it’s missing programming. Could also be a bad position sensor within one of the seat motors, preventing the module from knowing where it is.
What it’s probably NOT: A broken wire in the communication line (like a LIN or CAN bus) between the door and seat, or a door control module failure. While those can happen, if manual controls work, the primary communication path for basic movement is usually okay.
My definitive test: Connect a professional-grade scan tool (we’re talking Autel MaxiSYS, Snap-on Zeus, or OEM software—your cheap OBD2 reader won’t cut it here). I’ll check the MSM for Diagnostic Trouble Codes (DTCs). I’m looking for things like “Calibration Required,” “Module Not Programmed,” or “Position Sensor Out of Range.” Then, I’ll try to run a calibration routine. If it fails, or if a specific motor reports an “Out of Range” fault, the problem is definitely within the seat assembly itself.
Symptom 2: Seat Slams Back on Exit, Doesn’t Return on Ignition
This is the “easy entry” nightmare. You open the door, and the seat goes full rearward and often drops down, then just stays there. When you start the car, it doesn’t move back to your driving position.
What it points to: The MSM has completely lost its position reference points. It’s in a “safe mode” or fallback state. Could also be a failed motor or internal sensor specifically tied to the easy entry function.
What it’s probably NOT: A faulty door ajar switch or an incorrect ignition signal going to the Body Control Module (BCM). While those could cause other issues, if the seat moves (even if incorrectly), the BCM is generally getting some signal.
My definitive test: Again, grab the scan tool. I’ll monitor the BCM data stream to verify that the door ajar and ignition status signals are accurate. If those signals are correct, but the seat still acts up, the issue is almost certainly within the seat’s own control logic. A failed calibration routine will confirm this.
The Real Culprits: Why Your “New” Seat Isn’t Playing Nice
Once you’ve done your initial checks and ruled out external wiring, fuses, or other modules, the problem almost always boils down to one of three things with the seat assembly itself. Only one of these is a true hardware failure, believe it or not.
1. Missing Calibration or Programming (This is the Big One)
This isn’t a defect; it’s a mandatory setup step. Think of it like installing a new operating system on a computer—it needs to be configured. Your new seat’s module comes unconfigured. It doesn’t know your car’s VIN, its specific trim level, or which fancy features your vehicle actually supports. Without a proper seat calibration procedure, it can’t map the full travel limits of each motor (forward, back, up, down, recline, sometimes even thigh support). On many modern vehicles—especially European brands like Mercedes, BMW, Audi, and newer platforms from GM or FCA—this step is absolutely non-negotiable after a seat swap.
I’ve seen techs skip this, assuming “if it powers up, it works.” They button everything up, and then the customer is back, scratching their head. Some manufacturers even put it right in their service information: skipping initialization can lead to erratic operation or even body control module DTCs. It’s a fundamental step.
2. Incorrect Seat Part Number (Looks Can Be Deceiving)
This is a common trap, especially with used seats. Seats can look identical, bolt right in, and even have the same connectors, but under the trim, the electronics can be completely different. A seat from a base model might lack the full memory module, or it might be missing heating/ventilation functions that your car expects. Worse, a seat from a different model year might use a different network protocol (say, an older LIN bus versus a newer CAN FD). Even if it plugs in, the module won’t communicate properly with your car’s network.
My advice? Always, always, always verify the correct part number using your VIN in an OEM parts catalog. Don’t rely on visual matches or “it came out of the same kind of car.” I’ve been burned by that before.
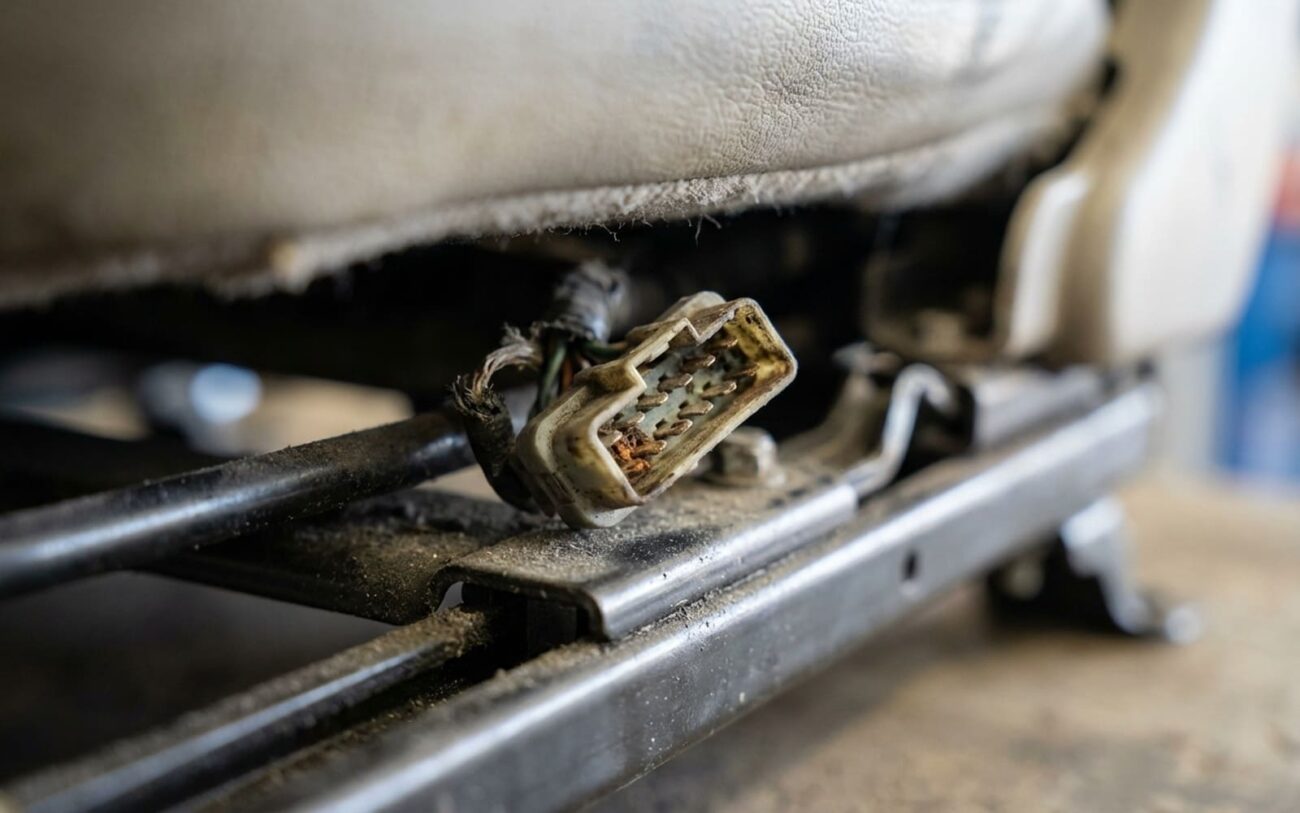
3. Internal Wiring or Sensor Damage (The Actual Hardware Fault)
This is less common with brand-new OEM seats, but it’s a real possibility with used or aftermarket units. A pinched wire in the seat track harness, a cracked connector at one of the motors, or a failed position sensor inside a motor can prevent the seat from calibrating or operating correctly. These kinds of faults usually set very specific DTCs, like “Seat Position Sensor Circuit Range/Performance” or “Calibration Failed – Motor Stalled.” These aren’t software glitches; they’re physical problems that require diagnosis and repair or component replacement.
And just to reiterate: if you can move the seat manually, you don’t have a blown fuse, a dead battery, or a broken main power feed. Those would kill all seat functions. This system is smarter than that; it’s just not speaking the right language yet, or it’s got a physical limitation.
How to Fix It: My Step-by-Step Approach
For Missing Calibration Professional Only
This is where your generic OBD2 scanner becomes a paperweight. You absolutely need a factory-level or high-end aftermarket scan tool. I’m talking Autel MaxiSYS, Snap-on Zeus, or the specific OEM software for your vehicle. Here’s the procedure I follow:
1. First things first: make sure your car’s battery is fully charged. I always hook up a battery maintainer during programming. If the voltage drops below 12.6V mid-calibration, you risk corrupting the module, and then you’ve got a much bigger headache.
2. Connect your scan tool and navigate to the body control system or directly to the seat module section.
3. Look for options like “Module Replacement,” “Initialization,” “Adaptation,” or “Special Functions” for the Memory Seat Module.
4. If prompted, enter your vehicle’s VIN. This is crucial for linking the module to your car’s specific security and feature set.
5. Initiate the seat calibration or learn routine. The seat will then start moving through its full range of motion: forward, back, up, down, recline, and sometimes even thigh support. Do NOT interrupt this process. Let it complete fully.
6. Once it’s done, clear any remaining DTCs and then test the memory buttons and easy entry function. This seat initialization process is mandatory after any seat replacement. Skipping it is like installing a new engine computer and expecting it to run perfectly without programming.
Incorrect Seat Part Number Non-Repairable
If you’ve confirmed the seat itself is the wrong part number for your vehicle, no amount of programming or calibration will fix it. You’ll simply need to source the correct seat assembly for your VIN. This is a hard truth, but it’s better to know now than waste hours trying to force it.
In very rare cases, you might be able to transfer the memory module from your old seat to the new seat frame. But this isn’t a simple swap. It requires:
- Physical compatibility for mounting the module.
- Potentially reprogramming the module to the “new” vehicle, especially if it’s locked to the old VIN.
- And, of course, running a new calibration routine afterward.
Honestly, this isn’t a plug-and-play solution; it’s a full module replacement job with all the same risks and labor involved. Most of the time, it’s just not worth the hassle.
Internal Wiring or Sensor Damage Professional Only
If your diagnostics, especially the scan tool, point to a damaged wire or sensor inside the seat assembly, you’ll need to get your hands dirty. This means partially disassembling the seat. Use proper trim tools to avoid damaging the upholstery—trust me, that’s an easy and expensive mistake to make. Follow your wiring diagrams to locate the fault. Common culprits I see are pinched wires in the harness that runs along the seat track, or broken connectors near the motors.
When you repair wiring, always use proper crimp connectors and heat shrink. Never, ever use electrical tape for a permanent repair; it just won’t hold up. If you have to remove any seat frame bolts (like the ones securing the track to the floor), make sure you re-torque them to OEM specifications. On many vehicles, these are critical safety fasteners and require a torque-plus-angle specification—something like “45 lb-ft plus 90 degrees.” Skipping this step risks the structural integrity of the seat in a crash, and that’s not something you ever want to compromise.
Validating the Repair: How I Know It’s Truly Fixed
Don’t just test it once and call it a day. A proper validation ensures you don’t get a callback a week later. After any calibration or repair, I run through this checklist:
My Seat Repair Validation Checklist
-
Test memory positions: Press memory buttons 1, 2, and 3 on the door panel. The seat must move smoothly and completely to each saved position.
-
Verify easy entry: Turn off the ignition, then open the driver’s door. The seat should move to its full rearward (and often lowered) easy entry position.
-
Confirm easy exit return: Close the door, then turn the ignition back on. The seat should smoothly return to your last selected driving position.
-
Scan for codes (again): Use the scan tool to clear any stored DTCs, then run a full diagnostic scan again after cycling the seat. Verify no active codes return.
-
Check for smooth operation: Listen and watch for any jerking, stalling, or partial movements. It should be smooth and consistent.
If any step fails, reconnect the scan tool. An active code like “Position Sensor Plausibility Error” or “Calibration Incomplete” means there’s still a hardware or communication issue. Don’t assume it’s always software; sometimes a motor is struggling due to internal binding or a failing gearbox, and it just can’t complete the calibration.
Cost Breakdown: What to Expect to Pay
Let’s be real about the money here. This isn’t a $20 fuse fix. It involves specialized tools, skilled labor, and sometimes expensive parts. Here’s a rough idea of what you’re looking at:
Software Calibration Only
Shop Cost (Est.): 1.0–1.5 hours labor ($150–$300). This is usually the cheapest and most common fix.
Success Rate: 95%+.
Secondary Risk: If there’s an underlying hardware fault that wasn’t detected, the calibration will fail, and you’ll have paid for diagnostic time that didn’t fully solve it.
Memory Module Swap/Replacement
Shop Cost (Est.): 2.0–3.0 hours labor + part cost + programming.
Success Rate: Around 80% (there’s always a risk of an incorrect part or programming issues).
Secondary Risk: Incorrect security access or VIN programming can permanently brick the new module, turning it into a very expensive paperweight.
Full Seat Assembly Replacement
Shop Cost (Est.): 1.5 hours labor + part cost + calibration.
Success Rate: 99% (assuming the correct part is used and calibrated).
Secondary Risk: This is a high cost for what is essentially a comfort feature. On older or lower-value vehicles, it might not be worth the investment.
Here’s my bottom line: if the total repair cost starts creeping up to 35–40% of your car’s current market value, and the manual seat adjustments work just fine, you might seriously consider disabling the easy entry function and living without memory positions. Many vehicles allow you to do this through the instrument cluster menu or with a scan tool. It’s not ideal, but it’s a practical decision based on value, especially on an older car.
How to Prevent This Headache in the Future
Honestly, this problem is almost always preventable with a little foresight. The best time to catch these issues is before the seat is fully installed and everything is buttoned back up. Here’s what I recommend, based on years of experience:
My Prevention Checklist for Seat Swaps
-
Triple-check the part number: Use your VIN and an OEM parts catalog. Seriously, don’t assume a “direct fit” is electronically correct.
-
Test basic functions before full reassembly: Once the seat is physically in but not fully bolted down, reconnect the battery. Can you move the seat manually? Does the car even recognize the seat module on the network (a quick scan tool check)? This isolates faults quickly.
-
Use a scan tool early: If possible, try to communicate with the MSM before you bolt the seat down and put all the trim back. This saves a ton of time if there’s a communication issue.
-
Perform calibration immediately after installation: Don’t treat it as an afterthought. It’s part of the installation process.
-
Consider data transfer (if applicable): If you’re removing an old seat, and your scan tool supports it, sometimes you can read its configuration data. Some advanced systems allow cloning or reference data transfer to the new module, though this is pretty rare and highly vehicle-specific.
And one last thing: if your car recently had a battery disconnect, or was involved in a collision (even a minor one that might have triggered a module reset), the memory seats might need reinitialization even without a replacement. A dead battery can wipe calibration data. So, whether you’re troubleshooting seat memory not working after new seat or after a battery disconnect, start with that calibration procedure. In my experience, it’s often the fastest and simplest fix.