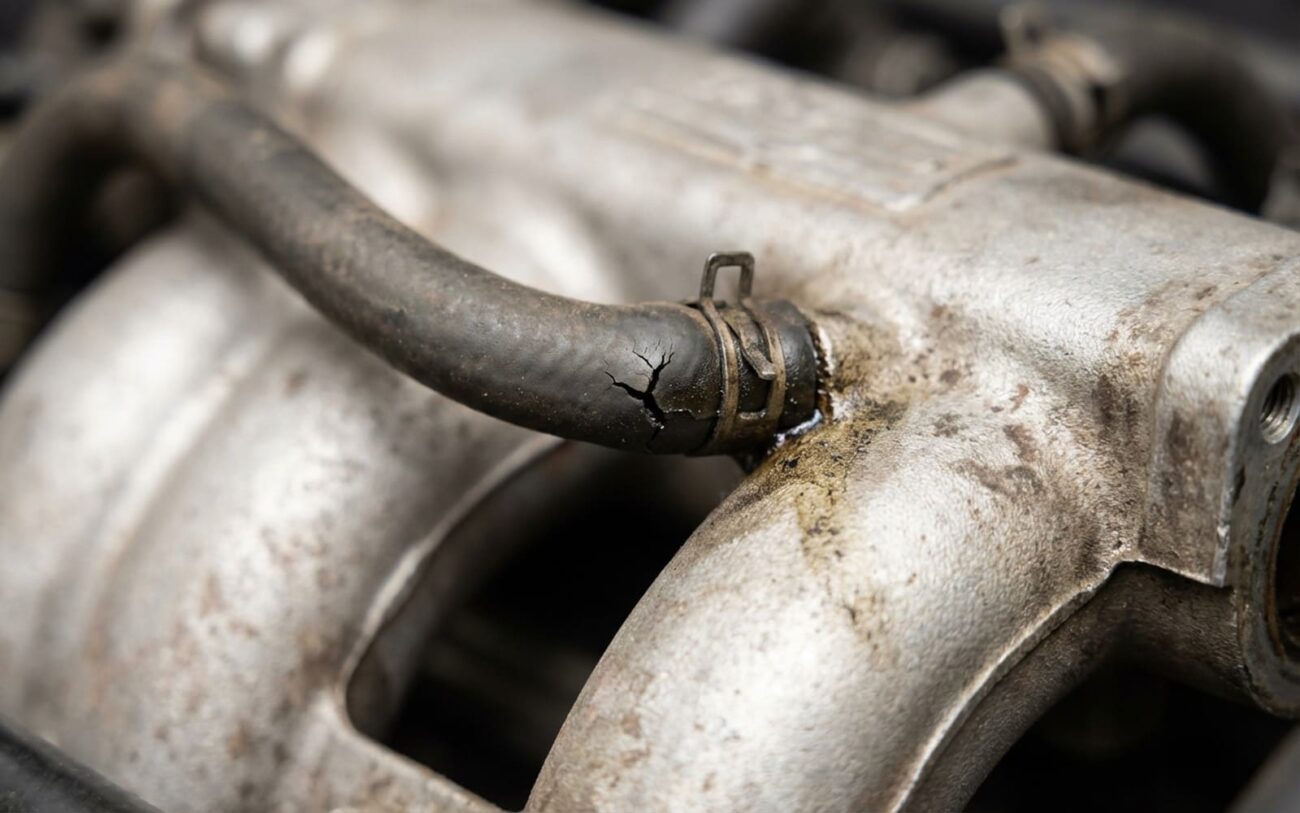
Alright, let’s talk about intake manifold air leaks. After more than 25 years under the hood, I can tell you this is one of those problems that can make you pull your hair out. It’s sneaky, it mimics other issues, and if you ignore it, it can turn into a real nightmare for your engine and your wallet. What we’re dealing with here is “unmetered air”—air getting into your engine after the Mass Air Flow (MAF) sensor has measured it. The engine computer (ECM) then tries to fuel the engine based on a reading that’s now wrong. Too much air, not enough fuel, and suddenly you’ve got a lean condition that throws everything off.
What You’ll Notice: The Symptoms I Look For
First thing’s first: how does this problem show itself? You’re driving along, or maybe just idling, and something feels off. Here’s what I typically see:
The Erratic Idle
This is probably the most common giveaway. You start the car, it warms up, and instead of settling down to a smooth, steady idle—say, around 700 RPM—it starts bouncing all over the place. It might surge high, then drop low, then surge again. It’s not just annoying; it’s a clear sign something’s wrong. Now, a bad Idle Air Control (IAC) valve or a leaky throttle body gasket can do this too, but the intake manifold leak often gets worse under light load or when you just barely touch the throttle.
Check Engine Light & Those Pesky Codes
Oh, that dreaded light. When an intake leak is present, you’re almost certainly going to get a P0171 (System Too Lean – Bank 1) and/or P0174 (System Too Lean – Bank 2). These codes are the oxygen sensors screaming that there’s too much oxygen in the exhaust, confirming that lean condition I mentioned. Sometimes, you’ll even see a random misfire code, like P0300, especially when you’re cruising at a steady speed. The lean mixture just doesn’t ignite properly. But hold on—don’t jump to conclusions. These lean codes can also pop up from a weak fuel pump, clogged injectors, or even an exhaust leak before the O2 sensor, which fools the sensor into thinking it’s lean.
The Tell-Tale Hiss or Whistle
Listen closely under the hood. A high-pitched hissing or whistling sound that changes with engine speed is a big red flag for a vacuum leak. It might be subtle at idle, but give it a little gas, and it gets louder. This is the sound of air being sucked through a tiny crack or a failed seal. The trick here is pinpointing the location. If that sound is coming from the middle or top of the engine, right around the intake runners or the plenum, then the intake manifold itself moves way up on my suspect list. Any vacuum line, PCV hose, or even a brake booster can hiss, so don’t just assume it’s the manifold right away.
My Diagnostic Playbook: Pinpointing the Real Culprit
Just having symptoms doesn’t mean you’ve got a cracked intake manifold. The real skill in this trade is ruling out all the common mimics. So many components feed into the intake system, and a leak anywhere after the MAF sensor but before the intake valves can look exactly the same. You need a systematic approach to confirm the source. Here’s how I go about it:
The Smoke Test: My Go-To
This is, hands down, the most definitive test. I use a professional smoke machine—the kind that pumps a non-flammable, non-toxic vapor into the intake system at low pressure, usually 1 to 2 psi. You seal off the intake, hook up the machine, and then you just watch. If there’s a leak, you’ll see smoke pouring out of it. This works for everything: cracked manifolds, bad gaskets, loose vacuum lines, even tiny pinholes you’d never see otherwise. It’s especially good for those hard-to-reach areas or internal cracks that don’t make an audible sound.
The Propane or Carb Cleaner Trick (Use with Caution!)
This is an old-school method that still works, but you have to be careful. With the engine idling, I’ll use an unlit propane torch or a can of carb cleaner with a straw (never spray directly on hot components, especially electricals!). I’ll carefully direct a small stream around suspected leak areas on the manifold, vacuum lines, and gaskets. While doing this, I’m watching my scan tool for the Short-Term Fuel Trims (STFTs). If the engine RPM momentarily smooths out or the STFTs drop significantly (towards 0% or negative), you’ve just fed the engine some fuel through the leak, confirming its location. Be smart about this—propane is flammable, and carb cleaner can damage some plastics and paints. Always have a fire extinguisher handy, and work in a well-ventilated area.
Listening for Leaks: The Mechanic’s Stethoscope
That high-pitched hiss? A mechanic’s stethoscope (or even a long piece of rubber hose held to your ear) is invaluable for isolating it. With the engine running, I’ll carefully probe around the intake manifold, vacuum lines, and any attached components. The sound will get noticeably louder as you get closer to the source. This helps differentiate a manifold crack from, say, a leaky brake booster line that might be making a similar noise.
And let me clarify something important:
A leaking intake manifold gasket is not the same as a cracked manifold. A gasket is a seal that sits between two components, like the manifold and the cylinder head. Gaskets fail, it’s common, and usually, it’s a more straightforward and less expensive repair. What we’re focusing on here is a structural failure—a crack or hole in the actual manifold body itself. If your leak is at a gasket surface, that’s a different repair path entirely, though the diagnostic steps are similar.
Why It Failed: Getting to the Root Cause
Once you’ve confirmed the leak is in the manifold body, the next question is always “Why?” The answer usually depends on what the manifold is made of and how it’s designed.
Plastic or Composite Manifolds: The Thermal Cycle is the Enemy
These are super common on modern engines—think many GM V6s, Ford V8s, and Chrysler engines. Their main enemy is thermal cycling. Every time your engine heats up and cools down, the plastic expands and contracts. Do that thousands of times over years, and the material fatigues. Cracks often start at stress points: where the throttle body bolts on, around the EGR valve, or especially at the PCV valve housing. I’ve seen countless 3.6L V6 engines (especially in GM vehicles) where the PCV valve housing develops a hairline crack, causing both a vacuum leak and sometimes even oil ingestion. While some manufacturers put out service bulletins for these known weak spots, the fix is usually replacement, not repair.
Aluminum Manifolds: Casting Flaws
Aluminum manifolds are tougher, but they’re not invincible. Occasionally, during the casting process, tiny voids or porosity can form internally. Over time, the constant heat and pressure cycles can cause these microscopic weak spots to open up, creating a leak path from the plenum to the outside. These are the hardest leaks to spot visually, and often, a smoke test is the only way to find them.
Accidental Damage
Less common, but it happens. A rock flying up from the road, a dropped tool during service, or even an impact from another component can cause a physical crack. Always give the manifold a good visual inspection for signs of external damage when you’re diagnosing a leak.
The Fix: What Works (and What Doesn’t)
So, you’ve found a crack in the manifold itself. Your next move depends on where it is, how big it is, and what the manifold is made of.
Small External Cracks: The Patch Job DIY-FEASIBLE with caution
Damaged Mounting Points: Precision Repair PROFESSIONAL-ONLY or REPLACE
Major Damage or Internal Leaks: Full Replacement NON-REPAIRABLE → REPLACE
Confirming the Repair: My Acid Test
A repair isn’t truly done until you’ve proven it actually works. That means testing, not just driving around the block.
Re-testing the Leak
If you patched an external crack with epoxy, the only reliable way to verify it’s sealed is another smoke test. Pressurize the intake system to 1–2 psi and carefully watch the repair site for at least five minutes. No smoke? That’s a good sign. But remember, some leaks might only show up under vacuum (engine running), so a smoke test under slight positive pressure is your best bet to confirm the physical seal.
For thread repairs, validation is simpler: the fastener should reach its specified torque without spinning, pulling out, or feeling loose. After assembly, a quick smoke test is still a good idea to ensure you haven’t introduced any new vacuum leaks during reinstallation.
Monitoring Fuel Trims: The Real Proof
After any repair—especially a full manifold replacement—clear those diagnostic trouble codes. Then, start the engine and let it reach full operating temperature. Using a good scan tool, monitor your Short-Term Fuel Trims (STFT) and Long-Term Fuel Trims (LTFT) at idle and under a steady load (around 2500 RPM). What you want to see is stability, ideally within ±10%. If those trims are within ±5%, you’ve done an excellent job. If they’re still consistently hovering at +20% or higher, you’ve either got another leak you missed, or there’s a secondary issue at play. Don’t assume the first fix was the last one; always verify with data.
Making the Call: Repair, Replace, or Move On?
Let’s talk brass tacks and real-world choices. The cost of this repair needs to make sense for your vehicle’s overall value and your long-term plans for it. Here’s a rough breakdown of what you’re looking at:
| Repair Type | DIY Cost (Parts) | Shop Cost (Parts & Labor) | Success Rate | Secondary Risk if Failed |
|---|---|---|---|---|
| Epoxy/Patch on external crack | $20 – $50 | $150 – $300 | Moderate (often temporary) | Debris ingestion, continued lean condition damaging catalytic converter. |
| Thread repair on mounting boss | $50 – $100 | $200 – $400 | High (if done correctly) | Component vibrates loose, noise, drivability issues, recurring CEL. |
| Manifold Replacement | $300 – $800+ | $800 – $1500+ | Very High (if installed correctly) | Improper gasket installation or incorrect torque leading to new leaks. |
Here’s the rule of thumb I use with my customers: if the cost of a proper manifold replacement starts to creep up to 30–40% of what your vehicle is actually worth (private-party value), it’s time to really think hard. Pouring $1,200 into a car that’s only worth $3,000 might not be the smartest financial move, especially if you know other high-mileage issues are just around the corner. A well-executed epoxy repair might buy you some time, extending the car’s life just enough to make the numbers work out. But if reliability is paramount—for a daily driver or a family vehicle—replacement is almost always the smarter long-term choice. Sometimes, this repair isn’t just about fixing a problem; it becomes the deciding factor in whether you keep the car or start looking for a new one.
Keeping It Healthy: Prevention & Monitoring
You can’t stop the aging process, but you can definitely slow it down. Most intake manifold failures are due to age and thermal stress, but poor maintenance practices can absolutely speed things up.
Be Gentle, Use a Torque Wrench
Anytime you’re working around the manifold—whether it’s replacing a PCV valve, an EGR valve, or a sensor—be extra careful. Cross-threading a fitting or, more commonly, over-torquing a plastic component creates stress that will eventually lead to cracks. I’ve seen more cracked plastic manifolds from ham-fisted mechanics over-tightening bolts than from actual material defects. Always, always use a torque wrench and follow the factory specifications. It’s worth the extra minute.
Regular Visual Checks & Listening
After any engine work, or just during your regular oil change, take a moment to listen for new hissing or whistling sounds. When the engine is cold, pop the hood and give the manifold a visual once-over, especially if it’s a plastic unit. Look for hairline cracks, any discoloration, or oil residue. A vacuum leak near a PCV connection, for instance, can draw in crankcase vapors, leaving a greasy spot that’s often a dead giveaway.
Know Your Engine’s Weaknesses
If your vehicle’s engine is known for intake manifold issues—like certain GM V6s (the 3.8L was notorious for intake gasket leaks that could lead to manifold damage) or some Ford V8s—consider adding a smoke test to your annual maintenance routine. It’s a quick, non-invasive way to catch those small leaks before they turn into major headaches and drivability problems. And if you’re chasing a lean code or a rough idle, always stick to the fundamentals: check for exhaust leaks, verify fuel pressure, and clean that MAF sensor before you assume it’s the intake manifold. Don’t chase ghosts.
