Alright, let’s talk about the Nissan Leaf e+ and its heat pump. I’ve been wrenching on cars for over 25 years, and I’ve seen these systems evolve. When a customer tells me their Leaf isn’t heating right, it’s rarely just a simple fan issue. These aren’t your grandpa’s resistive heaters; we’re dealing with a sophisticated thermal management system that’s designed for efficiency, and frankly, it can be a real headache to diagnose if you don’t know what you’re looking at.
How the Leaf’s Heat Pump Really Works (and Why It Matters)
When you crank up the heat in your Leaf e+, you’re not just turning on an electric coil. You’re engaging a true heat pump, which is essentially your air conditioner running in reverse. Instead of pulling heat from the cabin and dumping it outside, it’s doing the opposite: it’s scavenging what little thermal energy it can find from the cold outside air, concentrating it, and then bringing that warmth into the cabin. It’s pretty clever, and a lot more efficient than those older resistive heaters, especially when the outside temperature is between 20 and 40°F. I’ve seen them deliver up to three times the heat for the same battery draw in that sweet spot.
The system relies on a sealed refrigerant circuit, just like your A/C. You’ve got the electric compressor, which is the heart of it all, a reversing valve that’s critical for switching between heating and cooling, and a couple of heat exchangers. What acts as the condenser for cooling becomes the evaporator for heating, and vice-versa. There’s also an internal heat exchanger, sometimes called a chiller, that helps manage the refrigerant flow between modes. If any part of this sealed system goes south, your cabin heat drops off fast. And because it shares components with the A/C, a failure here means you’ll likely have issues with both heating and cooling. That’s why just checking a fuse won’t cut it; you need to understand what the refrigerant is doing, or not doing, under pressure.
Spotting a Failing Heat Pump: Symptoms and Initial Checks
A failing heat pump usually doesn’t give up quietly. The most common thing I hear from owners is “no warm air” or “it takes forever to get warm” when the temperature drops below 40°F. The car will often default to its backup PTC (Positive Temperature Coefficient) heater to keep you from freezing, but that thing is a power hog. You’ll see your range plummet, sometimes by 30% or more in winter. That sudden, unexplained drop in range is often the first real clue a driver gets.
Another tell-tale sign I look for is rapid compressor cycling. You’ll hear the compressor kick on for maybe 10-20 seconds, then shut right off, only to restart moments later. This usually means the system is hitting a safety limit – maybe low suction pressure from a leak or restriction, or high discharge pressure from a failing compressor or a blockage. Either way, you’re not getting any meaningful heat out of those short bursts.
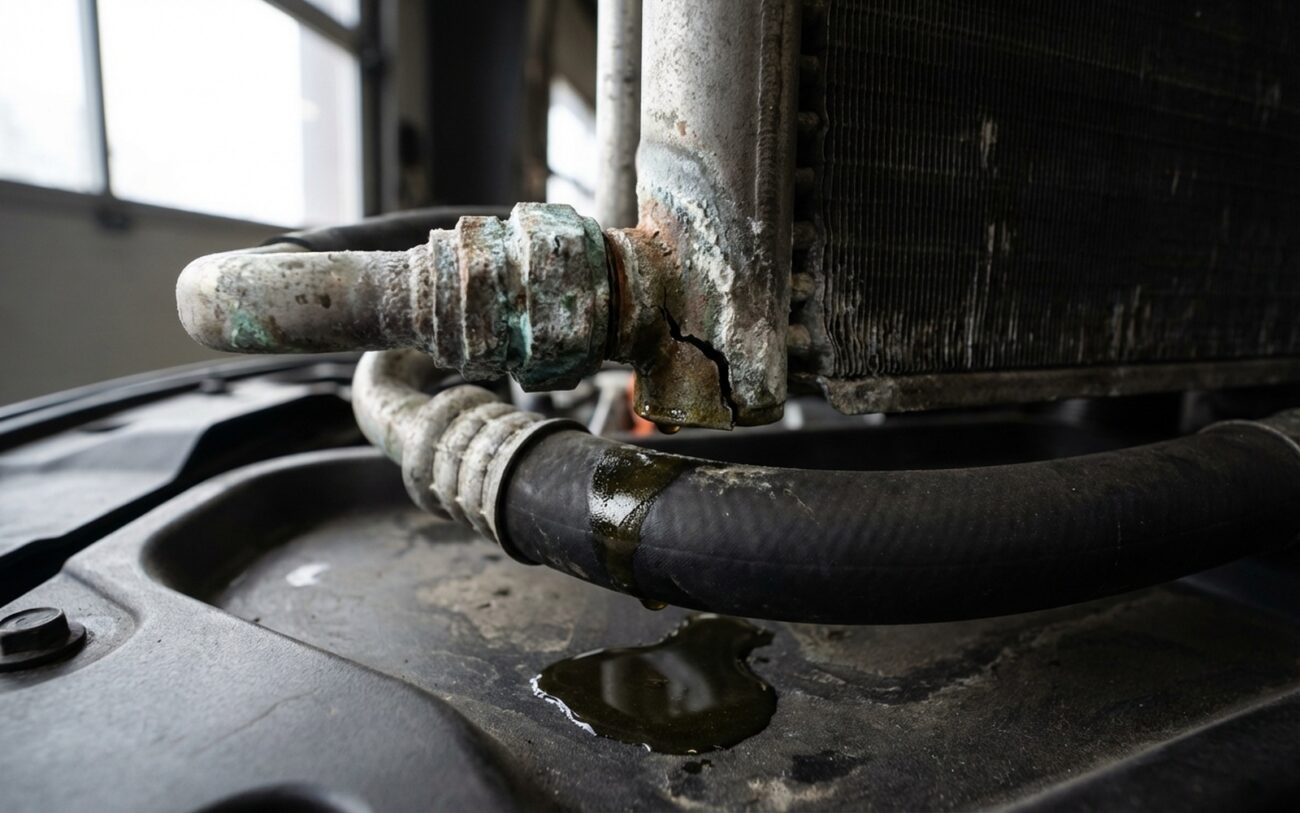
And then there’s the visual check. Pop the hood and look for dark, greasy residue on the aluminum housing of the heat pump unit, especially around any welded seams or pipe joints. Refrigerant carries oil with it, and when it leaks, it leaves a messy trail of dirt and grime. This isn’t just cosmetic; it’s a clear sign that a seal or a casting is compromised. Unlike a coolant leak, this oil staining points directly to an internal refrigerant system problem.
Diagnosis: Is It the Heat Pump, or Something Else?
Because the heat pump and the PTC heater both contribute to cabin warmth, a “no heat” complaint isn’t always straightforward. A bad PTC heater can fool you into thinking it’s the heat pump, and I’ve seen control module faults or even a weak 12V battery mess with the HVAC logic. The trick is figuring out if the refrigerant system itself is doing its job. Here’s how I break it down in the shop:
| Symptom | Likely Heat Pump Assembly Issue | Common External Mimics | My Definitive Diagnostic Steps |
|---|---|---|---|
| No cabin heat in cold weather | Reversing valve stuck, internal refrigerant leak in a heat exchanger, compressor failure (mechanical or electrical) | PTC heater failure, HVAC control module fault, low 12V battery voltage, incorrect climate control settings (e.g., defrost mode overriding heat) |
First, I’ll use my scan tool to command the PTC heater on and check for current draw on the high-voltage side. If it’s drawing power, the PTC is likely working. Then, I connect refrigerant gauges during heating operation (ambient below 40°F). A functional heat pump should show elevated suction (low-side) pressure. If both high and low pressures are nearly equal, that’s a strong indicator of a stuck reversing valve. |
| Rapid compressor cycling in heating mode | Internal restriction in a heat exchanger, moisture-induced ice blockage at the TXV (thermal expansion valve) | Low refrigerant charge from an external leak, faulty pressure transducer, blocked condenser fins (less common for heat pump mode) |
I’ll recover the refrigerant and weigh it. If the charge weight is correct or only slightly low, that points me towards an internal restriction. Moisture in the system is a big culprit here; it can freeze at the TXV, blocking flow and causing those pressure faults. After recovery, I might use a borescope to inspect accessible areas for blockages or ice. |
| Oil seepage at heat exchanger | Casting porosity or failed braze joint on the internal heat exchanger or evaporator core | Leaking Schrader valve core, degraded O-ring at a service port or line connection (these are easier fixes) |
My go-to here is to clean the suspected area thoroughly, add UV dye to the refrigerant, run the system for a bit, and then inspect with a UV light. If the leak is coming from the aluminum casting itself, or a braze joint on the core, rather than a replaceable O-ring or service port, that confirms an internal component failure. |
Why These Heat Pump Components Fail
From what I’ve seen over the years, heat pump failures in the Leaf e+ usually boil down to a few common culprits:
One big one is casting porosity. The aluminum heat exchangers or evaporators can have microscopic voids in the metal from the manufacturing process. Over time, these can develop into slow, insidious leaks, letting refrigerant and oil seep out. These aren’t sudden catastrophic failures; they’re slow killers that often start as intermittent performance issues before the system completely gives up the ghost.
Thermal cycling also plays a huge role. These systems are constantly switching between heating, cooling, and defrost modes, especially if you live somewhere with variable winter weather. All that repeated expansion and contraction puts a lot of stress on brazed joints and thin-walled tubing, particularly around the reversing valve and chiller unit. Eventually, fatigue cracks can form, and then you’ve got a leak.
Contamination is another factor that’s often overlooked, but it’s a killer. If the wrong type of PAG oil is used during service – say, ND-OIL8 instead of the specified ND-OIL11 – it can degrade seals and reduce lubrication. Even worse, if moisture gets into the system during an improper evacuation, it can mix with the refrigerant to form acids. Those acids then chew away at the internal components, especially the fine passages in the TXV and evaporator. I’ve seen more than one heat pump fail prematurely because a shop didn’t pull a proper deep vacuum before recharging the system. It’s a critical step, and if it’s skipped, you’re just asking for trouble down the road.
And of course, there’s always external damage. The condenser, which sits right at the front of the car, is vulnerable to road debris. A rock or a piece of tire tread can puncture a tube. You might not notice it right away, but it leads to a slow refrigerant loss, and eventually, the compressor can seize up from lack of lubrication. That’s a costly cascade failure.
Your Repair Options: From Straightforward to Surgical
How we fix it depends entirely on what’s actually broken. There’s no one-size-fits-all solution here.
Condenser Replacement Professional Only
Internal Heat Exchanger or Evaporator Replacement Professional Only
Internal Component Replacement Non-Repairable
Verifying the Fix: No Guesswork Allowed
In my shop, we don’t guess if a heat pump repair worked. We verify it. Every single time. Especially after opening the system for any reason:
First, for any opened system, I always start with a nitrogen pressure test. I’ll pressurize the system to 350–400 psi with dry nitrogen and monitor it for at least 15–30 minutes. Any pressure drop means there’s still a leak somewhere.
Next, a deep vacuum is critical. I pull the system down to below 500 microns using a good vacuum pump and a micron gauge, and I let it hold there for at least 30 minutes. If that vacuum rises above 700 microns, you’ve either got moisture still in the system (meaning a poor evacuation) or a hidden leak we haven’t found yet.
After recharging with the correct amount of refrigerant – typically 550–600g for the Leaf e+ – I run the system in both cooling and heating modes. I use an electronic gauge set to compare the high- and low-side pressures against Nissan’s service manual charts for the current ambient temperature. If I see deviations of more than 10–15 psi, something’s still off.
Finally, I measure the outlet air temperature at the center vent. In heating mode, with ambient temperatures around 30–40°F, you should be seeing 90–110°F within 10–15 minutes. I use an infrared thermometer for accuracy. And of course, an OEM-level scan tool should confirm that the reversing valve is switching correctly and that all sensors – ambient, cabin, refrigerant pressure – are reporting normal, consistent values. If all those checks pass, then I’m confident the repair is solid.
The Cold, Hard Math of Fixing It
Let’s be real: fixing heat pump issues isn’t cheap. But often, it’s not as bad as some folks fear. Here’s what I typically see:
Condenser Replacement
DIY Cost: Around $300 for the part, but you’re looking at another $500+ for the tools (recovery unit, vacuum pump) if you don’t have them. I absolutely do not recommend this as a DIY job due to EPA regulations and the precision required. When done right, replacing the receiver-drier and getting the oil charge perfect, the success rate is about 98%. The biggest secondary risk is incorrect oil volume or contamination, which will kill your compressor.
Internal Heat Exchanger or Evaporator Replacement
DIY Cost: Not feasible. You’re talking about HVAC case disassembly and dash removal, which is a massive undertaking. With proper evacuation and sealing, the success rate is around 95%. The main secondary risk is air leaks in the HVAC case or damage to blend door actuators during reassembly – that’s easy to do if you’re not careful.
Complete HVAC Module Assembly Replacement
DIY Cost: Absolutely not feasible. This is a full-on professional job. When you put in a brand new unit, the success rate is pretty much 99%. The secondary risk here is primarily financial outlay; you also need to make sure the new unit is compatible with the vehicle’s software, which sometimes requires programming.
Here’s my honest advice: if the repair estimate starts climbing past 50% of your Leaf’s current market value – and especially if the battery’s state of health is already below 70% – it’s time to seriously think about the long-term value. A new HVAC assembly can easily cost more than the car is worth in some cases. In those situations, selling the car as-is or trading it in might be the smarter financial play. I’ve seen too many owners pour good money after bad into a high-mileage Leaf with a degraded battery, only to face another major repair down the road.
Cost-Saving Tip from the Shop
If you’re out of warranty, an independent EV specialist can often save you a bundle. They’re starting to offer services like battery imbalance fixes and even individual battery cell replacements at costs that are typically 30–50% below dealership pricing. But you’ve got to vet their experience carefully – this isn’t a job for your average general mechanic. Find someone who really knows EVs.
Keeping Your Heat Pump Healthy for the Long Haul
My Top Tips to Prevent Recurrence
-
Always verify the correct refrigerant oil. This is huge. Make sure any shop working on your system uses ND-OIL11 PAG oil. Using the wrong type, even a little bit, can degrade seals and cause internal corrosion. Also, the recovery and recharge machine needs a high-efficiency filter for moisture and acid, and the system must be evacuated to at least 500 microns for a minimum of 30 minutes. No shortcuts here.
-
Use your heat pump regularly, even in mild weather. I tell my customers to run it for 10–15 minutes every few weeks. This keeps the seals lubricated and the reversing valve moving freely. Plus, it helps you notice any performance changes early on.
-
Do a quick system check before winter hits. On a cold morning, time how long it takes to get warm air from the vents. If it’s taking longer than usual, or if you notice the PTC heater seems to be running constantly (that range drop will be your clue), get it scanned. Also, take a minute to pop the hood and visually inspect the heat pump unit and condenser for any oil stains, dents, or debris buildup. Catching a small leak early can prevent a much more expensive compressor failure.
Look, the heat pump isn’t just about keeping you comfortable. It’s a vital part of your Leaf’s overall thermal management, impacting everything from battery health to driving range in cold weather. When it fails, you lose efficiency, range, and frankly, driver confidence. So treat it with the same care and attention you’d give to any other major system on your car.
