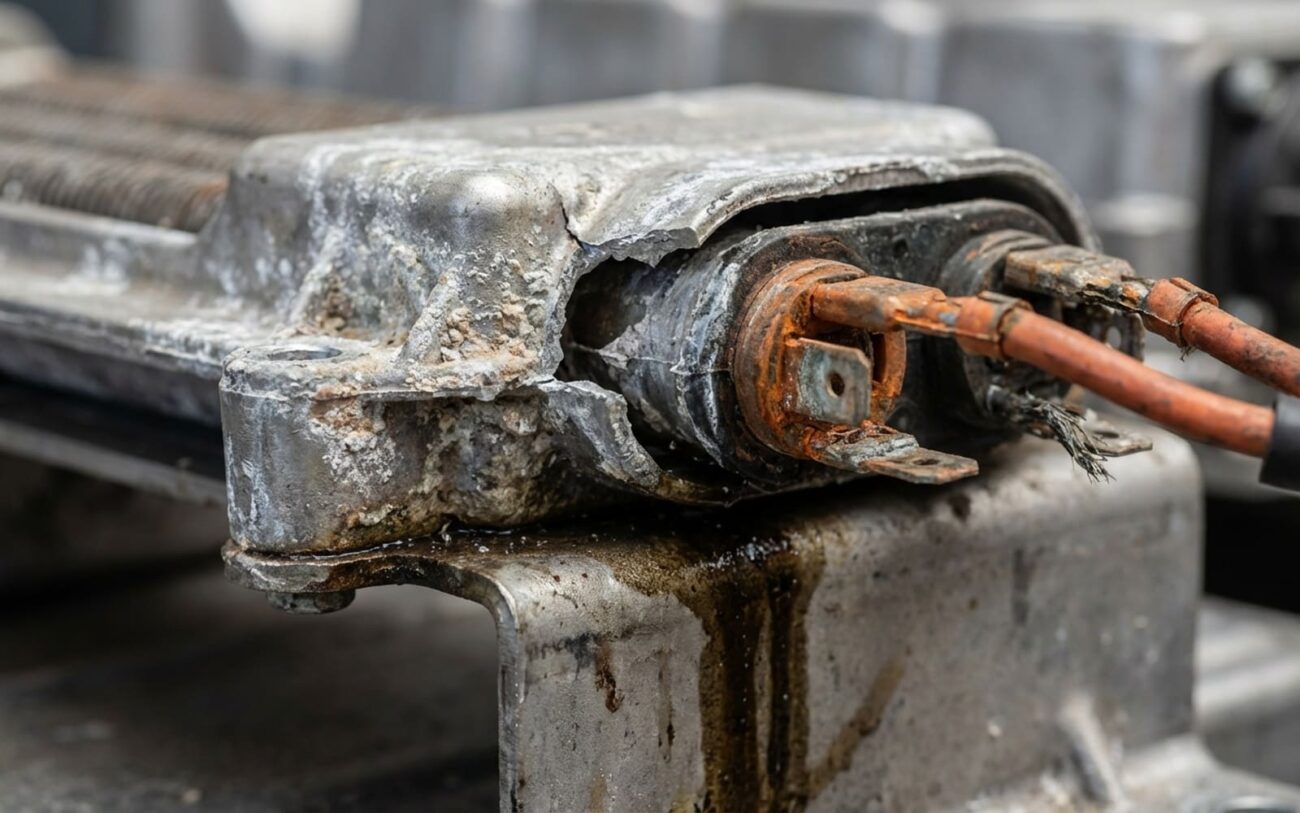
Alright, let’s talk about one of the most common complaints I hear from EV owners, especially when winter rolls around: no cabin heat. You crank the climate control to max, but all you get is lukewarm air, or worse, just plain cold. The car drives fine, no weird warnings on the dash, battery’s holding a charge – but you’re freezing your tail off. I’ve seen this countless times, and in an EV, it’s a different animal than your old gas guzzler.
See, in a traditional internal combustion engine car, you’ve got all that waste heat from the engine. That’s what feeds the heater core and keeps you warm. EVs don’t have that luxury. Every bit of cabin warmth relies on electrically powered systems. Most modern EVs use a compact heat exchanger – basically an electric heater core – to transfer thermal energy from a coolant loop into the cabin air. Some vehicles use a full-blown heat pump system, others rely on PTC (positive temperature coefficient) heaters, and a lot of them use a combination of both. When that heat goes missing, it’s almost always a problem with the thermal management system’s heat delivery side, and more often than not, it points right back to that primary heat exchanger.
Symptom Spotting: What Your EV Is Telling You
In my shop, I see two main scenarios when it comes to EV cabin heat problems:
Scenario 1: No Heat or Poor Heat Output
This is the classic one: you’re getting little to no heat, even when the system is commanded to max. Sometimes you’ll get a diagnostic trouble code (DTC) related to heater performance or coolant flow – something like a P050B, for example. Now, while a failed coolant pump, an air pocket in the system, or a malfunctioning HVAC control module can absolutely cause this, if the system just can’t produce heat, and especially if those DTCs are pointing to the heater itself, the heat exchanger is my first suspect.
Scenario 2: The Sweet Smell and the Puddle
This one’s a dead giveaway. You walk into your car, and there’s that distinct, sweet smell of coolant, maybe even a sticky puddle on the passenger-side floor. That’s a physical breach, plain and simple. In an EV, coolant isn’t just for keeping you warm; it’s critical for managing battery temperature and the power electronics, too. A leak inside the HVAC housing usually means the heat exchanger has cracked, a seam has failed, or a port connection is compromised. Sure, a leaking hose or O-ring can mimic this, but in my experience, the exchanger itself is the most frequent source of internal coolant leaks. This isn’t just about comfort anymore; it’s a safety hazard. Wet floors are slippery, and fogged windows are dangerous. And if you’ve got a heat pump system, coolant in the wrong place can even contaminate the refrigerant and damage the compressor – now that’s a real headache.
My Diagnostic Approach: Don’t Guess, Test!
You simply can’t afford to guess with these repairs. Replacing an integrated heat exchanger assembly is a massive job, both in terms of labor and cost. Before I even think about pulling a dashboard, I need to confirm exactly where the failure lies. Here’s how I typically break it down:
For No Heat or Poor Heat Output:
First, I’m checking the basics: Is the coolant level correct? Is the electric coolant pump actually running when commanded? I’ll use a factory-level scan tool to activate it with an actuator test. I’m also looking at the PTC heater element if the vehicle has one – sometimes those just fail outright. And for heat pump systems, I’ll check refrigerant levels, because low refrigerant can absolutely impact heating performance.
But the definitive test for the heat exchanger itself is monitoring live coolant temperatures. With the heater set to MAX, I’ll watch the coolant temperature at the heat exchanger inlet and outlet. If the pump is confirmed to be running strong, but I’m seeing a temperature differential of less than 5°C (that’s about 9°F) between the inlet and outlet, it tells me the heat transfer through the exchanger is poor. It’s either internally clogged or has some kind of flow restriction. While I’m in there, I’ll also command the blend door actuators through their full range with the scan tool, listening for any irregular movement or binding, and checking cabin temperature sensor readings against ambient to rule out those common mimics.
For Coolant Leaks Inside the Cabin:
When I see that telltale puddle, my first thought is always the heat exchanger. But I’ll quickly check for a misrouted condensate drain from the A/C system – it’s rare, but I’ve seen it mistaken for a coolant leak. I’ll also inspect any quick-connect fittings or O-rings at the firewall where the coolant lines enter the cabin. They can sometimes be the culprit.
The real confirmation comes from a cooling system pressure test. I’ll pressurize the system to manufacturer specs, usually between 1 to 1.5 bar (around 15-22 psi). If I suspect the heat exchanger, I’ll cap off its lines at the firewall and pressurize the rest of the system. If that holds, then the leak is definitely in the exchanger or its immediate connections. Then I’ll pressurize the isolated exchanger. A borescope can be invaluable here, allowing me to visually inspect for dampness or drips inside the HVAC housing during the test.
Why These Things Fail: Root Causes I’ve Seen
After years of tearing these systems apart, I’ve noticed a few patterns emerge when it comes to why these heat exchangers give up the ghost:
Manufacturing Defects: This is a real issue, especially in early production runs of new EV models. These units are typically aluminum plate-type exchangers, joined by high-temperature brazing. Microscopic porosity in those braze joints can develop into slow leaks over time. For example, I remember seeing a lot of early BMW i3 models (2014–2016) come in with documented internal micro-leaks in the primary heater exchanger. It led to gradual coolant loss and, eventually, no heat. BMW put out service advisories acknowledging the pattern, especially in colder climates.
Corrosion: This is a huge one. These aluminum units are incredibly sensitive to coolant chemistry. Using the wrong coolant – or just letting the correct coolant degrade without replacement – is a recipe for disaster. It leads to galvanic or electrolytic corrosion inside those narrow flow channels. This literally eats away at the metal, causing clogs or pinhole leaks. I’ve personally seen cases where a customer, trying to save a buck, used some generic aftermarket coolant for a “top-off,” and within months, the heat exchanger was toast.
Thermal Fatigue: Think about what these components go through. They cycle from sub-zero temperatures to 90°C (194°F) or more, repeatedly, for years. That constant expansion and contraction puts a lot of stress on the brazed joints and manifold connections. Over time, that stress can lead to hairline cracks. It’s a slow process, but it’s very real, especially in vehicles that see a lot of use in extreme climates.
Impact or Vibration Damage: This is pretty rare, but it can happen. Road debris can sometimes dent fins, or improper service procedures could crack a housing. But honestly, I see internal degradation far more often than external damage.
Just a quick note:
It’s absolutely critical to rule out other things before you condemn the heat exchanger. A failed coolant pump, a blown HVAC fuse, a bad cabin temperature sensor, or even a software glitch can all mimic these symptoms. For instance, a failed electric compressor or a problem in a heat pump control module might throw heater-related DTCs, but the actual fix is completely different. Always, always validate component operation before you decide the exchanger is the problem.
The Fix: What It Takes to Get Warm Again
This is Professional Territory. Period.
Once we’ve confirmed the diagnosis, the repair path depends on what exactly failed. Let me be clear: these are not DIY jobs for the average owner. You’re dealing with high-voltage safety protocols, refrigerant handling, and a full dashboard disassembly. This requires professional tools, specific training, and a lot of patience.
Pathway A: External Leak at Hose Connections Professional Only
Pathway B: Full Heat Exchanger Assembly Replacement Professional Only
Pathway C: The Sealant Trap (Don’t Do It!) Professional Only
After the Repair: Making Sure It Sticks
Once any repair is done – whether it’s a simple seal swap or a full core replacement – proper validation is non-negotiable. You can’t just button it up and send it out the door hoping for the best. Here’s my post-repair checklist:
Post-Repair Validation Steps I Use
-
First, a static cooling system pressure test. I’ll pressurize it to the cold fill pressure, usually around 1.2 bar (17-18 psi), and let it sit for at least 30 minutes. Any drop of more than 0.1 bar means there’s still a leak somewhere.
-
Next, a thermal cycle test. I run the heater at maximum until the cabin is fully warm and the coolant hits its operating temperature, usually 85–90°C (185-194°F). Then I let it cool completely to ambient. I repeat this cycle three times. I’m looking for consistent heat output, no coolant loss, and absolutely no new leaks popping up.
And of course, I’m using the scan tool to verify HVAC performance. I compare the target outlet temperatures to the actual readings – they should be within 5°C (9°F) of each other. For vehicles equipped with a heat pump, I’ll also test the A/C performance to make sure no contamination occurred during the disassembly. Sometimes, a blockage at the TXV or evaporator can indicate residual debris or, worse, sealant migration if someone tried that ill-advised “fix” before I got to it.
Cost, Risk & The “Is It Worth It?” Question
Let’s be realistic: this repair is expensive. Whether it makes economic sense depends heavily on the vehicle’s current market value, the health of its high-voltage battery, and your long-term plans for the car. Here’s a quick breakdown of what you’re looking at:
| Repair Type | DIY Cost (Parts Only) | Shop Cost (Parts & Labor) | Success Rate | Secondary Risk if Failed |
|---|---|---|---|---|
| O-ring/Seal Replacement | $50 (seals only) | $800 – $1,500 | 95% if diagnosed correctly | Persistent coolant leak; potential for electrical damage from fluid ingress |
| Full Heat Exchanger/Housing Assembly Replacement | $700 – $1,200 (part only) | $2,500 – $4,500+ | 98% | Improper reassembly may cause refrigerant leaks, dashboard rattles, or SRS system faults |
| Temporary Sealant | $30 | $150 (flush + sealant) | <50% for this component | High risk of clogging PTC heater, TXV, or other thermal system components—leading to cascading failures |
Here’s a rule of thumb I often use with my customers: if the repair cost is going to exceed 40% of the vehicle’s current market value, and the high-voltage battery is already showing signs of degradation (say, below 70% state of health), it’s time to seriously reconsider. You’re investing in a system that’s crucial for both comfort and battery longevity, but if the car is nearing its end-of-life, the math just might not justify it. I’ve seen people spend $4,000 to fix a $9,000 EV with aging cells. That’s a tough call to make, but it’s always better to make it with your eyes wide open, knowing all the facts.
Keeping Your Heat On: Prevention Is Key
Look, you can’t prevent every manufacturing flaw, but you can absolutely extend the life of your EV’s heating system significantly. It’s all about smart maintenance.
My Top Prevention Tips:
The single most important thing I can tell you? Use ONLY the OEM-specified coolant. Whether your car calls for Tesla’s G-48, BMW’s G48, or some other proprietary blend, that chemistry is specifically designed to protect the aluminum and rubber components in your thermal loop. Mixing coolants or using generic substitutes is a guaranteed way to accelerate corrosion and scaling – especially if you live in an area with hard water. I’ve seen it happen too many times.
Also, don’t ignore the manufacturer’s severe service maintenance schedule for coolant flushes. A lot of people think EVs have “lifetime” coolant, but that’s rarely true; it’s usually just an extended interval. Flushing every 5–7 years, depending on your vehicle and climate, helps prevent that internal buildup that restricts flow and kills heat transfer efficiency.
And for early detection, here’s a simple trick: test your heater every fall before the cold weather really hits. Command max heat and pay attention to how quickly the cabin warms up. If it’s noticeably slower – say, taking twice as long as last year – that’s a red flag. It could signal reduced coolant flow or a failing PTC element. Catching it early means you can plan the repair on your terms, not panic when you’re caught in a snowstorm.
Always remember, that cabin heater isn’t just some isolated comfort feature. In almost every EV, it’s part of a much larger, unified thermal management system that also regulates the temperature of your battery and power electronics. So, a failing heating loop doesn’t just mean cold feet; it can reduce regenerative braking, limit fast charging speeds, and ultimately shorten your battery’s lifespan. Keeping this system healthy isn’t just about comfort; it’s about protecting your car’s overall performance, range, and longevity.
