Taillight Welcome Lighting Failure: Diagnose Like a Pro
Let’s cut to the chase. You hit unlock, the car does its little light show—puddle lamps, dash glow, maybe a sweep across the tail lights—and one side doesn’t play along. No animation. No flash. Just dead. Before you start swapping parts or blaming the BCM, you need to know where the fault actually lives. I’ve seen shops replace body control modules because they didn’t check the taillight connector. Don’t be that guy.
Stop Driving If You See This
Step One: Is the Taillight Actually Dead?
Just because the welcome sequence doesn’t work doesn’t mean the taillight is bad. Could be the BCM never sent the signal. Could be a door switch isn’t triggering. Could be a ground fault under the rear bumper. So before you pull the taillight, test the command.
Grab a scan tool. Force the welcome lighting function. Then back-probe the connector at the taillight—look for 12V on the power pin or LIN bus activity with a scope. If you’ve got signal and no light, the problem is inside the assembly. No signal? Then the issue is upstream—BCM, wiring, or input. Don’t skip this step. I’ve saved customers hundreds by catching a failed door jamb switch that was killing the whole sequence.
| Symptom | Points to Taillight | Mimics from Elsewhere | How to Confirm |
|---|---|---|---|
| One taillight dead during welcome sequence | Failed LED segment, cracked PCB trace, internal short | Open in door courtesy switch, BCM software hiccup, LIN bus dropout |
Back-probe connector during forced activation. Signal present? Fault is internal. |
| Flickering or dim animation | Degrading solder joints, failing driver chip, partial thermal damage | Weak battery, corroded ground (G203), alternator ripple |
Check ground voltage drop. More than 0.1V? Fix the ground. Less? Blame the board. |
| Fog or water inside lens | Failed seal, cracked housing, clogged vent | Water forced in via harness grommet, high-pressure wash damage |
Remove unit, dry it, seal vents temporarily, spray-test. Leak from housing? It’s toast. |
What’s Really Failing Inside?
Modern taillights aren’t bulbs in a housing. They’re circuit boards with surface-mount LEDs, driver chips, and sometimes microcontrollers. Two things kill them: heat and water.
Thermal cycling cracks solder joints. Turn the lights on, board heats up. Turn off, it cools. Do that 5,000 times, and you get microfractures—especially on heavy components like LED arrays. I’ve seen units test fine cold, then fail when warmed with a heat gun. On VWs and Audis from 2015–2018, this was rampant. No TSB, but every shop in the country knew about it.
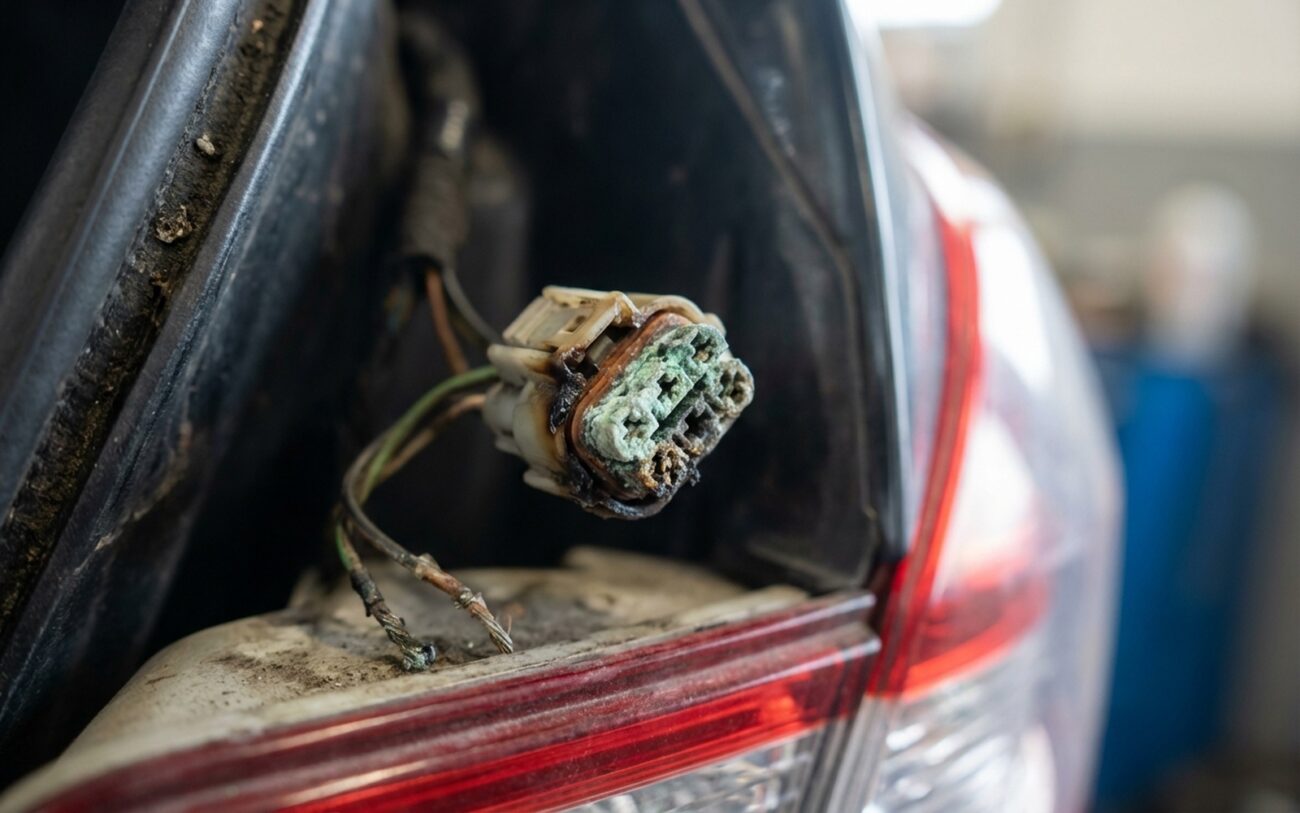
Moisture is worse. Even a hairline crack from a shopping cart bump lets in humid air. The vent can clog, creating suction that pulls in water. Once inside, corrosion starts on the PCB. I’ve pulled boards with green fuzz on the traces—game over. And yes, that corrosion can back-feed into the BCM. I’ve bench-tested more than one control module that failed because of a $0.03 trace short in a taillight.
How to Fix It (And What Actually Works)
Reseal the Lens (If It’s Serviceable)
PROFESSIONAL-ONLY / OEM-SERVICE-COMPONENT DEPENDENT
Replace the Whole Assembly
NON-REPAIRABLE → REPLACE ASSEMBLY
Dry & Seal (Last Resort)
TEMPORARY / LAST-RESORT
Did It Actually Work?
Don’t just hit unlock and walk away. Test it.
For a resealed unit: leave it off the car for 24 hours in a humid area (like a garage). Then re-install and do a spray test—hose it down like a car wash. No moisture inside? Good. Then run five lock/unlock cycles. All functions—brake, turn, reverse, welcome—must work every time.
For a replacement: scan for codes. Look for B1A7F or similar “courtesy lamp circuit” faults. If it’s a LIN bus system, scope the signal. I’ve seen units that lit up fine but sent garbage data back to the BCM, causing intermittent warnings. That’s the kind of thing you only catch with a scope.
Cost vs. Risk: What’s the Smart Move?
| Repair Type | DIY Cost | Shop Cost | Success Rate | Secondary Risk |
|---|---|---|---|---|
| Lens reseal | $50–$100 (adhesive, tools) | $200–$400 | 60% (highly technique-dependent) | Moisture returns, causes internal corrosion, risks BCM damage. |
| Full assembly replacement (OEM) | $300–$800 (part only) | $500–$1200 | 98% with proper programming | Incorrect config may disable features or trigger dash warnings. |
Here’s my rule: if the OEM light costs more than 25% of your car’s value, look at a certified aftermarket unit. But verify it supports your vehicle’s protocols. A light that doesn’t talk to the BCM properly is just expensive plastic.
Prevention: The 10-Second Check That Saves $1,000
Every time you unlock the car at night, take two extra seconds. Walk around. Look at the taillights. Are they both animating? Is the brightness even? In daylight, check for condensation—especially after rain. I’ve caught failing seals just by seeing a faint fog line along the lens edge.
If your car still uses bulbs, hit the connectors with dielectric grease during service. It won’t stop a cracked housing, but it’ll slow corrosion at the terminals. And don’t blast the taillight seams with a pressure washer. That force can pop weak seals loose over time.
Oh—and don’t assume it’s hardware. I’ve had customers swear their welcome lighting was broken, only to find it was disabled in the infotainment settings. Check the menu. Sometimes the fix is a few button presses, not a $600 taillight.
