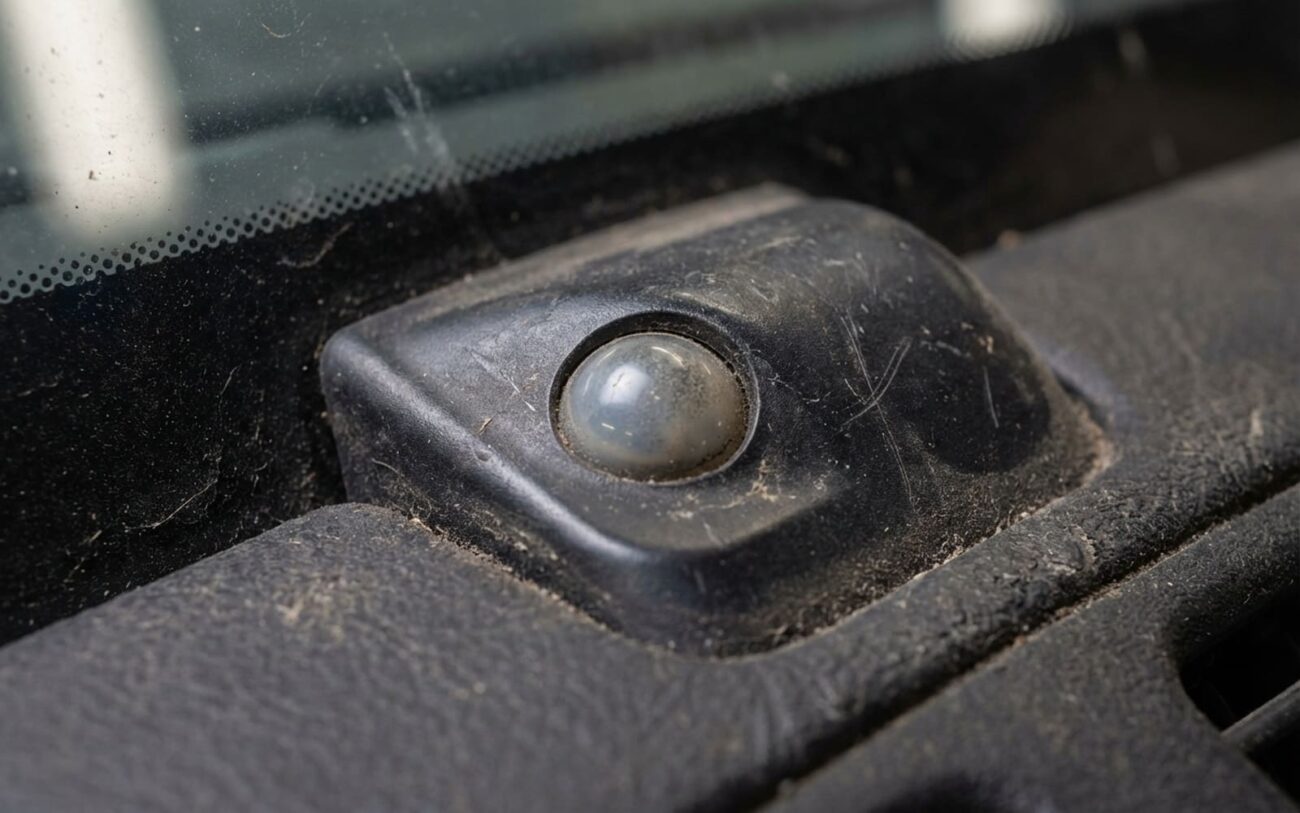
If your automatic climate control is blasting you with cold air on a sunny day, even when you’ve got the temperature set perfectly, you’re not alone. This is a classic symptom of a failing sun sensor, or what some folks call a solar load sensor. I’ve seen this complaint countless times in the shop, especially on cars from about 2008 onwards as these systems became more sophisticated.
Here’s the deal: your car’s HVAC system isn’t just looking at the cabin temperature. It’s also trying to anticipate how much heat is coming through the windshield from the sun. That’s the sun sensor’s job. It tells the climate control module, “Hey, it’s bright out here, we’re going to get a lot of solar gain, so crank up the A/C a bit to compensate.” It’s a smart system, designed to keep you comfortable before you even feel the cabin heating up.
But when that sensor goes bad, it can get stuck. It might tell the module it’s getting full sun, even if it’s cloudy, or worse, it’s sending an exaggerated signal all the time. The result? Your A/C compressor runs overtime, the fan speed ramps up unnecessarily, and you’re left shivering while the car thinks it’s doing you a favor. It’s not just annoying; that constant overworking can put extra wear and tear on your A/C compressor and other components, leading to bigger bills down the road.
Diagnosing the Sun Sensor: My Approach
Before you start throwing parts at it, you need to confirm it’s actually the sun sensor. I’ve seen too many people replace the wrong thing, and that just wastes time and money. Here’s how I go about it in the shop:
The “Tunnel Test” – Your First Clue
This is a quick, real-world test you can do yourself. If your A/C is overcooling like crazy in direct sunlight, try driving into a tunnel, under some dense tree cover, or just pull into your garage. If the air suddenly starts to warm up, and the fan speed drops, that’s a huge indicator that the problem is directly tied to sunlight. If the issue persists at night, in the shade, or in a dark garage, then you’re probably looking at something else—like a faulty in-cabin temperature sensor, a blend door actuator that’s stuck, or even a software glitch in the HVAC module itself. But if it’s only a daytime, sun-dependent issue, the solar load sensor is definitely at the top of my list.
Live Data: The Definitive Test
This is where a good scan tool becomes indispensable. You need one that can access the HVAC control module and read live data from the sun sensor. A basic OBD2 reader usually won’t cut it. What I’m looking for is the sensor’s output, which is often displayed in volts or as a percentage of “solar load.”
Here’s the test I use:
- With the engine running and the climate control on, connect your scan tool and navigate to the HVAC module’s live data stream. Find the parameter for “Sun Sensor,” “Solar Load,” or similar.
- Observe the reading. In a brightly lit area, it should show a relatively high value.
- Now, cover the sun sensor completely with your hand or a thick cloth. The reading on the scan tool should drop significantly, ideally to near zero or its lowest possible value.
- Next, shine a bright flashlight directly onto the sensor. The reading should climb, often to its maximum value.
If the sensor responds smoothly and proportionally to changes in light, then the sensor itself is likely good, and you might be looking at a wiring issue or a problem with the HVAC module misinterpreting the signal. But if the reading is stuck high (e.g., 100% solar load in a dark garage), or stuck low (zero in full sun), or doesn’t change at all, then you’ve pinpointed a problem with the sensor or its circuit.
Don’t Just Chase Codes
Modern cars will often store diagnostic trouble codes (DTCs) in the climate control module for sun sensor circuit malfunctions (e.g., “sun sensor circuit malfunction” or “solar load sensor signal out of range”). These codes are helpful, but they don’t automatically mean the sensor itself is bad. I’ve seen countless times where a technician replaces the sensor based on a code alone, only to find the real issue was a corroded connector, a chafed wire, or a poor ground connection. Always verify the power, ground, and signal integrity at the sensor connector before you condemn the part. You’ll typically find a 5-volt reference, a ground, and a signal wire. A multimeter can quickly tell you if those are present and stable.
Tech Tip: If the sun sensor reading is completely out of whack (maxed out or zeroed) but the wiring checks out, try wiggling the connector at the sensor and at the HVAC module while watching live data. Sometimes a loose pin or intermittent connection will show itself that way.
Why Sun Sensors Fail
When the sun sensor itself is truly the culprit, it’s usually one of a few common internal issues. It’s not often a gradual loss of sensitivity; they tend to fail in a way that sends a fixed or exaggerated signal.
1. Photodiode or Photoresistor Degradation
This is the core component that actually detects light. Think of it as a tiny solar panel. Over years of constant UV exposure and heat cycling on the dashboard, the semiconductor material can simply degrade. Instead of converting light intensity into an accurate electrical signal, it might start sending a permanently high signal (like it’s always in full sun) or a completely dead signal. It’s a physical breakdown, not just a calibration issue.
2. Internal Signal-Conditioning Circuit Failure
A sun sensor isn’t just a bare photocell. It has a small integrated circuit (IC) inside that processes and stabilizes the raw signal before sending it to the HVAC module. This chip can fail due to voltage spikes, heat, or just old age. When it goes, you might get a complete loss of signal, or a fixed, incorrect output. This isn’t something you can repair; the whole sensor needs to be replaced.
3. Optical Lens Deterioration
Many sun sensors have a small plastic lens or cover designed to diffuse light evenly across the internal photodiode. Over time, especially with exposure to harsh cleaning chemicals (like glass cleaner sprayed directly on the dash) or intense UV, this plastic can haze, crack, or delaminate. When that happens, it scatters light unevenly or blocks it, sending a distorted signal to the internal components. I’ve seen service bulletins from some manufacturers specifically addressing premature lens failure on certain models, leading to those false high solar load readings.
It’s crucial to remember that a dirty windshield above the sensor, aftermarket tint film, or even a dash mat covering the sensor can interfere with its readings. These aren’t sensor failures, though; they’re external obstructions. Likewise, if the HVAC control module is misinterpreting a perfectly good signal from the sensor, that’s a module software or hardware issue, not the sensor’s fault. The sensor is just the messenger, after all.
Repairing the Sensor: It Depends Where It Is
How you go about replacing a sun sensor depends entirely on its location and how it’s integrated into your vehicle. There are two main scenarios, and they have very different implications for your skill level and your wallet.
Scenario 1: The Accessible, Standalone Sensor (DIY-Friendly)
On many vehicles, the sun sensor is a small, standalone unit mounted on the dashboard, often near the base of the windshield or within the defroster grille. This is usually a pretty straightforward repair, definitely something a competent DIYer can tackle with basic tools.
You’ll typically need:
- Plastic trim removal tools (essential to avoid scratching your dash)
- A small Torx driver (T10 or T15 are common) or a small Phillips screwdriver
- A digital multimeter (for pre- and post-repair checks)
The process usually involves:
- Disconnecting the negative battery terminal (always a good safety practice when working with electrical components).
- Carefully prying up or removing the trim piece surrounding the sensor. Go slow here; plastic clips can break easily, and a scratched dash is a permanent reminder of a rushed job.
- Disconnecting the electrical connector from the old sensor.
- Unscrewing or uncliping the old sensor from its mounting.
- Installing the new sensor, reconnecting the electrical plug, and reassembling the trim.
- Reconnecting the battery.
I’ve seen people try to use screwdrivers to pry trim, and that’s a quick way to damage your interior. Invest in a cheap set of plastic trim tools; they’ll save you headaches.
Scenario 2: The Integrated or Hidden Sensor (PROFESSIONAL-ONLY)
This is where things get complicated, especially on higher-end vehicles like Mercedes, BMWs, Audis, and even some newer domestic models. The sun sensor might be:
- Embedded deep within the dashboard pad.
- Part of a multi-function module behind the rearview mirror (often combined with rain sensors, ambient light sensors, or even camera systems for ADAS).
- Bonded directly to the inside of the windshield.
Replacing one of these is absolutely a professional job. It can involve:
- Extensive dashboard disassembly.
- Removing and reinstalling the windshield (if it’s bonded to the glass). This requires specialized tools, urethane adhesive, and a controlled environment to prevent leaks or air gaps. And if the windshield comes out, you must follow the OEM drive-away time specifications for the adhesive to cure properly. Skipping this step is a huge safety risk, as the windshield is a structural component in a collision.
- Calibration and programming. After installation, the new module often needs to be calibrated using a factory-level scan tool. This can involve a full system “relearn” procedure to ensure all integrated sensors (rain, light, camera) are working correctly.
My advice? If your sun sensor is in this category, do not attempt it yourself unless you have the factory service manual, the specialized tools, and the training. You’re likely to cause more damage than you fix, and that can get very expensive very quickly.
After the Fix: Don’t Skip Validation
Just because you’ve installed a new sensor doesn’t mean the job is done. I always tell my guys: “Test, don’t guess.” You need to verify that the new sensor is working correctly and that the climate control system is happy. This is where your bidirectional scan tool comes back into play.
- Monitor Live Data (Again): With the new sensor installed, fire up your scan tool and go back to the HVAC live data stream. Repeat the covering and flashlight test. The sun sensor reading should now fluctuate smoothly and proportionally as you vary the light hitting it. If it’s still stuck or erratic, you might have a wiring issue you missed, a faulty new sensor (it happens!), or a problem with the HVAC control module itself.
- Road Test in Sunlight: Take the car for a good drive, specifically seeking out direct sunlight. Pay close attention to the automatic climate control’s behavior. It should now maintain your set temperature without overcooling. The fan speed should adjust naturally, not ramp up aggressively the moment the sun hits the windshield like it did before.
- Clear DTCs and Complete a Drive Cycle: Clear any stored diagnostic trouble codes from the HVAC module. Then, drive the vehicle through a full drive cycle (this varies by manufacturer, but usually involves a mix of city and highway driving) to allow the system to self-test. The codes should not return. If they do, you’ve still got an underlying issue, possibly a damaged harness or a control module that’s not playing nice.
This validation step is critical. Don’t hand the keys back to the customer (or yourself) until you’re absolutely sure the problem is resolved. A recurring code after a sensor replacement is a red flag that something else is going on.
Cost, Value, and Keeping it Running
Let’s talk about what this repair might cost you and whether it’s worth it. The price tag can swing wildly depending on your vehicle and the sensor’s location.
Repair Cost Breakdown
| Repair Type | DIY Cost (Part Only) | Shop Cost (Labor + Part) | Success Rate (When Properly Diagnosed) | Secondary Risk if Improperly Performed |
|---|---|---|---|---|
| Replace standalone dash-top sun sensor | $50–$150 | $200–$350 | 98% | Scratched dash, broken trim clips, or damaged connector during removal |
| Replace integrated sensor/module (e.g., behind windshield or dash) | $300–$600 | $800–$1,500 (includes windshield removal/install if needed) | 95% | Windshield leak, dash rattles, or calibration failure if not properly reassembled or programmed |
Making the Economic Decision
This isn’t a safety-critical failure, so it rarely leaves you stranded. The decision to fix it often comes down to comfort versus cost. If you’re looking at a $200–$350 repair on a car you plan to keep for a few more years, I’d say it’s absolutely worth it. Your comfort level will improve dramatically, and you’ll be protecting your A/C compressor from premature wear due to constant over-cycling. That’s a much more expensive repair down the line.
However, if the repair is pushing $1,000 or more on an older car that’s already got other major issues, you might decide to live with it. Most modern climate control systems allow you to manually override the automatic mode, so you can set the fan speed and temperature yourself. It’s not ideal, but it’s functional and bypasses the faulty sun sensor input entirely. It’s a trade-off you’ll have to weigh.
Prevention and Early Detection
You can’t stop electronic components from aging, but you can definitely extend the life of your sun sensor. The biggest culprit I see for premature failure is chemical damage. Never, ever spray glass cleaner, vinyl dressing, or any aerosol cleaning product directly onto or near the sun sensor. Those solvents can seep into the lens and accelerate hazing or delamination, ruining the sensor’s ability to read light accurately. A damp microfiber cloth is all you need for that area.
For early detection, just pay attention to your car’s behavior. If the climate control starts acting up only on bright, sunny days and works fine at night or under heavy clouds, that’s your warning sign. Get it checked out. A quick scan tool check of the live data can catch a degrading sensor before it becomes a major annoyance. Addressing it early can save you from a lot of discomfort and potentially protect other expensive A/C components in the long run.
