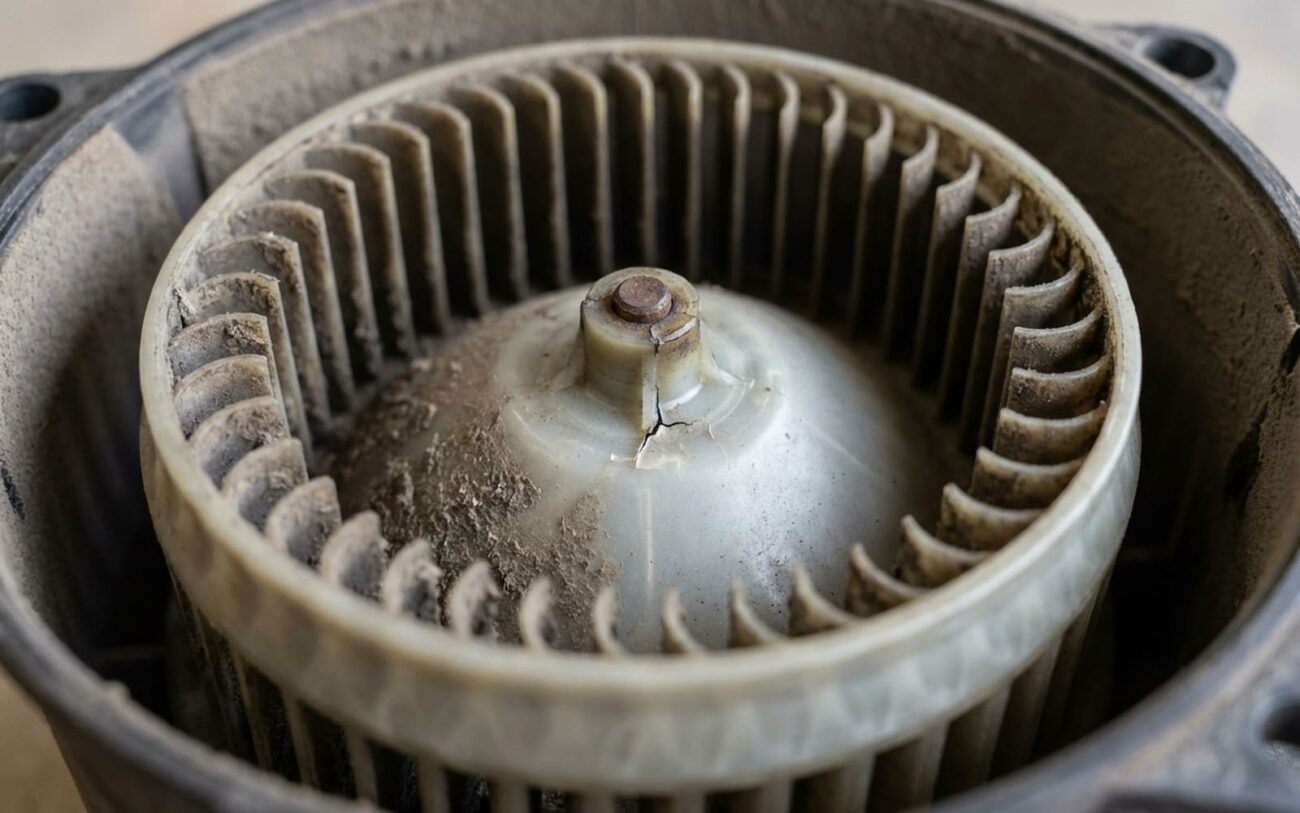
That high-pitched whistle when you crank the fan to max? Yeah, I hear it all the time in the shop. It’s not your imagination, and no—your blower motor isn’t about to explode. But it is telling you something’s off in the airflow path. Let me break down what’s really going on, how to find it, and whether it’s worth fixing.
It’s Not the Motor—It’s the Air
First thing I tell customers: if the noise only happens on high speed and stops when you drop it down, this isn’t a failing motor. It’s turbulence. Think of blowing across a bottle—change the angle or speed, and the pitch changes. Same principle here. The blower wheel pulls air in fast on high, and if there’s a restriction, gap, or damage in the intake path, that’s where the whistle starts.
And here’s a dead giveaway: if switching between fresh air and recirc changes the sound—or kills it—you’re dealing with an intake path issue. That narrows it down to the cabin air filter housing, the duct leading to the blower, or the housing inlet itself. Don’t go tearing out the motor yet. Not until you’ve ruled out the easy stuff.
Now, if the noise turns into grinding, scraping, or a high-pitched electrical whine? That’s different. Shut it off. That’s either a bearing going out or a failing resistor pack. But a pure whistle? That’s aerodynamic.
Pinpointing the Source—Don’t Guess
In my shop, we don’t swap parts hoping it’ll fix the noise. We isolate. And I’ve seen too many guys replace a blower motor only to realize the problem was a cracked filter housing or a pine needle jammed in the intake.
Here’s how I break it down—symptom by symptom—because the fix depends entirely on what’s causing the turbulence.
| Symptom | Blower Assembly Issue | External Mimic | Definitive Test |
|---|---|---|---|
| Whistle only on high speed | Turbulence from bent, cracked, or imbalanced squirrel cage fins | Debris (leaves, nesting material) in HVAC intake duct |
Test: Remove the blower motor. Inspect the squirrel cage—any bent, missing, or cracked fins? Spin it by hand. It should rotate smoothly, no wobble, no contact with the housing. |
| Whistle changes with recirc mode | Crack or seal leak at blower housing inlet | Damaged cabin air filter, missing gasket, or warped housing |
Test: With the motor out, run the fan on high. Use a borescope to check the duct. Feel around the inlet—any suction? That’s a leak. Listen closely: air pulling through a gap makes a whistle you can hear. |
| Whistle with vibration | Imbalanced blower wheel (damage or defect) | Debris stuck on one side of the wheel |
Test: Remove the assembly. Place the shaft on parallel rails or a balancer stand. If it always rolls to the same point, it’s imbalanced. Could be a manufacturing flaw—or someone dropped a tool on it during a filter change. |
| High-pitched whine (not whistle) | Worn motor bearings causing armature wobble | Failing blower resistor or speed controller |
Test: Use a mechanic’s stethoscope. Bearing noise peaks at the motor housing. Resistor noise? That’s loudest near the resistor pack—usually mounted in the HVAC case just before the blower. |
You need three tools for this: a flashlight, a borescope (trust me, it pays for itself), and a stethoscope. Skip them, and you’re just guessing. And guessing gets expensive.
When the Blower Itself Is the Problem
Once you’ve ruled out external causes, it’s time to look inside the blower assembly. I’ve seen four main issues over the years:
1. Molding flash on the squirrel cage. Yeah, it sounds minor, but on some batches—especially certain Honda and Toyota models from 2016–2018—I’ve pulled brand-new motors with visible plastic burrs on the fin edges. They’re not supposed to be there. At high RPM, they create turbulence. You won’t see it unless you pull the motor and inspect under good light.
2. Physical damage to the scroll housing. This happens during cabin air filter changes. Someone gets aggressive with a screwdriver, dents the spiral chamber, and now the airflow is disrupted. Even a small dent changes the pressure dynamics. I’ve fixed this with a heat gun and careful reshaping—on metal housings. Plastic? Not so much.
3. Age-related cracking. In hot climates, the plastic wheel degrades over time. Micro-cracks form at the hub or along the fins. The wheel loses balance, starts vibrating, and creates a whistle. I’ve seen this on 8+ year-old Subarus and Mazdas—especially if the cabin filter wasn’t changed regularly.
4. Design resonance. Some systems just have a harmonic frequency that kicks in at high speed. Not a defect—just bad engineering. I’ve replaced blower wheels with updated OEM parts (same model, different part number) and silenced the whistle for good. Check for TSBs before you assume it’s wear.
And one thing: if the whistle is coming from the dash vents, that’s not the blower. That’s a blend door, cracked duct, or plenum leak. Different issue. We’re focused on the intake side—before the air hits the wheel.
How to Fix It—From Simple to Serious
Clean or De-burr the Squirrel Cage
Repair the Blower Housing Professional Only
Replace the Blower Motor Assembly
The Tape “Fix” (Last Resort)
Did It Actually Work? Here’s How to Know.
Don’t just plug it in and call it good. Run the fan on high for at least five minutes. Cycle between fresh air and recirc. The whistle should be gone—completely. No “almost gone.” No “only under hard acceleration.”
If you replaced the motor, check current draw with a clamp meter. Compare it to factory specs. Should be within 10%. Higher? Something’s dragging. Lower? Possible open circuit or weak windings.
And use your stethoscope. Press it around the housing seals. Any hiss? That’s a leak. Even a tiny one can re-whistle under load.
Keep It From Coming Back
This one’s simple: change the cabin air filter on schedule. Use a quality filter—don’t go cheap. A clogged or poorly sealed filter lets debris bypass into the blower wheel. I’ve pulled out everything from pine needles to mouse nests. All because the filter was overdue.
Also, check the fresh air intake—usually at the base of the windshield on the passenger side. Clear leaves, grass, and debris every six months. Takes two minutes. Prevents a $600 repair.
I’ve said it for years: most blower issues start with dirty air. Keep it clean, and the system lasts.
Is It Worth Fixing?
Here’s the real talk: if the repair involves $1,500 in labor to replace a cracked HVAC housing, ask yourself—is the car worth it? On a 10-year-old sedan, probably not. A whistle doesn’t stop you from driving, defrosting, or staying cool.
But a $300 motor swap? That’s usually worth it. Especially if you’re keeping the car long-term. A quiet HVAC system matters for comfort—and resale.
Bottom line: clean it first. If that doesn’t work, assess the cost vs. value. And if you’re not sure? Bring it to a shop that’ll diagnose before they disassemble.
Quick Prevention Checklist
-
Change the cabin air filter every 12,000–15,000 miles—or yearly, whichever comes first.
-
Inspect the fresh air intake (base of windshield) every 6 months. Clear debris.
-
Use OEM or high-quality aftermarket filters. Cheap ones don’t seal well.
-
When replacing the blower, torque mounting screws to 20–35 inch-pounds. No exceptions.
