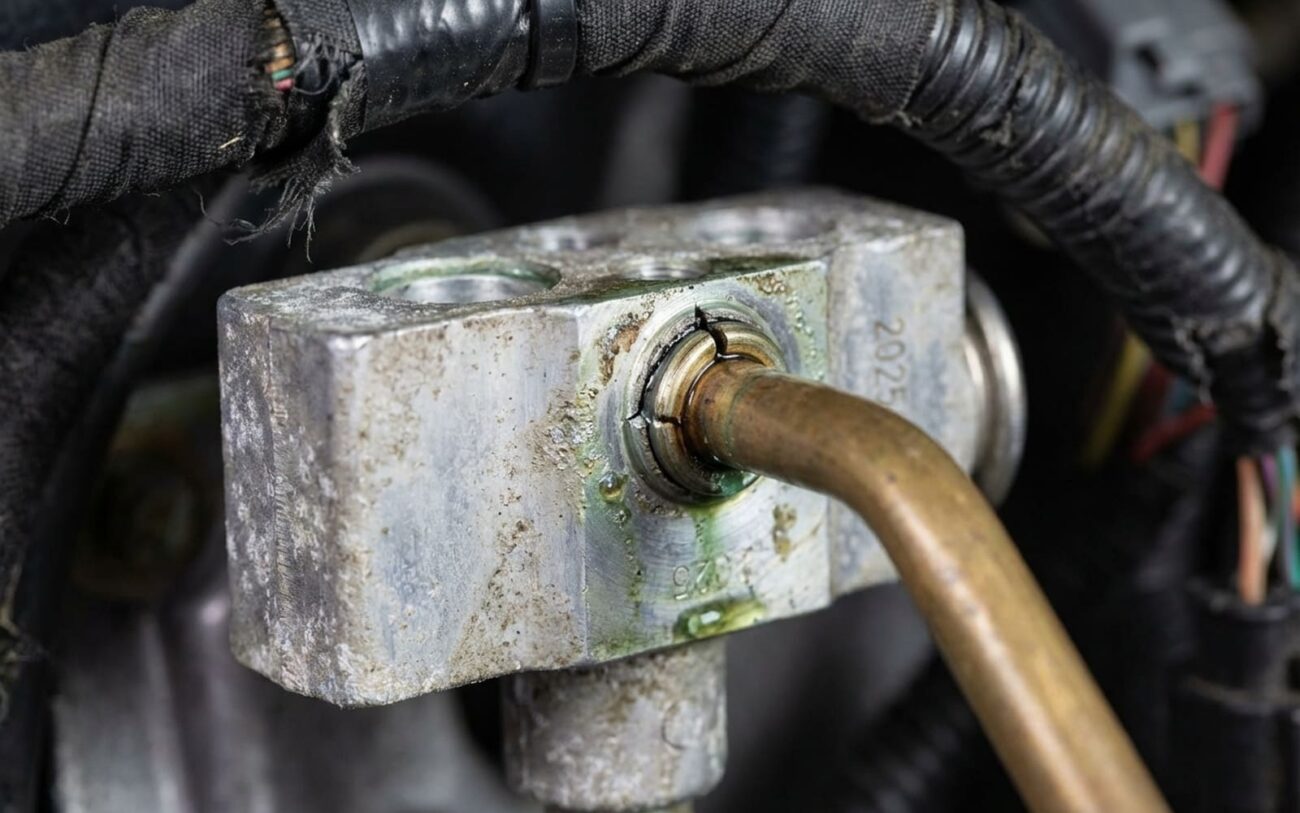
Alright, let’s talk A/C. If you’ve got a 2016 or newer Hyundai or Kia and your air conditioning just isn’t cutting it anymore—not blowing as cold as it used to—you’re not alone. I’ve seen this exact scenario play out on countless Elantras, Sonatas, Optimas, and Sportages in my bay. We’re talking cars with anywhere from 60,000 to 100,000 miles on them, sometimes even less.
And here’s the kicker: in most of these cases, it’s not a simple refrigerant leak or a dead compressor. More often than not, the culprit is a faulty thermal expansion valve (TXV). This little valve is critical. It’s the gatekeeper, controlling how much refrigerant gets into your evaporator core. When it acts up, the whole system goes south, even if the compressor is humming along and you’ve got a full charge.
Recognizing the Symptoms (and Why They Matter)
What I usually see first is just plain weak cooling. You crank the A/C to max, the compressor kicks on, but the air coming out is just kinda cool, never truly cold. When I hook up my manifold gauges, both the high-side and low-side pressures are typically lower than what they should be for the ambient temperature. That’s a classic sign of a TXV stuck open, letting too much refrigerant flood the evaporator. The refrigerant just blasts through, doesn’t have enough time to properly expand and absorb heat, and boom—your cooling goes way down.
Then there’s the other side of the coin: a complete loss of cooling. This one often comes with visible frost or ice—you might see it on the low-pressure line, around the service port, or even inside the HVAC case if you can peek in there. This tells me the TXV is stuck closed or severely restricted, basically starving the evaporator. With no refrigerant flowing properly, the pressure drops like a rock, and any moisture in the system freezes up. You might also notice your compressor rapidly cycling on and off every few seconds. That’s the evaporator temperature sensor doing its job, seeing the ice build-up and shutting down the compressor to protect it. It’ll thaw, kick back on, and the whole cycle repeats.
Look, letting either of these conditions slide is asking for trouble. A TXV stuck open can lead to something we call ‘liquid slugging.’ That’s when liquid refrigerant—and remember, liquids don’t compress—gets sucked into the compressor. You can bend connecting rods, crack valves, or just outright grenade the whole compressor in a heartbeat. What started as a $200 valve job suddenly turns into a $1,500-plus repair, requiring a new compressor, condenser, filter-drier, and a full system flush. I’ve seen too many compressors replaced when the TXV was the real problem all along. It’s a common misdiagnosis, and it costs people a lot of money.
My Diagnostic Approach: Cutting Through the Noise
Now, weak A/C can be a tricky beast. Low refrigerant, a tired compressor, even something simple like a clogged cabin air filter or a faulty blend door actuator can all mimic TXV symptoms. That’s why I never guess. We rely on a methodical approach: pressure readings, temperature checks, and specific diagnostic tests to pinpoint the real issue.
| What I See / Gauge Reading | My Initial Suspect | Common Lookalikes | How I Confirm It |
|---|---|---|---|
| Low high-side and low-side pressures, poor cooling | TXV stuck open (overfeeding) | Low refrigerant charge, compressor inefficiency |
Pinch Test: With the system running, I’ll gently pinch the liquid line just before the TXV. If the high-side pressure jumps up and the cooling improves, even for a moment, that TXV isn’t metering right. It’s stuck open, plain and simple. |
| High high-side pressure, very low low-side pressure, no cooling | TXV stuck closed or restricted | Clogged orifice tube (if equipped), blocked filter-drier |
Temperature Drop Test: For a restriction, I grab my infrared thermometer. Measure the temperature before and after the TXV. If you see a big drop—I’m talking 20°F or more—right across that valve, you’ve found your restriction. |
| Frost on low-side line or evaporator inlet | TXV stuck closed/restricted | Faulty evaporator temperature sensor or control circuit |
Scan Tool Check: If I see frost, I’m checking the evaporator temp sensor data with my scan tool. If the sensor is reading normal temps but there’s still ice, then the sensor isn’t lying; the TXV is starving the evaporator. |
| Normal pressures but poor cooling | Incorrect TXV superheat (internal wear or calibration drift) | Blend door failure, cabin air filter blockage, low airflow |
Superheat Calculation: This is where superheat calculation comes in. It’s a bit more involved, but it tells you exactly how much heat the refrigerant is picking up. I measure the evaporator outlet pressure and temperature, convert that pressure to a saturation temperature, and then subtract it from the actual outlet temp. If that number isn’t in the 8–12°F range, the TXV isn’t metering correctly. It’s usually internal wear or calibration drift. |
Why These TXVs Fail (The Root Causes)
So, why are these TXVs failing so often in these particular Hyundai and Kia models? From what I’ve seen in my own shop, pulling these things apart, and just from following industry trends, it boils down to two main things: internal contamination and component degradation. This valve works on super precise tolerances. Even microscopic bits of debris—say, from a desiccant bag breaking down in an old filter-drier—can jam up the mechanism. I’ve literally opened these valves up and found sludge or tiny metal fines blocking the needle seat. When that happens, it can’t open or close like it’s supposed to.
Another common failure point is the thermal sensing bulb. It’s a small capillary tube that clips onto the evaporator outlet, and it’s filled with a special fluid. That fluid expands and contracts with temperature, telling the valve how much refrigerant to let through. If that bulb leaks or loses its charge, the valve basically goes blind. It loses its feedback and just defaults to a fixed position, usually wide open or completely shut.
And over time, the internal spring can fatigue, or the diaphragm can wear out. That can throw off the valve’s calibration, causing it to meter refrigerant incorrectly even if it’s not totally stuck. This kind of gradual degradation often explains why some cars start with just ‘okay’ A/C that slowly gets worse, instead of a sudden, complete failure.
And yes, this is a known issue:
Just so you know, this isn’t some obscure problem I’m making up. Both Hyundai and Kia have issued Technical Service Bulletins (TSBs) and even some service campaigns for 2016-2020 models, specifically addressing premature TXV failures due to internal wear and contamination. It’s a recognized engineering issue, not just anecdotal. Now, don’t confuse this with other common A/C issues like a clogged cabin air filter or a blend door problem—those mess with airflow, not refrigerant flow. And while a refrigerant leak is a separate beast, a failed TXV can definitely lead to compressor damage, which then creates bigger problems. (Oh, and just a quick note: A/C refrigerant and engine coolant are two totally different systems, so don’t mix those up!)
The Fix: Professional Territory Only
This Ain’t No DIY Job
Alright, let’s get one thing straight right off the bat: replacing a TXV is not a DIY job. Seriously. You need EPA Section 609 certification just to handle refrigerant, plus a whole arsenal of specialized tools. We’re talking a dedicated refrigerant recovery machine, a proper manifold gauge set, a vacuum pump that can pull down to at least 500 microns (and hold it!), an electronic leak detector, and precise scales to charge by weight. And every single time you open the system, you must replace the receiver-drier or accumulator. Its desiccant goes bad the second it hits open air, and skipping this step guarantees future problems.
Recover Refrigerant & Get Access Professional Only
Install New TXV & Evacuate Properly Professional Only
Charge System by Weight (No Guessing!)
Post-Repair Validation: Making Sure It’s Right
Once the repair is done, my job isn’t over. You’ve got to validate it properly, every single time. The system has to hit three key benchmarks before I consider it truly fixed:
Key Validation Benchmarks
-
Vent Temperature: I run the engine at about 2,000 RPM for ten minutes, with the ambient temperature between 70–80°F. Then I check the center vent. It should be blowing between 35°F and 45°F. If it’s not, something’s still off.
-
Pressure Readings: Next, I hook up the gauges again. Both high and low-side pressures must be within the manufacturer’s specs for the current ambient temperature. I always cross-reference with a proper pressure/temperature chart for the specific refrigerant (R-1234yf or R-134a). No guessing here.
-
Leak Integrity: And finally, leak integrity. Before charging, the system has to hold a deep vacuum (below 500 microns) for at least 15 minutes, with absolutely no rise. After charging, I go over every single connection, the condenser, and the evaporator area with an electronic leak detector. I’m looking for even the tiniest sniff of refrigerant. A good repair is a leak-free repair.
I always take it for a quick test drive too. Just to make sure the compressor cycles properly and no pending codes pop up. Modern cars are smart; they’re constantly monitoring evaporator temperature and system performance. Any little hiccup can trigger a code. And yes, all the tools for this—gauges, micron meter, thermometer, leak detector, and a good scan tool—are essential. You can’t do this job right without them.
Cost, Risk & The Smart Decision
Alright, let’s talk brass tacks: the cost. Replacing a TXV and filter-drier in these Hyundais and Kias is a labor-intensive job, mostly because of where that valve is tucked away under the dash. So, it’s not a cheap fix. But I’ll tell you this: trying to cut corners here will almost always cost you more in the long run.
| Repair Type | DIY Cost | Shop Cost | Success Rate (if done correctly) | Secondary Risk if Repair Fails |
|---|---|---|---|---|
| Professional TXV & Filter-Drier Replacement | N/A | $800 – $1,500 (parts & labor) – This is a ballpark, depends on your shop and location. | High (>95%) – If done right, it’s a lasting fix. | Contaminated system from improper flushing or incorrect oil. That leads to a repeat failure or, worse, a dead compressor down the road. |
| Attempted DIY without certification/tools | $200–$400 (parts only) – But that’s just for the parts you might buy. | N/A | Very Low – Honestly, almost zero. | Personal injury from high-pressure refrigerant (it’s dangerous stuff!), hefty environmental fines for venting refrigerant, completely contaminating the system, and ending up with zero A/C function. You could also just ruin the car. |
There’s also the economic reality to consider. I always tell my customers: if the repair cost is pushing past, say, 30% of your vehicle’s current market value—especially if it’s an older car nearing the end of its life—it might not make financial sense to proceed. But for a well-maintained car with plenty of miles left, getting that factory-cold A/C back is absolutely worth the investment, both for your comfort and for the car’s resale value. Nobody wants to buy a car with no A/C.
Prevention & Monitoring: Keep Your Cool
Preventing these TXV failures largely comes down to good service practices. Always, always use the exact refrigerant type specified on your underhood label. R-1234yf and R-134a are not interchangeable; using the wrong one will damage components. And I’ll say it again: any time the A/C system is opened up—for any reason, condenser, compressor, whatever—the receiver-drier or accumulator must be replaced. It’s not optional. The desiccant inside absorbs moisture, and once it’s exposed to air, it’s done. A saturated drier means moisture in your system, and that means future problems.
For early detection, I recommend a simple habit: at the start of every cooling season, hop in your car, crank the A/C to max, and let it run for ten minutes. Then, check the center vent temperature. If it’s noticeably warmer than last year—say, 50°F instead of a crisp 40°F—that’s your early warning sign. Get it checked out before it leaves you sweating on the side of the road.
Regular cabin air filter changes are also a big deal. They keep the airflow across your evaporator optimal. Restricted airflow can actually mimic low refrigerant symptoms and put unnecessary stress on the whole system. And if you ever notice your compressor clutch cycling strangely, or hear a faint hissing sound near the firewall—get it looked at. Catching a failing TXV early can absolutely save your compressor and prevent a much, much larger repair bill down the line. Trust me on that one.
