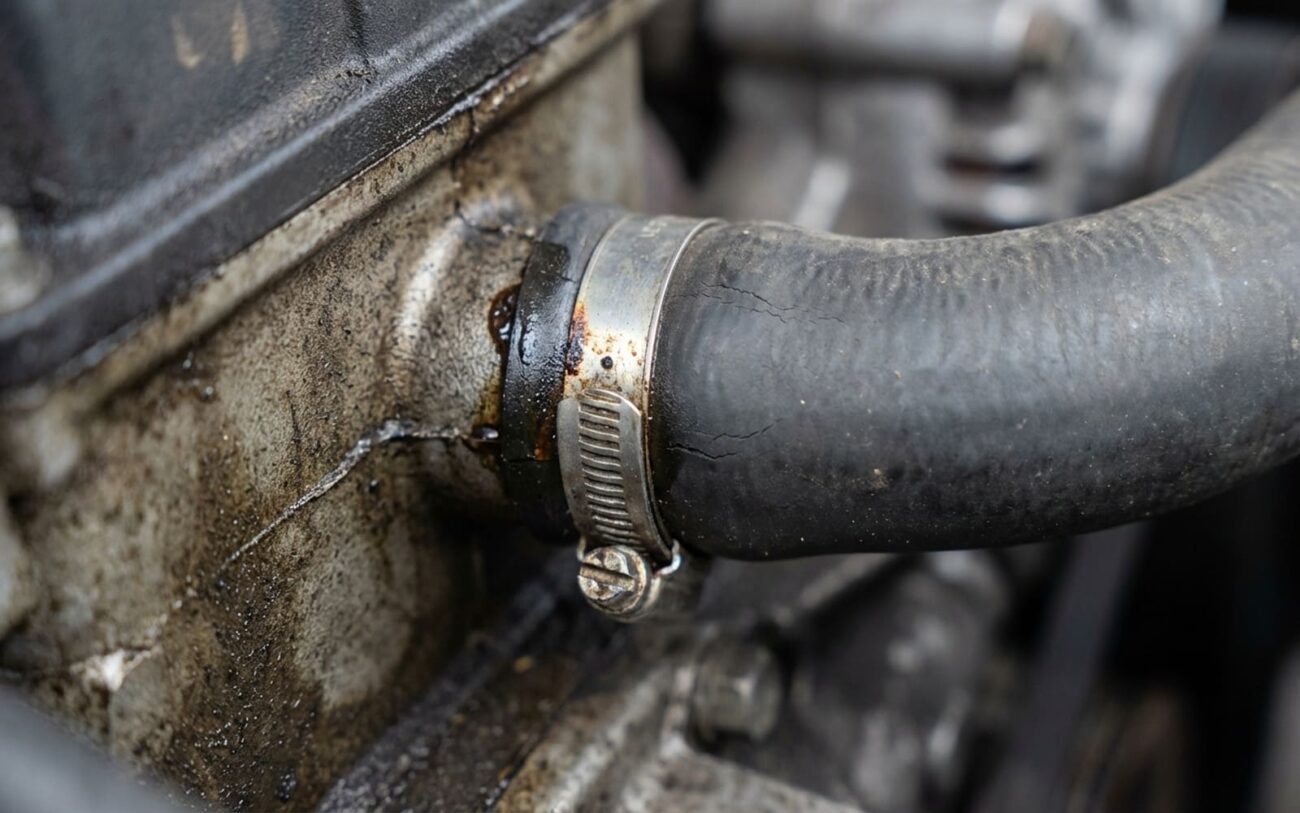
That Whistle After a Hose Job? It’s Almost Always the Clamp.
Alright, let’s talk about that new, annoying high-pitched whistle you’re hearing right after you swapped out a coolant hose, vacuum line, or maybe a turbo pipe. I’ve been turning wrenches for over 25 years, and I can tell you, in nine out of ten cases, that sound isn’t the hose itself. It’s air or steam screaming past a clamp that isn’t doing its job.
It’s a red flag, plain and simple. If it’s an intake or vacuum hose, that whistle is unmetered air getting sucked into your engine. That messes with your fuel-air mixture, leaning things out, and can trigger a check engine light with codes like P0171 or P0174. You might feel a rough idle, hesitation, or just a general lack of power. If it’s a coolant hose, you’re losing pressure, and that’s a fast track to overheating, boiling coolant, and potentially warped cylinder heads. Trust me, you don’t want to ignore this sound.
Finding the Squealer: Don’t Just Guess
The first rule: don’t just grab a wrench and start cranking on every clamp you see. The leak might not be the one you just touched. Maybe you bumped another vacuum line, didn’t fully seat a connector, or left a port open during reassembly. You need to confirm the source, not play a guessing game.
| Symptom | Most Likely Culprit (Clamp Interface) | Common Mimics | My Go-To Diagnostic Test |
|---|---|---|---|
| High-pitched whistle after hose replacement | Clamp loose, misaligned, wrong type, or hose not fully seated on the fitting’s bead. | Cracked plastic connector, a split in the hose under the clamp, or an open vacuum port (e.g., PCV hose). |
For intake/vacuum: A smoke machine is the gold standard. Introduce smoke at idle; you’ll see it pour out of the leak. For sound, use a mechanic’s stethoscope (or a length of 3/8″ rubber hose to your ear) to pinpoint the exact source.
|
| Coolant loss or steam after hose replacement | Clamp not sealing evenly, or hose not fully seated on the fitting bead. | Cracked thermostat housing, damaged radiator neck, or a more serious internal leak like a head gasket. |
A cooling system pressure test is non-negotiable. Pressurize the system to the cap rating (usually 13–18 psi). Watch for weeping or dripping directly at the clamp. For tiny, stubborn leaks, add UV dye and inspect with a black light after a short drive.
|
| Boost or vacuum leak (performance issues, codes) | Clamp insufficiently tightened, wrong type for the pressure, or hose slipped. | Split in the hose itself (especially under the clamp), leaking intercooler, or a torn turbocharger hose. |
For forced induction (turbo/supercharger): A boost leak test. Seal the intake, pressurize to 15–20 psi, then spray soapy water around all connections. Bubbles mean a leak. Also, monitor the pressure gauge for a rapid drop.
|
A quick tip if you don’t have a smoke machine: grab a length of 3/8″ rubber hose. Hold one end to your ear and sweep the other end near suspect connections with the engine running. The whistle will get noticeably louder right at the leak point. Just be smart and keep clear of any moving belts or fans – safety first, always.
Why Your Clamp Let You Down: The Usual Suspects
So, you’ve found the leak. Now, why did it happen? It’s rarely a faulty hose itself. More often, it’s an installation error or a mismatch. Even experienced DIYers (and, yes, sometimes pros) make these mistakes.
First up: Wrong clamp type. Most OEM systems use constant-tension spring clamps, especially on heater hoses, radiator hoses, and many vacuum lines. These clamps are designed to expand and contract with temperature changes, maintaining consistent pressure. If you swap one for a standard worm-drive clamp, you lose that flexibility. The rigid band can’t compensate, and you get leaks when things heat up and cool down. I see this misdiagnosed constantly; people just keep tightening the worm clamp, which only makes it worse by cutting into the hose.
Second: Improper clamp placement. This is crucial. The clamp must sit squarely over the raised bead on the fitting, whether it’s metal or plastic. If it’s too far back on the hose, riding the edge of the bead, or crooked, it won’t compress the hose evenly. No amount of tightening will fix bad positioning.
Third: Overtightening. This is a big one. On spring clamps, crushing the ears with pliers permanently deforms the spring, killing its tension. On worm-drive clamps, over-torquing can cut right into rubber or silicone hoses, strip threads, or crack plastic fittings – especially common on modern, plastic intake manifolds. I’ve seen more damage from “just a little extra turn” than from undertightening.
Fourth: Undertightening. Surprisingly common. The clamp feels snug, but it’s not tight enough to create a seal under system pressure. Most people rely on “feel,” but SAE standards actually specify torque values for clamps. That’s why a torque screwdriver or small torque wrench is a smart investment.
Fifth: Wrong size or cross-threaded clamp. Using a clamp that’s too wide, too narrow, or one that got cross-threaded during installation prevents proper, even compression. Always double-check the fit before you start tightening.
The Fix: From Simple Snug to Full Redo
Easy Access, Simple Clamp Issue
Hard-to-Reach Clamp Professional Recommended
Systemic Clamp Issues
A note on temporary fixes: For a very slow coolant seep (not a spray!), some manufacturers, like GM, approve sealant tablets. They can form a micro-seal in tiny gaps. But be warned: these particles can eventually clog heater cores or radiator tubes. I generally advise against them unless it’s an absolute emergency to get home. And for intake, vacuum, or fuel systems? Forget about sealants. They won’t seal, and you’ll just foul sensors or damage injectors. There’s no safe temporary fix for a vacuum leak; that unmetered air will cause engine damage.
Confirming the Fix: Don’t Just Assume Silence
This is where a lot of people go wrong. Just because the whistle is gone at idle doesn’t mean you’ve fixed it. Many leaks only show up under load or when the system is at full operating pressure. You need to test it properly.
For coolant repairs: Get a cooling system pressure tester. Most auto parts stores rent them out. Pump it up to the pressure listed on your radiator cap (usually 13–18 psi). Let it sit for at least 15 minutes. If the pressure gauge doesn’t drop, you’re in good shape. Then, drive the car to full operating temperature, let it cool completely, and repeat the pressure test twice. After all that, inspect the repaired clamp area closely for any dampness, residue, or staining. Zero tolerance here – any moisture means it’s still leaking.
For intake or vacuum repairs: If it was a boost leak, perform another boost leak test. Seal the intake, pressurize to 15–20 psi, and listen. Use soapy water on all connections again – any bubbles mean you’ve still got a leak. Then, grab your OBD-II scanner and check live data. Specifically, look at your short-term (STFT) and long-term (LTFT) fuel trims at idle and at 2500 RPM. They should be within ±5%. If your long-term trims are still above +8%, you’re still pulling in unmetered air somewhere. For general vacuum systems, that smoke machine is still your best friend for definitive confirmation.
What’s This Going to Cost You? (Or Save You)
Let’s talk dollars and cents. Fixing a clamp leak isn’t usually a bank-breaker, but ignoring it can absolutely trash your engine. Think of it as cheap insurance.
Single Accessible Clamp (DIY)
Cost for the correct OEM-style clamp.
Multiple/Inaccessible Clamps (DIY)
Cost for a set of quality clamps, plus maybe a specialized tool like clamp pliers.
Shop Repair (Accessible)
Typically 0.5–1 hour labor plus the part. Independent shops are often more reasonable here.
Here’s the real talk: even on an older $2,000 car, spending $150 to fix a clamp and prevent a $3,000 engine meltdown (from overheating or running super lean) is the smartest money you’ll ever spend. I’ve seen too many engines ruined because someone skipped a proper pressure test or ignored a small whistle.
Shop Cost for Inaccessible Clamps
For those hard-to-reach clamps, a professional shop might charge $200–$500. This covers the diagnostic time, the labor to remove components for access, and the part itself. It’s not cheap, but it’s cheaper than a new engine.
How to Never Have This Problem Again
Prevention is simple, but it requires discipline. After all these years, I’ve boiled it down to a few key habits:
-
Always use the correct clamp type. If the factory put a constant-tension spring clamp there, replace it with one. If you’re upgrading to silicone hoses, know they’re less compressible and more prone to “cold flow” than rubber. For boost applications with silicone, you absolutely need lined constant-tension clamps or heavy-duty T-bolt clamps. Standard worm-drives will almost always fail on silicone over time.
-
Build a validation habit. After any hose work, test it before you put everything back together. Do a pressure test or a smoke test while the area is still open and accessible. It’s much easier to fix a leak when you can still get to it.
-
Visually confirm every clamp. Make sure it’s perfectly centered on the fitting’s bead, not riding an edge or crooked. This takes literally two seconds and saves hours of headaches.
-
Listen on your first test drive. With the radio off, drive slowly and listen carefully for any new noises. A faint whistle caught early saves you a world of trouble later.
That persistent whistle under the hood after a hose change? It’s almost always a clamp. Go back to basics, diagnose it right, and fix it once. Your engine will thank you.
