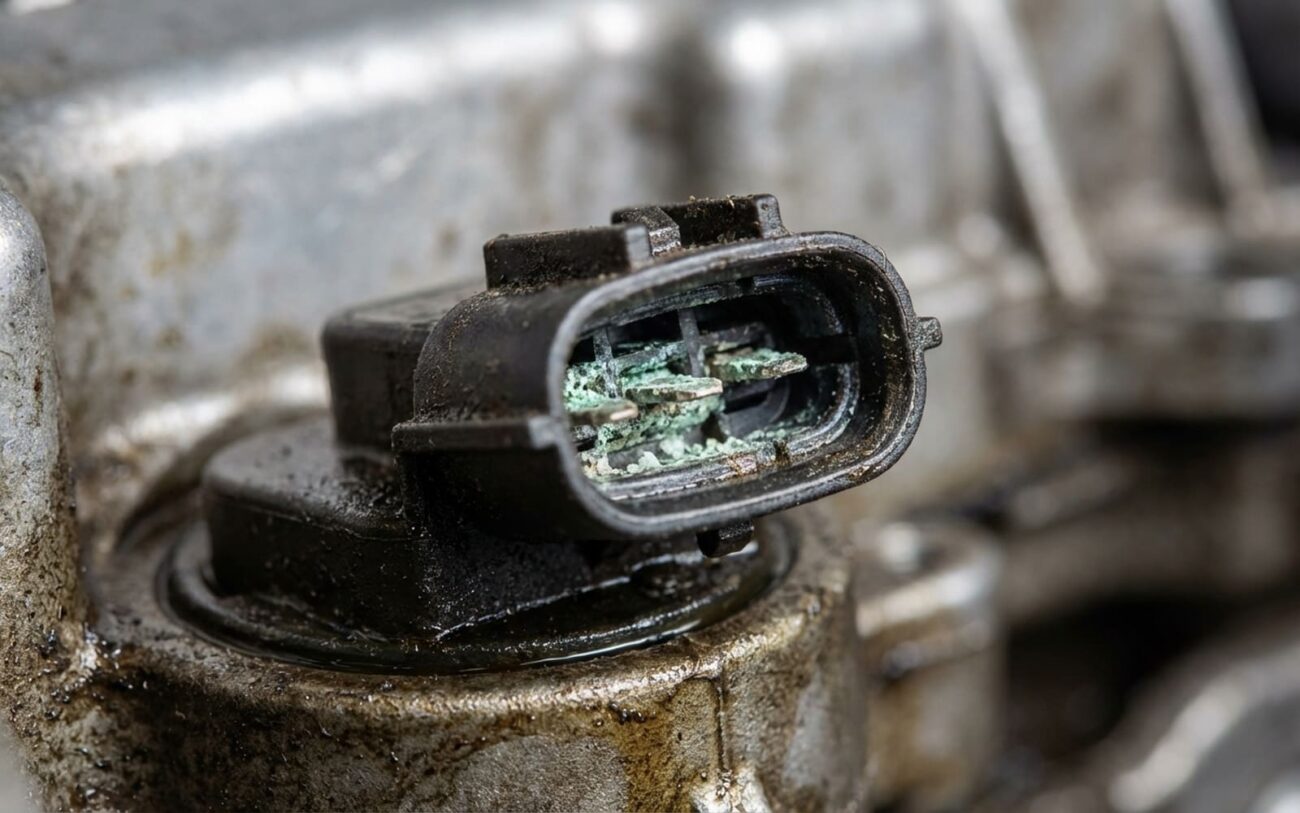
Boost Pressure Sensor Codes: Don’t Just Replace It!
Alright, let’s talk about boost pressure sensors. I’ve been turning wrenches for over 25 years, and if there’s one thing I’ve learned, it’s that a check engine light and a code pointing to a sensor doesn’t always mean the sensor itself is bad. Especially with turbo engines, when that light flashes and your ride suddenly feels like it’s dragging an anchor, the boost pressure sensor often gets blamed. It’s a small but mighty component that tells the engine computer (ECM) how much pressure is in the intake manifold. The ECM uses this data to fine-tune your turbo, adjust fuel delivery, and keep everything running smoothly. If that sensor starts lying, or if the data gets messed up on its way to the computer, you’re going to see trouble codes.
The usual suspects are P0236, P0237, P0238, and P0234. But here’s the kicker, and it’s a big one: these codes signal a problem in the boost pressure monitoring circuit, not necessarily the sensor itself. I’ve seen countless times where folks just swap out the sensor, only to have the light come back on a week later. That’s a waste of money and, more importantly, it means you’ve missed the real problem, which could be anything from a tiny vacuum leak to a failing turbo component.
What You’ll Feel: Symptoms on the Road
When a boost pressure sensor starts acting up, you’ll usually know it. The most common complaint I hear is a sudden, noticeable loss of engine power. Your turbocharged engine just feels flat, especially when you try to accelerate or go uphill. Many modern vehicles will throw themselves into a “limp mode” to protect the engine, drastically reducing power output. The turbo might feel completely unresponsive, or you might even hear it spooling but get no corresponding push from the engine.
Sometimes, though, there’s no obvious performance drop. The check engine light just comes on, and a boost-related code gets stored. This is where a good scan tool comes in handy. If you can monitor live data, you’ll want to watch the actual boost pressure reading. Look for anything weird: a reading stuck at zero, pegged at maximum, or jumping all over the place. A P0234 overboost code is particularly concerning—it means the system is seeing more pressure than it should, which can lead to pre-ignition or detonation if ignored. That’s a recipe for major engine damage. But again, don’t assume the sensor is the culprit right away. A sticky wastegate, a failing boost control solenoid, or even a partially collapsed intercooler hose can cause the same symptoms.
My Diagnostic Playbook: Pinpointing the Real Problem
Diagnosing a boost pressure issue isn’t about throwing parts at it. It’s about systematically verifying what the system is actually doing. These codes are often just symptoms of electrical or mechanical problems elsewhere. For instance, a P0236 (range/performance) might seem like a bad sensor, but it could be a tiny, hard-to-find boost leak or a wastegate that’s just a bit slow to react. A P0237 (low input) could look like a dead sensor, but I’ve seen it caused by nothing more than a broken wire or a corroded connector. The key is to test, not guess.
Here’s the breakdown I use in my shop to separate a true sensor fault from all the look-alikes. This table helps me cut through the noise and get to the root cause efficiently:
| DTC & What It Means | Could Be the Sensor Itself | Common External Mimics (Check These First!) | The Definitive Test I Use |
|---|---|---|---|
| P0236 (Boost Sensor Circuit Range/Performance) | Sensor’s internal diaphragm is contaminated or aging, causing it to drift off calibration. | A small, persistent boost leak (intercooler, hose, clamp), a wastegate actuator that’s slow to open or close, or a restricted intake path. |
Pressure-test the entire intake system. Apply a known pressure (5–10 psi) directly to the sensor port and compare the scan tool reading to your gauge. |
| P0237 (Boost Sensor Circuit Low Input) | An internal short to ground, a failed signal circuit, or the sensor itself isn’t receiving the 5V reference. | Damaged wiring, corroded connector pins, an open circuit in the harness, or a fault with the ECM’s reference voltage output. |
Back-probe the sensor connector: verify you have 5V reference, a good ground, and a signal voltage of roughly 0.5V with the engine off (at atmospheric pressure). |
| P0238 (Boost Sensor Circuit High Input) | An internal open circuit or a short between the signal wire and the 5V reference wire inside the sensor. | The signal wire is shorted to power somewhere else in the wiring harness, a poor ground connection, or a damaged connector. |
Unplug the sensor. Check for continuity between the signal and 5V reference wires. Visually inspect the harness for any signs of chafing or a short to power. |
| P0234 (Turbo Overboost Condition) | The sensor is reading lower than the actual pressure, causing the ECM to command more boost than is actually needed. | A wastegate that’s stuck closed, a failed boost control solenoid, a collapsed intercooler outlet hose, or an exhaust restriction. |
First, confirm the sensor’s accuracy (similar to P0236 test). Then, perform an actuator test on the wastegate. Compare actual boost (from a known-good external gauge) versus requested boost (from scan tool). |
Look, the ECM is smart, but it’s only as good as the information it gets. A bad reading from one sensor can send the whole system into a tailspin. That’s why validating the sensor’s output and checking all related components is absolutely critical before you even think about replacing parts. It’s the same diagnostic mindset you’d use for something like engine overheating with no visible leaks – don’t assume the obvious, dig deeper.
Why These Sensors Go Bad (The Real Dirt)
So, you’ve done your tests, ruled out everything else, and confirmed the sensor itself is giving you false readings. Now you might wonder, why did it fail in the first place? In my experience, most boost pressure sensors succumb to contamination. The sensor port lives right in the intake tract, which isn’t just breathing clean air. It’s constantly exposed to oil vapor from the crankcase ventilation (PCV) system. Over time, that oily gunk builds up on the internal diaphragm, making it less sensitive or even causing it to stick. Carbon buildup from blow-by gases can also mess with its accuracy.
Thermal cycling is another big factor—the constant heating and cooling under the hood can degrade the internal electronics or create tiny cracks in the solder joints. Physical damage from vibration or impact is less common, but I’ve seen it on older, high-mileage vehicles or those that see a lot of rough roads. On certain Ford EcoBoost and GM diesel platforms, for example, I’ve seen repeated P0234 codes that were eventually traced back to known design flaws in the original sensor, leading to updated replacement parts from the manufacturer. But let’s be clear: a cracked intercooler or a disconnected charge pipe doesn’t kill the sensor; they cause boost leaks that fool the sensor. A seized wastegate or a failed electronic boost control solenoid is an actuator issue, not a sensor issue. Mixing these up is how you end up with comebacks and frustrated customers.
Making the Repair (If It’s Truly the Sensor)
Once you’ve definitively confirmed the boost pressure sensor is faulty, the actual replacement is usually pretty straightforward. I’d classify this as [DIY-FEASIBLE] for anyone with a basic set of hand tools and some mechanical common sense. You’ll need the correct replacement sensor (double-check the part number—some vehicles have different calibrations), a Torx or small socket set, some electrical contact cleaner, and ideally, a small torque wrench.
Before you even think about putting the new sensor in, clean that mounting port thoroughly. I use brake cleaner or electronic parts cleaner to get rid of any debris, oil sludge, or carbon buildup. You don’t want to immediately contaminate your brand-new sensor. When you install it, hand-tighten it first, then use your torque wrench. Typical specs are around 8–12 Nm (which is about 70–100 in-lb). Overtightening is a common mistake; it can crack the sensor housing or damage the sealing O-ring. And unless the manufacturer specifically says so, don’t use any thread sealant—most sensors seal with a rubber or silicone gasket.
As for a temporary fix? [TEMPORARY] Cleaning the electrical connector and the sensor’s pressure port with electronic cleaner might restore function for a little while. But honestly, it’s unreliable. The risk of it failing suddenly, especially when you’re under load or merging onto a highway, is just too high to depend on it. Get it fixed right.
The Proof is in the Drive: Post-Repair Validation
Replacing the sensor is only half the job. The next critical step is verifying the repair. Clear all the diagnostic trouble codes (DTCs) from the ECM. If your scan tool has the option, reset any adaptive learning parameters the ECM might have stored—this helps the computer learn the new sensor’s characteristics faster. Then, you need to take the vehicle for a proper road test. This isn’t just a quick trip around the block; you need to drive it under various conditions, including some steady throttle sweeps from around 2,000 to 4,000 RPM.
While you’re driving, keep your scan tool hooked up and monitor the “actual boost” and “desired boost” parameters. The actual boost should rise smoothly and closely follow the desired boost curve, without any noticeable lag, sudden spikes, or drops. If you see a variance of more than 1–2 psi under stable conditions, you’ve still got an issue—likely a boost leak you missed or a sluggish actuator. If the live data looks clean and that check engine light stays off for several drive cycles, then you’ve likely nailed it. I’ve had customers come back thinking they were “fixed” because the light was off for a day, only to return with the same code because they didn’t validate under real load. Don’t skip this step; it’s what separates a good tech from a parts changer.
Smart Money: Costs, Risks, and When to Walk Away
Let’s talk brass tacks. Understanding the financial and mechanical risks involved helps you make smart repair decisions.
| Repair Type | DIY Cost | Shop Cost | Success Rate | Secondary Risk if Failed |
|---|---|---|---|---|
| Boost Pressure Sensor Replacement | $50 – $200 (part only) | $200 – $500 (parts and labor) | 98% if diagnosis is correct | If the root cause wasn’t the sensor, the underlying issue remains. This can lead to repeated limp mode events, poor fuel economy, or even engine damage from detonation. Misdiagnosis turns a simple fix into a much more expensive repair down the road. |
The sensor itself is usually pretty affordable, but shop labor can add up, especially if it’s buried deep in the engine bay. The real financial risk isn’t the repair cost; it’s skipping proper diagnostics. Spending $200 on a new sensor without doing your homework can leave you with the exact same problem and $200 less in your pocket. As a general rule of thumb, if the total repair cost starts creeping past 60% of your vehicle’s current market value, and you’ve got other aging components (like the turbo itself, transmission, or suspension), it’s worth taking a hard look at whether that investment makes sense long-term. Sometimes, it’s better to cut your losses.
Keeping Boost Healthy: Prevention & Monitoring
Once you’ve got a new boost pressure sensor in there, or if you just want to keep your current one happy, prevention is key. The biggest enemy, as I mentioned, is oil vapor from the PCV system. So, keeping that crankcase ventilation system clean and working as it should is paramount. Change your PCV valve or filter according to the manufacturer’s schedule, and inspect those intake hoses for any signs of sludge buildup. Using the correct engine oil—the one specified by the manufacturer—also helps reduce those volatile deposits that can gunk up sensor internals.
For early warning, I always recommend getting yourself a decent OBD2 scanner and periodically checking live data, even if your car feels fine. Take note of your idle and part-throttle boost readings when the system is healthy. That baseline makes it much easier to spot early drift or anomalies before they trigger a code and leave you stranded. On vehicles known for boost issues—like some VW/Audi TSI, BMW N20, or older EcoBoost engines—this kind of proactive monitoring can catch a failing wastegate actuator or a developing leak long before it becomes a major headache. A few minutes of preventive checking can save you hours of roadside troubleshooting and a lot of money in the long run.
