Alright, let’s talk about misfires. Not the easy ones, the kind that make you scratch your head and wonder if you’re chasing ghosts. If you’ve got a Kia Theta II (that’s your 2.0L or 2.4L GDI) or a Hyundai Gamma (1.6L GDI/T-GDI) in the shop, especially one pushing past 80,000 miles, and it’s throwing a P0300 or a cylinder-specific P0301, P0302—you name it—don’t just grab a set of plugs and coils. Trust me on this: these engines have a nasty habit of developing internal problems right around that mileage, and they’ll eat your time and your customer’s money if you don’t diagnose them right.
When to Suspect the Worst: Red Flags for Internal Misfires
A true internal misfire isn’t usually a “one and done” deal. What I typically see are symptoms that keep coming back, especially after you clear the codes. We’re talking about a rough idle that feels like the engine is shaking itself apart, a noticeable vibration when you’re stopped at a light, and that annoying hesitation or stumbling when you just barely touch the throttle.
The misfire itself often shows up when the engine is cold or under light load—classic signs of a mechanical fault rather than something simple like a bad sensor or a momentary hiccup. If you’re working on a Hyundai Santa Fe or a similar model with a Theta II, this pattern is unfortunately all too familiar in my shop.
Don’t Ignore the Secondary Codes
Always, and I mean always, check for other codes alongside that P030X. If you’ve got a lean condition code—like a P0171 or P0174—and your scanner is showing Long-Term Fuel Trim (LTFT) stuck up above +10%, that’s a big clue. The engine control module (ECM) is trying to dump extra fuel into the engine because it thinks there’s unmetered air getting in. Usually, that screams “vacuum leak.”
But here’s the kicker: if you’ve checked all the external stuff—the hoses, the intake gaskets, the PCV valve and its hoses—and they all look good, that leak could be inside the engine. I’ve seen cracked cylinder heads or a busted integrated PCV system (which is often built right into the valve cover on these engines) cause this exact scenario. It’s a real head-scratcher if you’re only looking externally.
The Diagnostic Roadmap: Finding the Real Culprit
Guessing is expensive. That’s why we have diagnostic tools and a process. These engines can throw similar symptoms for both external and internal faults, so don’t just rip it apart. Start simple, then dig deeper.
Step 1: The Basics (Rule Out the Easy Stuff)
First things first: if you have a misfire code on a specific cylinder, swap the ignition coil and the spark plug with a known good cylinder. Clear the codes, run the engine. If the misfire follows the coil or the plug, congratulations, you found your culprit. But if that misfire stays put on the original cylinder, you’re definitely dealing with something internal. That’s when the real work begins.
Step 2: Compression and Leak-Down Tests (The Engine’s Health Check)
Next up is a compression test. Low compression on one or more cylinders is a pretty clear indicator of a mechanical problem—something’s wrong with the rings, the valves, or the head gasket sealing. But a compression test alone won’t tell you where the leak is. For that, you need a leak-down test. By pressurizing the cylinder at top dead center (TDC) with shop air, you can listen for where that air is escaping. It’s like listening to the engine talk to you:
- Hissing from the exhaust pipe? You’ve got an exhaust valve issue.
- Hissing from the intake manifold or throttle body? That’s an intake valve problem.
- Bubbles in the coolant reservoir? Head gasket or a cracked head.
- Air coming from the oil fill cap or dipstick tube? Piston rings or a cracked piston.
Step 3: Advanced Diagnostics for Specific Symptoms
Let’s break down what tests to run based on what you’re seeing:
Misfire with Low Compression
This points to mechanical failure in the cylinder. On Theta II GDIs, I’ve seen a lot of piston ring land cracking. For the Gamma engines, piston scuffing is common, or sometimes it’s just worn valve seats or guides. After your leak-down test, a borescope inspection is your best friend. Get that camera in there and look for piston damage, valve issues, or cylinder wall scoring. That’ll confirm what you heard with the leak-down.
Misfire with Lean Code (P0171/P0174) and High Fuel Trims
If you’ve ruled out external vacuum leaks, you’re likely looking at an internal issue like a cracked cylinder head or a failed PCV system, especially if it’s integrated into the valve cover. My go-to here is a smoke test on the intake system. If you don’t find anything, try introducing propane near suspected internal areas while monitoring fuel trims. If the trims drop, you’re on the right track. For PCV issues, a crankcase pressure test can be very telling. Excessive pressure means the PCV isn’t venting correctly, often pointing to a diaphragm failure in the valve cover.
Misfire with Coolant Loss and Combustion Gases
This is the one that makes me cringe. It strongly suggests a cylinder head casting crack (a known issue on the Gamma 1.6L, often between exhaust valves 3 and 4) or even engine block porosity. A simple cooling system pressure test is a must. It should hold 16-18 psi for at least 20 minutes without dropping. Combine that with a combustion gas detector (often called a “block tester”) on the coolant reservoir. If that blue fluid turns yellow, you’ve got exhaust gases in your coolant, and that’s definitive proof of a breach.
Why These Engines Break: The Root Causes
These aren’t random failures. There are specific design and operational characteristics of GDI engines, especially these particular ones, that lead to these common breakdowns.
Theta II GDI: Piston Ring Land Failure and LSPI
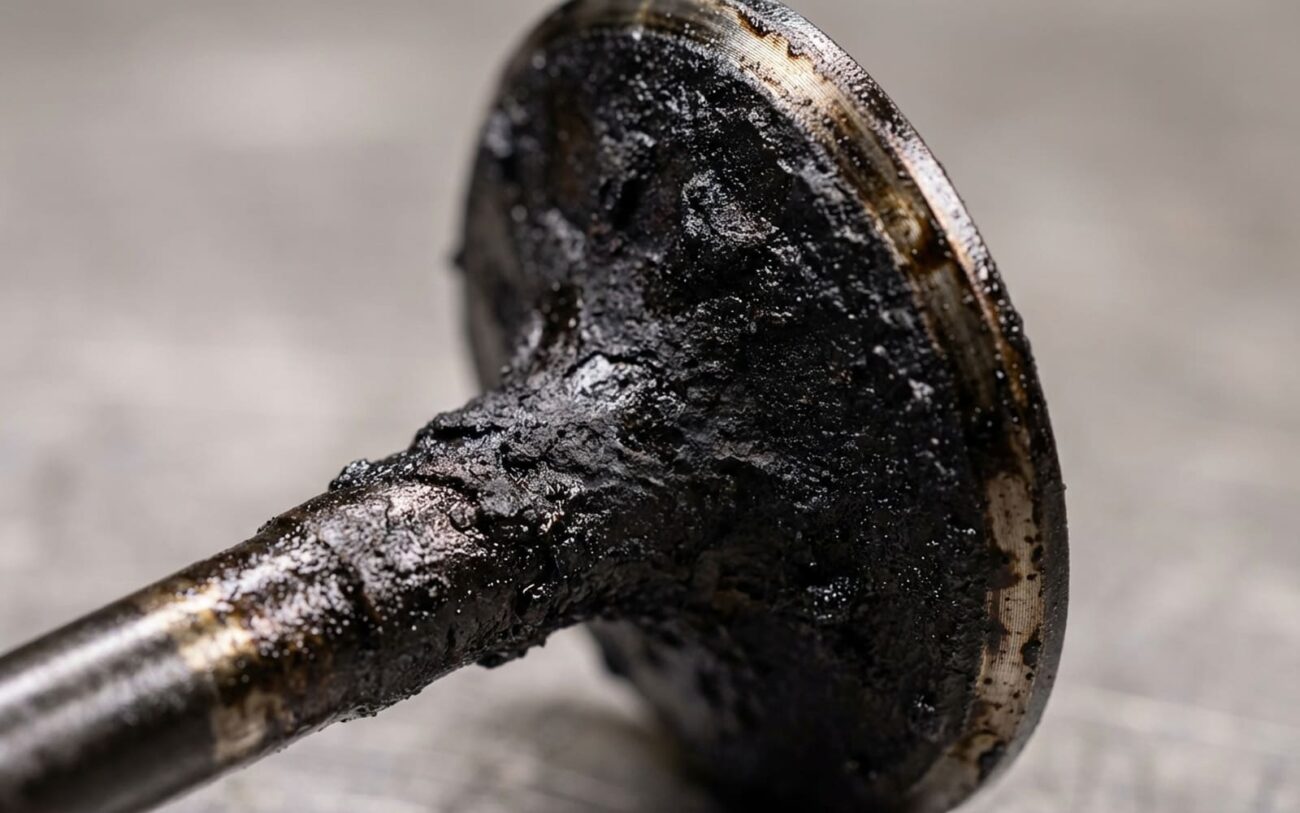
The Theta II engines are notorious for piston ring land failure. It’s a two-punch combo. First, you’ve got carbon buildup on the intake valves—a direct consequence of GDI not washing fuel over the valves. These deposits can break off and get sucked into the combustion chamber. But the real killer is Low-Speed Pre-Ignition (LSPI). This is an unpredictable, violent detonation event that happens at low RPMs under high load (think lugging the engine). It creates extreme pressure spikes that can literally shatter the thin ring lands on the piston. It’s not a spark or fuel issue; it’s a combustion anomaly that the mechanical components just can’t handle. I’ve seen pistons come out of these engines looking like they were hit with a hammer.
And don’t forget the manufacturing debris issue. Some Theta II engines, particularly early ones, had tiny metal shavings left over from production. These can block oil squirters or restrict oil flow to the pistons, leading to scuffing or even outright seizure. While not every engine has this, it’s a documented factor in early failures, especially as mileage climbs.
Gamma 1.6L: The Cracked Cylinder Head
The Gamma 1.6L engine has its own Achilles’ heel: cylinder head cracks due to thermal stress. These usually form between the exhaust valves on cylinders 3 and 4. That’s where the heat concentration is highest, and over time, the material fatigues. When that crack breaches a coolant passage, you get coolant leaking into the combustion chamber or the exhaust port. That causes misfires, steam from the exhaust, and eventually overheating. It’s a nasty one, and like I said, a standard compression test won’t always catch it.
High-Pressure Fuel Pump (HPFP) Contamination
The fuel system in GDI engines is no joke. The HPFP operates at over 2,000 psi, and its internal tolerances are incredibly tight. As these pumps wear out, they can shed microscopic metal particles into the fuel rail. This debris then travels downstream to the injectors, where it can cause them to stick open (leading to a rich misfire) or fail to open completely (causing a lean misfire). The problem starts small but can contaminate the entire high-pressure side of the system. If you’re replacing injectors, I always recommend inspecting the HPFP and considering a preventive replacement if the vehicle has high mileage. It’s cheap insurance against doing the job twice.
Your Repair Options: From a Deep Clean to a Full Heart Transplant
Once you’ve nailed down the diagnosis, your repair path becomes clear. There’s no magic bullet here; each specific failure demands a specific approach.
Short-Block or Complete Engine Assembly Replacement NON-REPAIRABLE
Cylinder Head Replacement Professional Only
Intake Valve Cleaning Professional Only
High-Pressure Fuel Pump (HPFP) Replacement Professional Only
Don’t Skip the Validation: Making Sure the Fix Actually Worked
After any major internal engine repair, you can’t just clear the codes and send the car out. Thorough validation is absolutely non-negotiable. Your goal is to confirm that the mechanical integrity is restored, everything’s sealed up tight, and the ECU has adapted correctly.
Post-Engine/Head Replacement Checks
For a short-block or cylinder head replacement, your pass/fail criteria are strict. First, no misfire or lean codes after a full 50-mile drive cycle. That cycle needs to include cold starts, highway cruising, and some hard acceleration. Then, perform another compression test: all cylinders must be within 10% of each other. Next, a cooling system pressure test is critical—it needs to hold 16–18 psi for at least 20 minutes with absolutely no drop. Finally, use a combustion leak detector (that block tester) on the coolant overflow reservoir. The fluid should stay blue. Any color change means exhaust gases are still getting into the cooling system, and you’ve got a problem.
Post-Fuel System Checks
For fuel system repairs, like replacing the HPFP or injectors, your scan tool is your best friend. Monitor the fuel rail pressure PID. At idle, it should match OEM specifications (often around 500 psi), and under load, it can easily exceed 2,000 psi in these GDI systems. Most importantly, watch those Long-Term Fuel Trims. After a few drive cycles, they should stabilize within ±5%. If they stay high or low, you still have a leak or a restriction somewhere in that fuel or air system.
The Dollars and Sense: Making the Tough Decision
Let’s be real about the costs involved. These aren’t cheap repairs, and you’ve got to weigh the investment against the vehicle’s actual value. Sometimes, walking away is the smarter move.
| Repair Type | DIY Cost (Parts Only) | Shop Cost (Est. Labor + Parts) | Success Rate | Secondary Risk if Failed |
|---|---|---|---|---|
| Cylinder Head Replacement (Gamma) | $1,200–$2,000 | $2,800–$4,000 | 95% | Coolant contamination in oil, repeated overheating, potential need for full engine replacement. |
| Short-Block Engine Replacement (Theta II) | $4,500–$7,000 | $6,500–$9,000 | 98% | Catastrophic mechanical failure, possible engine seizure, total loss of vehicle usability. |
Here’s the hard truth I tell my customers: if the repair cost is going to exceed 60% of the car’s current private-party value (check Kelley Blue Book or NADA for that number), and there’s no warranty or powertrain extension to help out, you really need to consider your alternatives. A used long-block swap might save you some money, but you absolutely have to ensure it’s a low-mileage unit from a reliable source. In many cases, especially with a vehicle over 10 years old, replacing the car entirely might be the more economical choice in the long run—unless it has some serious sentimental value or you absolutely depend on its utility.
Keeping Trouble Away: Prevention and Early Detection
Prevention is always cheaper than repair. For these GDI engines, especially the Theta II, oil and maintenance discipline are paramount. This isn’t just about changing the oil; it’s about using the right oil and changing it often.
Oil Matters: Fighting LSPI
To prevent LSPI, you absolutely must use the recommended full-synthetic, low-viscosity oil—usually 0W-20 or 5W-20—with the latest API SP rating. This isn’t a suggestion; it’s a requirement. And I recommend changing it every 3,750 miles or at 50% of the oil life monitor, whichever comes first. Don’t stretch those intervals, especially if you do a lot of short trips or stop-and-go driving. That’s when LSPI is most likely to rear its ugly head.
Proactive Carbon Cleaning
To combat GDI carbon buildup, I’m a big proponent of proactive intake valve cleaning. Walnut shell blasting every 60,000 to 80,000 miles isn’t in the factory schedule, but it’s a proven way to avoid rough idle, misfires, and reduced performance down the line. It’s especially wise if you start noticing hesitation on cold starts or if your fuel trims are consistently elevated.
My Early Detection Checklist (What I Tell My Customers)
-
Plug in an OBD-II scanner monthly. Check for pending codes. I’ve seen them appear days or even weeks before that check engine light ever illuminates.
-
Listen for unusual noises at startup. A brief metallic rattle that disappears as the engine warms up can be piston slap, a sign of trouble brewing.
-
Check your oil level weekly. Unexplained consumption often signals ring or valve guide wear. Don’t just top it off and forget it.
-
Once a year, have a shop perform a cooling system pressure test. It’s a quick, cheap test that can catch a small head crack or gasket leak before it turns into an overheating nightmare.
