When Your Scanner Goes Silent: No Communication at All
You plug in your OBD2 scanner, turn the key, and instead of seeing data or pulling codes, the screen just stares back at you: “No Communication” or “Link Error.” Been there, done that, probably a thousand times. It’s one of the most frustrating things we deal with in the shop, especially when it’s not just one computer acting up, but the whole darn network. No engine control module (ECM), no transmission control module (TCM), no body control module (BCM) – nothing at all.
Now, before you go assuming every computer in the car decided to quit at once (which, trust me, is extremely rare), understand this: you’re almost certainly looking at a problem with the vehicle’s communication backbone, not the modules themselves. Think of it like your house losing power and internet. All your devices might be perfectly fine, but they can’t do a thing without those basic services. In a car, those critical services are ignition power, a solid ground, and the CAN (Controller Area Network) bus. Your first job is to figure out which one of those has gone missing or is compromised.
Beyond the Scanner: What Else Is the Car Telling You?
The “no communication” message is just the starting gun. What else is going on? This helps confirm if it’s truly a network-wide problem or something just mimicking it. If the dash looks like a Christmas tree – check engine, ABS, traction control, airbag, power steering warnings all lit up – that’s a pretty strong indicator that the network or its power supply is down. But don’t rely on that alone; a bad instrument cluster can sometimes light up everything too.
What’s more telling are actual functional losses across multiple systems. Can’t shift out of park? Gauges dead? Climate control unresponsive? Radio blank? These symptoms point to a deeper issue – a loss of power, ground, or the integrity of the CAN bus itself. If you’re seeing these, you’re on the right track.
First Point of Attack: The Diagnostic Link Connector (DLC)
When all modules are unreachable, the problem lies in a shared resource: power, ground, or the CAN network. Your scan tool is useless right now, so your digital multimeter (DMM) becomes your primary diagnostic tool. I always start at the DLC itself. It’s the gateway, so it better be working.
Here’s what I check, right at the OBD2 port:
- Power (Pin 16): With the key on, you should see battery voltage (around 12.6V) between Pin 16 and chassis ground. If it’s dead, check the OBD2 fuse in your fuse box. That’s a common, easy fix.
- Ground (Pins 4 & 5): Check for good chassis ground continuity on both Pin 4 (chassis ground) and Pin 5 (signal ground). You should see near 0 ohms to a known good ground point on the chassis. A voltage drop test is even better: connect your DMM between Pin 4 or 5 and the negative battery terminal. With the key on, you should see less than 0.1V. Anything higher indicates a high-resistance ground.
- CAN Bus Voltage (Pins 6 & 14): This is where the data lives. With the key on, measure between Pin 6 (CAN-H) and chassis ground, and between Pin 14 (CAN-L) and chassis ground. You should see roughly 2.5V to 3V on both. They’ll be slightly different, but in that range. If one is at 0V or battery voltage, you likely have a short to ground or power.
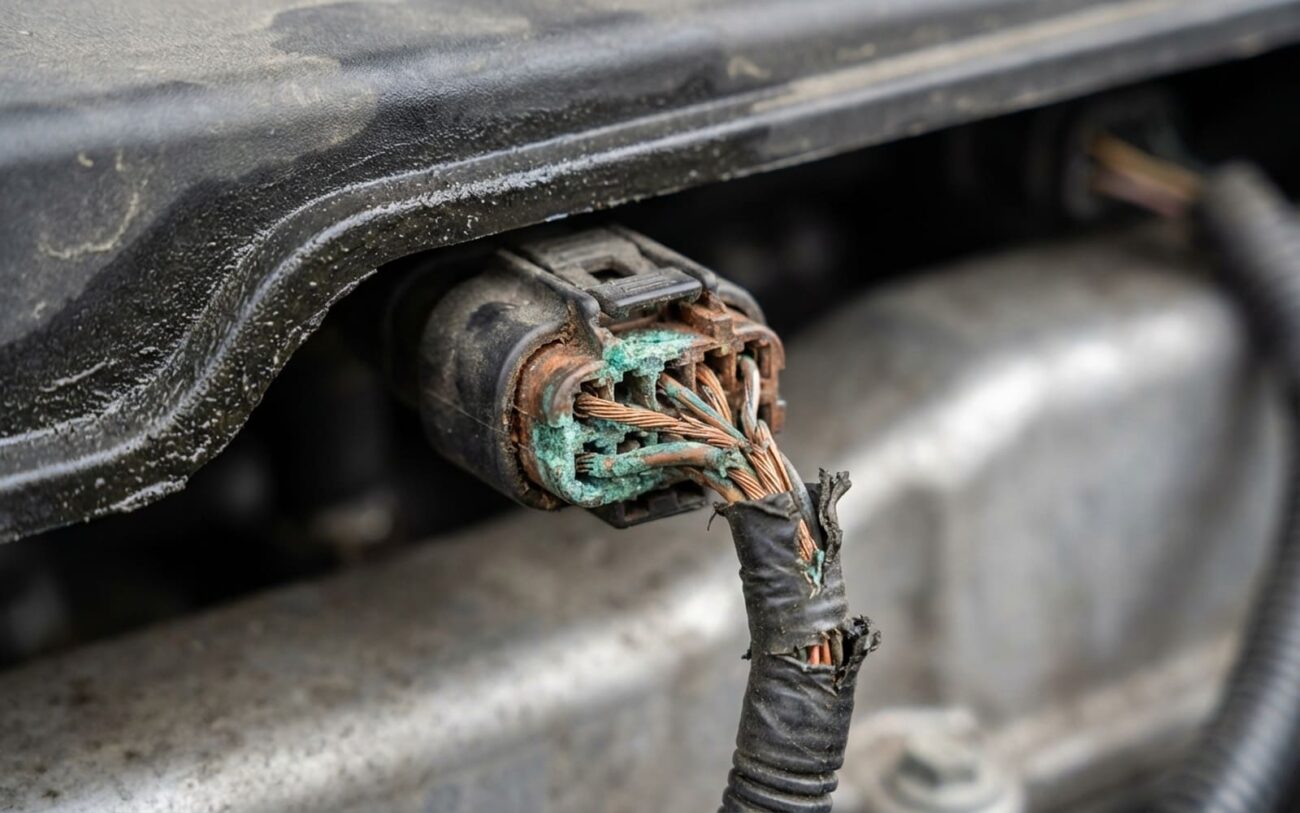
You’d be surprised how often a bent pin, a little corrosion, or even a coffee spill in that DLC port throws everything off. I’ve seen factory crimps fail after years of vibration, too. Always give it a good visual inspection.
Digging Deeper: The CAN Network’s Common Failure Points
The CAN bus is essentially a twisted-pair data highway connecting all your control modules. When it goes down, the whole vehicle can seem electrically dead, not because the modules are fried, but because they can’t “wake up” or talk to each other. If your DLC checks out, then the problem is deeper in the network. Here’s where I usually find the issues:
-
Physical Harness Damage: The main CAN trunk runs through the vehicle, and it’s vulnerable. I’ve seen it pinched by seat tracks, crushed in a door jamb, or rubbed through on a sharp bracket. Look for damage in high-flex zones like firewall passes, under seats, and door sills. A wiggle test on main harness junctions while monitoring CAN voltage with your DMM can sometimes reveal intermittent issues.
-
Electrical Shorts or Opens: This is a big one. Either CAN-H or CAN-L can short to battery voltage, to ground, or simply go open. Any of these will kill communication. If your voltage checks at the DLC (Pins 6 & 14) showed something way off (0V or 12V), you’re likely dealing with a short.
-
Corroded Ground Splices: Many modules share common ground points. Corrosion at these splices adds resistance, effectively starving modules of a proper ground. This can cause intermittent communication or even total network failure.
-
Termination Resistor Failure: The CAN bus needs two 120-ohm resistors at opposite ends of the network to prevent signal reflection. If one of these fails open, the resistance measured at the DLC will be 120 ohms instead of the normal 60 ohms. This can lead to erratic or no communication.
Pro Tip: Check for TSBs
Before you pull your hair out, always check for Technical Service Bulletins (TSBs) for your specific make and model. There are known design flaws or common issues. For example, I’ve seen some Chrysler and GM platforms with documented problems where ground corrosion at body control module connections would just kill the network. No point reinventing the wheel if the manufacturer already knows about it.
The Fix: Getting Your Car Talking Again
Once you’ve narrowed down the problem, here’s the approach I take:
Repairing the Diagnostic Link Connector (DLC) DIY/Professional
Cleaning or Repairing Corroded Ground Points DIY Feasible
Repairing the Main CAN Bus Trunk Professional Only
Addressing Network Termination Issues Professional Only
Don’t Pack Up Yet: Validating the Repair
Restoring communication isn’t the end of the job – it’s just the beginning of validation. You need to confirm the network is stable and fully functional. This is where most DIYers (and some less experienced pros) mess up, leading to comebacks.
-
Electrical Verification: Recheck all your initial measurements at the DLC: Pin 16 voltage, Pin 4/5 ground drop (should be <0.1V), and CAN signal voltages (2.5–3V average). Everything should be spot-on.
-
Network Integrity Check: With the battery disconnected, measure resistance between CAN-H (Pin 6) and CAN-L (Pin 14) at the DLC. It must read between 55–65 ohms. This confirms both terminating resistors are present and the bus isn’t open or shorted internally.
-
Functional Verification: Now, finally, plug in your scan tool. It should communicate with every module. Read and clear any stored U-codes (network communication codes). Then, take it for a good test drive, monitoring live data if possible, to ensure no intermittent issues pop up.
Cost and Value: Is the Repair Worth It?
This is where the rubber meets the road. Network issues can be cheap fixes or they can get expensive fast. Here’s a general idea of what you’re looking at:
| Repair Type | DIY Cost (Parts) | Shop Cost (Labor) | Success Rate | Secondary Risk |
|---|---|---|---|---|
| DLC Repair | $20–$50 | 1.0–1.5 hours | High | Intermittent connection if done poorly |
| CAN Trunk Repair | $100–$200 | 3.0–8.0 hours | Medium-High | New faults if improper wiring/shielding |
| Ground Repair | <$10 | 0.5–1.0 hour | High | Recurrence if not cleaned/protected properly |
| Module Replacement | $1,000+ | 1.0–2.0 hours | High | Expensive misdiagnosis if not the root cause |
My advice? If it’s a simple DLC or ground issue, absolutely fix it. If it’s a deep-dive CAN bus issue, especially on an older, high-mileage vehicle, you need to weigh the cost of repair against the value of the car. These can be labor-intensive, and sometimes, it’s just not worth it.
Prevention: Keep the Network Alive
A little preventative maintenance goes a long way in avoiding these headaches:
-
Keep that OBD2 port clean and dry. Avoid spills or harsh cleaning products near it.
-
Use a memory saver when disconnecting the battery. It helps prevent modules from losing their minds and sometimes causing communication glitches when power is restored.
-
Give the DLC a quick visual inspection annually for bent pins, corrosion, or loose terminals. It takes two seconds.
-
Address minor electrical gremlins early. Flickering lights, intermittent radio cut-outs, or weird gauge behavior can be early warnings of a degrading network.
-
Apply dielectric grease to connectors and ground points during routine maintenance, especially in corrosive environments. It’s cheap insurance.
