No Tail Lights? Brake Lights Work? Ground’s Shot — Here’s How I Know
I’ve seen this a hundred times: customer walks into the shop, says, “Tail lights won’t come on at night, but brake lights are fine.” First thing I ask: “You checked the bulbs?” (Spoiler: yes, they did.) Second thing I think: it’s the ground. Not maybe. Almost certainly.
Brake lights and tail lights look like they’re on the same circuit because they share the same housing — but electrically, they’re separate. Brake lights run on their own feed, usually from the stop lamp switch through a dedicated fuse. Tail lights, side markers, parking lamps — they all tie into a common ground point, often near the trunk latch or quarter panel. When that ground fails, everything relying on it goes dark. Brake lights? Still work. That’s not a coincidence — that’s circuit design.
And before you say it — yes, a blown fuse could cause this. So could a dead BCM output or a failed headlight switch. But in 25 years of chasing gremlins, I’ve found a bad ground in 9 out of 10 cases when brake lights work and tail lights don’t. Fuses blow for a reason — usually a short. If there was a short, you’d smell something burning, or the fuse would pop again after replacement. No? Then it’s not the fuse. It’s the ground.
Symptoms That Point to Ground Failure
You don’t need a scan tool. You need a multimeter and common sense. Here’s what I look for — and how I test it.
| Symptom | Root Cause (90% of Cases) | What Else Could Fool You | How I Confirm It |
|---|---|---|---|
| All rear running lights dead — brake lights OK | Failed common ground (G201, G301, etc.) | Blown TAIL/PARK fuse, bad headlight switch |
Check fuse first — obvious, but skip it and you look stupid. Then measure resistance from tail light socket ground to clean chassis metal. Over 5 Ω? Ground’s bad. I’ve seen readings over 30 Ω — that’s not a circuit, that’s a resistor. |
| Lights flicker when opening trunk or hatch | Corroded or broken wire in trunk harness | Intermittent BCM signal |
Voltage drop test — lights on, DMM between socket ground and known-good point. Wiggle the harness at the hinge. If voltage jumps above 0.1V, you’ve got a break. On Honda Accords and Toyota Camrys, this happens every winter — salt + flex = dead wires. |
| Tail lights dim when headlights turn on | Partial ground corrosion — high resistance, not open | Low system voltage, weak alternator |
Compare voltage drop on tail light ground vs. brake light ground. Brake side should read under 0.1V. If tail light ground shows 0.3V or more, that’s your problem. That missing voltage? It’s turning into heat — and eating your light output. |
Voltage drop testing is the only way to know for sure. Continuity checks can lie — you might have continuity with the lights off, but under load, resistance kills the circuit. That’s why I always test with the lights on. Real-world conditions. If you’re not doing that, you’re guessing.
What Actually Fails — And Why
Grounds don’t just fail out of nowhere. There’s always a reason. After pulling apart hundreds of these, I’ve narrowed it down to three main culprits.
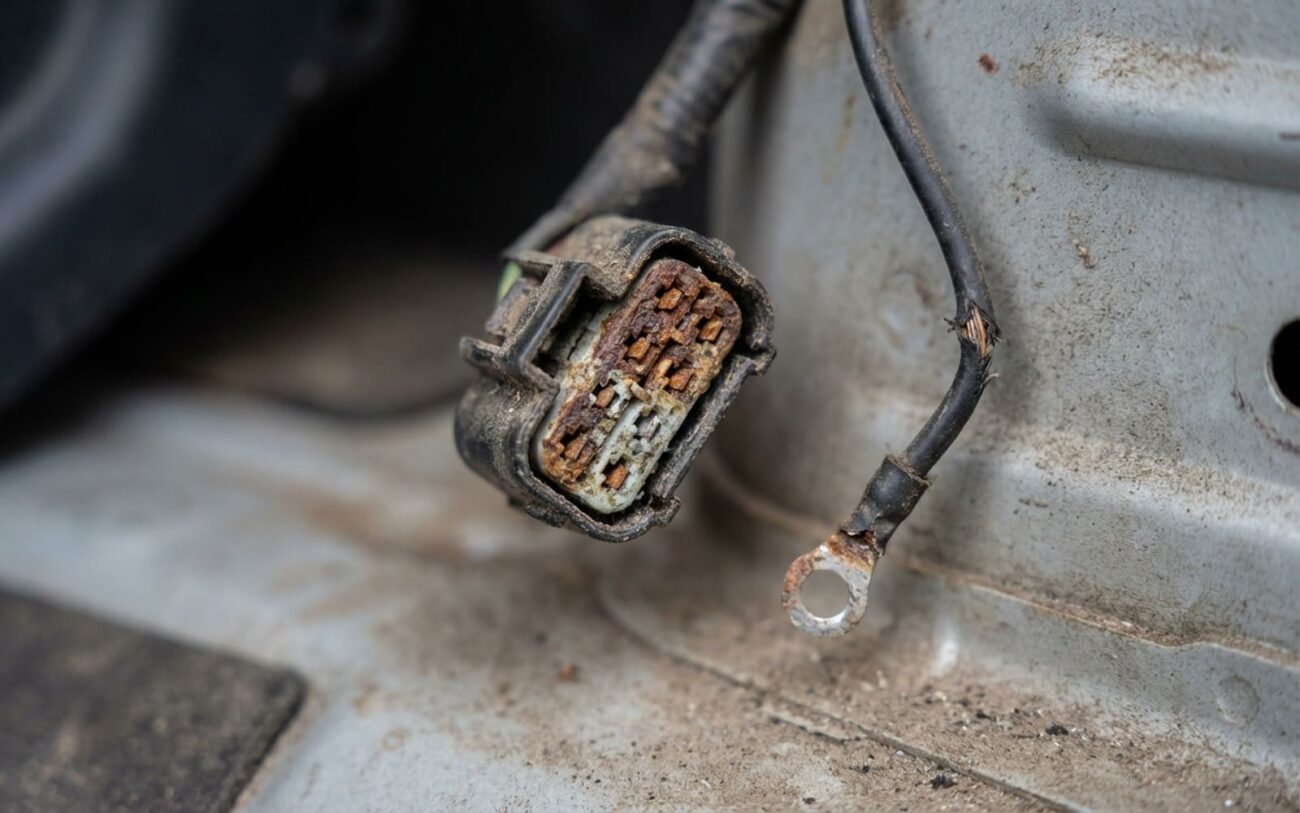
Corrosion — especially on older Fords and GMs. The ground point is usually a small bolt behind interior trim — trunk lid, quarter panel, under the rear bumper. Moisture gets in, road salt follows, and over time, that steel stud turns into a crusty mess. I’ve seen cases where the bolt looked fine, but under the washer? Green, powdery oxidation. That’s not a ground — it’s an insulator. On 2010–2014 F-150s, this happens so often I keep a wire brush in my socket set just for G201.
Wire fatigue — this one kills hatchbacks and SUVs. The harness runs from the body into the liftgate, bending every time you open it. After 5–10 years, copper strands break inside the insulation. The wire looks intact, but it’s electrically dead. You can wiggle it, and the lights flicker — classic sign. I’ve cut open harnesses on Outbacks and CR-Vs and found 3 out of 4 strands broken. No wonder it failed.
Bad factory crimps — sneaky one. The terminal was never fully crimped at the plant. Holds for years, then vibration or heat cycles finally break it. No corrosion, no damage — just a loose connection inside the connector. You won’t see it without pulling the pins. I only find these when I’ve ruled everything else out.
How I Fix It — From Quick Clean to Full Harness Job
Clean the Ground Point [DIY-Friendly]
Splice a Broken Wire [DIY to Pro]
Replace a Harness Section Professional Only
Run a Bypass Wire [DIY Temporary]
Prove It’s Fixed — Or It’s Not Fixed
I don’t care if the lights come on. That doesn’t mean the fix is good. I’ve seen too many “fixed” grounds fail a week later because someone didn’t test it right.
First: resistance test. Less than 5 Ω from socket ground to chassis. If it’s higher, you missed something.
Second: voltage drop test — lights on, DMM across the ground path. Anything over 0.1V means resistance is still there. I’ve had guys swear they fixed it, only to see 0.4V — that’s 40% of your voltage turning into heat. No wonder the lights were dim.
Third: stress test. Open and close the trunk 10 times. Hit the turn signals. Flick the hazards. If the lights flicker, you’ve got a loose connection or a break in a flex zone. Go back and check the harness.
