No Air to Your Feet? Here’s What I See.
If you’ve got a W205 C-Class or W213 E-Class and your feet are freezing (or burning) because no air is making it to the footwell – even when you mash that “floor” button on the climate control – I can tell you right now what you’re probably dealing with: a failed footwell blend door actuator.
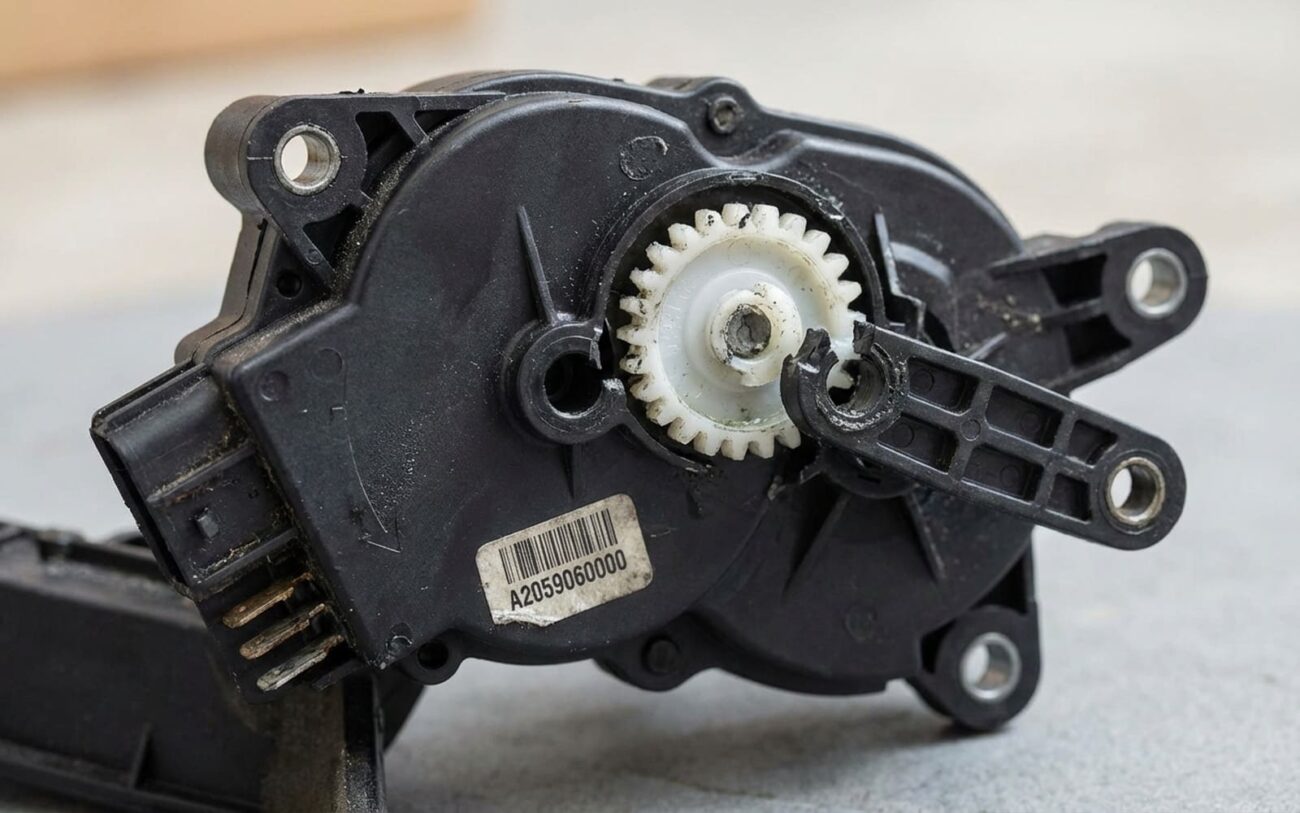
I’ve seen this exact issue dozens of times in my shop over the years. It’s one of the most consistent HVAC complaints on these models, no question. The actuator itself is just a small electric motor with plastic gears that controls a flap inside the main HVAC housing. When it fails, that flap usually stays stuck closed, completely blocking airflow to your feet. It’s a real nuisance.
Another dead giveaway? A faint ticking, clicking, or whirring noise coming from under the driver or passenger side dashboard. You’ll usually hear it for about 30 to 60 seconds right after you start the car. That’s the actuator’s motor spinning, but the gears are stripped or jammed, so it can’t actually move the flap. Think of it like a tiny electric screwdriver running in place, but not turning anything. Sometimes, you’ll also notice the air distribution is just plain illogical: defrost mode sends air to your feet, or switching to footwell mode does nothing at all. That usually means the internal position sensor in the actuator has failed, sending incorrect feedback to the HVAC control module.
Status: NO RESPONSE
How I Pinpoint the Exact Problem
Now, before you go ripping apart your dash or ordering parts, let’s get one thing straight: you need a solid diagnosis. Yes, the symptoms scream “footwell actuator,” but I’ve seen other things mimic it – a collapsed air duct, a flaky climate control unit, or even a communication error on the LIN bus. Guessing wastes time and money, especially when you’re pulling apart a Mercedes dash.
The Pro Tip
“The only reliable way to confirm the fault is with a proper diagnostic scanner that supports bidirectional control—like Mercedes’ XENTRY system.”
My go-to is always a proper diagnostic scanner with bidirectional control. Mercedes’ XENTRY system is ideal, of course, but a good aftermarket scanner that can talk to the HVAC module will do. Here’s what I look for:
- No Airflow to Feet: This is the most common complaint. I’ll perform an “Actuator Movement Test” via the scanner. I command that footwell flap from 0% to 100% travel. If it doesn’t move at all, or if the live data shows no change in position, or even erratic values, then you’ve found your culprit. It usually means internal gear failure, a seized motor, or sometimes a disconnected linkage arm.
- Clicking or Whirring Noise: If you’re hearing that tell-tale noise, command the footwell actuator specifically through your scanner. Get your hand on the actuator housing. You should feel it trying to move. If it’s just buzzing or clicking without any actual flap movement, those plastic gears are stripped. It’s like a tiny electric screwdriver spinning in place, unable to turn the screw. Just make sure it’s this actuator making the noise, not an adjacent one like for defrost or center vents.
- Illogical Air Distribution: If the air distribution is just plain weird – like defrost air coming out your feet, or the system seems confused – that often points to a failed internal position sensor in the actuator. The computer thinks the flap is somewhere it isn’t. Check the live data for flap position; you’ll often see it jump around wildly or stay stuck at an implausible value. This can also be mimicked by a LIN bus communication fault or a SAM module error, but the actuator is the most common cause.
And speaking of fault codes, I often see things like “B126C87 – Left footwell flap motor malfunction” or a generic “mechanical jam detected.” When you see those, it’s almost always an internal actuator failure, not some complex wiring issue or a software bug. These codes typically point straight to the actuator itself.
Why These Little Motors Fail
So, what actually gives up the ghost inside these things? It’s not necessarily a design flaw, but it’s definitely a wear item made with cost-effective materials. You’ve got a plastic housing, molded acetal gears, and a small DC motor. After years of constant movement – especially in places where the AC or heat runs all the time – those plastic gears just wear down. Eventually, the teeth shear off, and the motor spins uselessly, unable to move the flap. It’s just the nature of plastic gears in a high-cycle application.
Your Fix Options (and a Critical Warning)
Alright, you’ve diagnosed it. Now, how do we fix it? You’ve got a few options, but there’s one non-negotiable step no matter what you choose: calibration.
Calibration is Mandatory
I can’t stress this enough: after you install a new actuator, you must perform a “basic setting” or actuator adaptation using a diagnostic scanner. If you skip this, the system will command full movement, jam the motor against the housing, and you’ll likely destroy your brand-new actuator immediately. I’ve seen it happen. Don’t be that guy.
Actuator Replacement (DIY)
Professional Calibration Required
Temporary Manual Set
Making Sure the Repair Actually Worked
Replacing the part isn’t the finish line; proper verification is. After you’ve installed and calibrated that new actuator, you need to test it thoroughly before you put the dash back together. Use your scanner to run the actuator through its full range – command it from 0% to 100% several times. It should move smoothly, without any hesitation, grinding, or that tell-tale clicking you heard before.
Physical Verification
And don’t just trust the scanner. Have someone operate the climate control while you physically confirm air starts and stops at the footwell vents as expected. Try all the different modes: defrost, floor, AUTO. The system needs to respond logically, just like it should.
What This is Going to Cost You
So, what’s this whole ordeal going to set you back? Here’s a general idea of what I see in the shop, and what you can expect if you tackle it yourself.
DIY Parts
Cost for one OEM or high-quality aftermarket actuator. This assumes you have your own tools and access to a scanner for calibration.
Full Shop Repair
This typically includes professional diagnostics, the new part, labor for dash disassembly and reassembly, and the mandatory software calibration.
SAM Module Fault
In rare but serious cases, a shorted actuator can damage the front Signal Acquisition Module (SAM). This is why I always emphasize early repair; it prevents a much more expensive control module replacement.
Can You Prevent This?
Maintenance & Detection
-
Cycle your HVAC modes regularly. I’ve found that moving those flaps prevents the gears from binding or the motor from seizing up due to long-term inactivity. Don’t just leave it on “Auto” all the time.
-
Listen for early warning signs. That faint “tick” or “whir” under the dash is often a soft code waiting to become a hard failure. Catch it then, and you might save yourself some hassle.
-
Don’t ignore “Air Distribution Fault” messages. Modern Mercedes systems are smart. They’ll often store implausible signal messages or minor fault codes long before total failure. Get it scanned if you see anything like that.
