Alright, let’s talk about those pesky driver assistance warnings. You’ve got the adaptive cruise acting up, maybe a forward collision alert flashing for no reason, or that generic “Check Driver Assistance System” message staring you down. After 25 years in this business, I know the first question that pops into most folks’ heads: Is it that expensive radar sensor up front, or is the main ADAS control module—the computer running the whole show—fried? It’s a common point of confusion, and frankly, it costs people money when they guess wrong. The good news is, with a solid diagnostic approach, you can narrow it down. Let me walk you through how I tackle these problems in my shop.
First Clues: Reading the Warning Signs
These complex ADAS systems don’t just fail silently; they usually throw a fit. The warning messages and diagnostic trouble codes (DTCs) are your first real clues. They tell a story, but you’ve got to know how to interpret it. The symptoms for a bad radar sensor and a failed ADAS control module can look similar on the surface, but the patterns in the codes and behavior are usually quite distinct.
When It’s Likely the Radar Sensor
The radar sensor, typically tucked away behind your front grille or bumper, is on the front lines. If it’s acting up, I usually see a very specific Diagnostic Trouble Code (DTC) related directly to that unit. These codes often start with a “C” for chassis-related faults. For example, a code like C1B43:96 – Sensor Data Invalid/Erratic practically screams “radar sensor problem.”
These sensors are pretty sensitive. I’ve seen countless cases where a simple stone chip cracked the lens, or a minor front-end bump, even one that barely left a scratch, bent the mounting bracket or damaged the sensor itself. That’s enough to throw off the adaptive cruise or disable automatic emergency braking (AEB) completely. What’s important here is that these failures often happen on a perfectly clear day. If your system drops out when the weather is good, it’s probably not environmental interference; it’s the sensor itself. And always do a visual check: if the plastic cover is fogged, cracked, or the housing looks bent, that’s a strong indicator even before I plug in my scan tool.
When It’s Likely the ADAS Control Module
Now, if the ADAS control module—that central brain processing all the sensor data—is failing, you’re going to see a much broader issue. This module controls multiple systems, so a failure here typically leads to widespread communication problems. You’ll pull up multiple DTCs, often across different systems: radar, camera, ultrasonic parking sensors, sometimes even stability control. These codes usually start with a “U” for network communication issues. Think U0101: Lost Communication with Engine Control Module or U0402: Invalid Data from Forward Radar. The whole suite of driver assistance features might go offline at once, or you might see a cascade of errors.
When I hook up my professional scan tool, a failing module might not respond at all, or it might refuse programming attempts. That’s a major red flag. Unlike a sensor, a dead control module can sometimes fail without setting an immediate warning light, meaning your safety systems could be disabled, and you wouldn’t even know until you actually needed them. That’s a scary thought.
My Diagnostic Process: No Guesswork Allowed
Diagnosis is all about following a logical process, not throwing parts at the problem. My goal is to isolate the fault: Is it the radar sensor, its wiring, or the ADAS module itself? Skipping steps always leads to comebacks and frustrated customers.
Scenario 1: Suspecting the Radar Sensor
If the codes point to a single radar sensor issue (those C-codes we talked about), here’s my usual routine:
- Visual Inspection: First, I physically check the radar sensor’s location. Is the lens cracked, fogged, or obstructed? Is the mounting bracket bent or loose? Even a slight misalignment can cause major issues.
- Scan Tool Live Data: I’ll go into the radar sensor’s live data stream. I’m looking for target detection, signal strength, and any internal fault counters. If it’s showing erratic readings or no target detection when it should, that’s a strong clue.
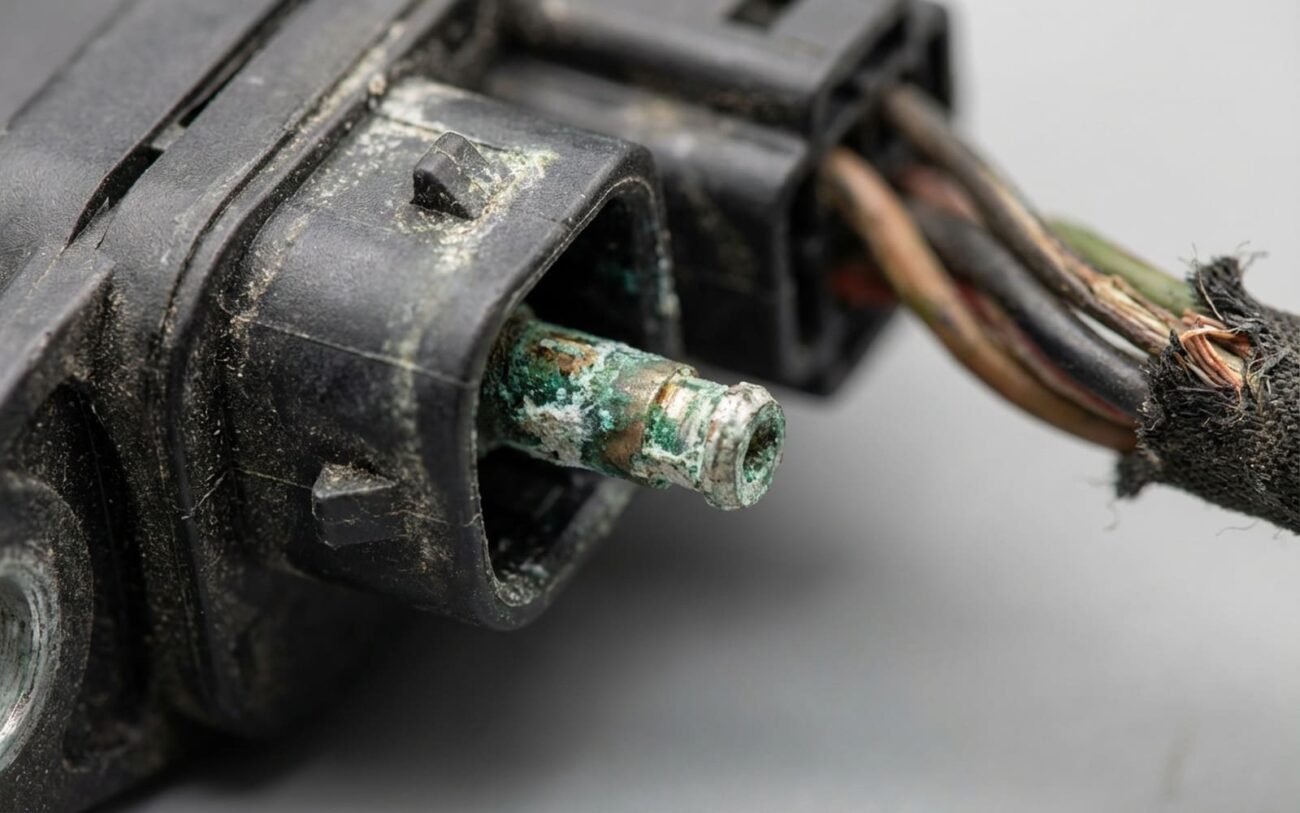
- Wiring Check: If the sensor seems physically okay and the live data is questionable, I’ll check the wiring harness. I’m looking for a solid 12V power supply, a good ground connection, and clean CAN bus signals. I’ll use a multimeter for power/ground, and an oscilloscope to look for any distortion or dropouts on the CAN-H and CAN-L wires. A corroded pin in the connector can mimic a bad sensor.
- Known-Good Swap (If Practical): Sometimes, if I have a known-good sensor from another vehicle or inventory, I’ll temporarily swap it in. If the fault follows the sensor, it’s bad. If the problem persists, then I know I need to dig deeper into the wiring or the module.
Scenario 2: Suspecting the ADAS Control Module
When I see multiple U-codes and widespread ADAS system failure, my focus shifts to the central module:
- Communication Check: The absolute first thing is to see if my scan tool can even communicate with the ADAS module. If it can’t, that’s a huge red flag. A non-communicating module is often a dead module.
- Power and Ground: Just like with the sensor, I’ll check the power and ground connections directly at the module connector. No power, no party. A blown fuse or a bad ground can shut down the whole module.
- CAN Bus Integrity: This is critical. I use an oscilloscope to check the CAN-H and CAN-L waveforms. I’m looking for clean, square waves. Any distortion, voltage drops, or flat lines indicate a problem with the communication network, which could be the module itself, another module on the bus, or a wiring issue.
- Intermittent Faults (Thermal Testing): If the system works when cold but fails when hot (or vice-versa), I suspect a thermal breakdown. I’ll use a heat gun (carefully!) and freeze spray on both the radar sensor and the ADAS module while monitoring live data. If the fault appears or disappears under thermal stress, I’ve found my culprit. This is a classic trick for finding failing internal components or bad solder joints.
A note on low voltage: I’ve seen more ADAS issues than I can count traced back to a weak battery or a failing alternator. These systems are incredibly sensitive to voltage fluctuations. Always make sure your vehicle’s charging system is healthy before diving into complex ADAS diagnostics.
Why These Parts Fail: What I’ve Seen Over the Years
Understanding the root causes helps prevent repeat failures. These aren’t random breakdowns; they follow patterns I’ve observed for decades.
Radar Sensors: The Environment is Their Enemy
Radar sensors live in a really harsh environment. They’re constantly exposed to road debris, extreme temperature swings, and moisture. Over time, water can seep past seals, especially on vehicles that are frequently washed or driven in wet climates. This leads to internal corrosion on the RF board or cracked solder joints from constant thermal cycling. I’ve seen this repeatedly on models like the Ford Explorer and Toyota Camry, where vibration and heat just degrade the internal electronics. Ford even issued service bulletins for certain model years related to solder joint issues in these units. The big takeaway here: physical damage and environmental stress are the primary culprits.
ADAS Control Modules: The Brains Under Attack
ADAS control modules fail for different reasons. Heat is a major one—these modules are often tucked away behind dash panels or near the firewall, where underhood heat can really build up. Voltage spikes from a failing alternator, or even improper jump-starts, can fry sensitive circuits. I’ve traced several “no communication” faults back to poor battery connections or aftermarket accessories overloading the system. And then there’s software corruption: if the vehicle loses power during an update, or a memory sector simply fails, the module can lock up. That’s not a wiring issue; it’s an internal fault. Because these units are sealed and often encrypted, you can’t just open them up to repair a trace or replace a capacitor. It’s almost always a replace-or-reprogram situation.
Your Repair Options: The Straight Talk
This is Professional Territory, Folks.
Let me be clear: there’s no DIY fix for these components. You can’t “repair” a radar sensor or rebuild an ADAS module in your garage. The technology is too integrated, too precise, and too secure for that. If you’re not a professional shop with the right tools and training, you’re out of your depth here.
Replacing a Radar Sensor
Mechanically, replacing a radar sensor is often pretty straightforward—a few bolts, unplug a harness, install the new unit. But here’s the absolute critical step: calibration. You cannot skip this. Even a tiny 1-degree misalignment can cause false braking, missed detections, or simply prevent the system from working at all. Calibration requires specific targets, a perfectly level surface, and a specialized scan tool capable of initiating the process. We’re talking OEM-level software or high-end aftermarket tools. Some systems need static calibration (done in the shop), others require a dynamic drive cycle (out on the road, often with clear lane markings and traffic). If the calibration fails or isn’t done correctly, the system won’t work, and worse, it could behave unpredictably, which is a huge safety issue.
Replacing an ADAS Control Module
Replacing the ADAS control module is even more involved. This isn’t a plug-and-play part. The new module has to be programmed with your vehicle’s VIN, its specific model options, and the correct software version. That means a shop needs OEM-level access or a specialized programmer. In rare cases—and only when my diagnostics confirm the hardware is fine and it’s purely a software issue—a reflash using a J2534 pass-thru tool might restore function. But if there’s any underlying hardware damage, attempting a reflash can fail and permanently “brick” the module. I’ve seen shops try this to save a few bucks, only to end up replacing the module anyway. My advice: if the module is dead and your power/grounds are solid, just replace it and get it programmed right the first time.
Making Sure the Fix Actually Worked: Verification is Key
Verification isn’t optional. You need proof the system is fully functional, not just “no codes.” This is where a lot of shops cut corners, and it always comes back to bite them.
After Replacing a Radar Sensor:
-
Clear all Diagnostic Trouble Codes (DTCs).
-
Perform the required static calibration using the correct target setup and a level surface.
-
Confirm on the scan tool that the calibration was “Successful” or “Completed.” Don’t just assume.
-
If a dynamic calibration is also needed, complete the specific drive cycle under the right conditions (clear weather, visible lane lines, specific speeds).
-
On a test drive, I always monitor live data: Is the sensor detecting vehicles ahead? Is the distance and closing speed updating correctly and smoothly?
-
No codes, good live data, and proper system function on a test drive means the repair passed my check.
After Replacing or Reprogramming an ADAS Module:
-
First, confirm full communication with the scan tool. If it’s not talking, it’s not working.
-
Check that all previous U-codes are gone and don’t return after a key cycle or short drive.
-
Ensure the module is correctly programmed with the vehicle’s VIN and all necessary calibration data.
-
Run active tests: I’ll activate adaptive cruise in traffic, verify blind spot monitoring responds to vehicles, and check forward collision alerts.
-
Perform a full road test under real-world conditions. I want to see every ADAS system respond exactly as designed.
-
If every system responds as it should, then you’re good. If not, I go back to diagnostics—I never hand the car over until it’s right.
The Hard Numbers and the Tough Choice
This kind of work isn’t cheap, and you need to know what you’re facing before you approve any repair. Here’s a breakdown based on what I typically see:
| Repair Type | DIY Cost (Part Only) | Shop Cost (Part, Labor, Calibration) | Success Rate | Secondary Risk if Failed |
|---|---|---|---|---|
| Radar Sensor Replacement | $400 – $1,500 | $500 – $2,000+ | 99% when properly calibrated | ADAS functions disabled; increased collision risk; potential liability |
| ADAS Module Replacement | $800 – $2,500 | $1,200 – $3,500+ | 95% (depends on correct programming) | Complete loss of safety systems; possible immobilizer or CAN bus issues |
| Module Reprogramming (software-only) | $0 + tool subscription | $150 – $500 | 80% (fails if hardware is damaged) | May brick the module, forcing full replacement |
Here’s the reality check: if the repair cost starts creeping up past, say, 40% of your car’s current market value, you really need to consider the long-term viability. In some situations, especially with older vehicles, the only sensible option—where legally allowed and safely documented—is to disable the ADAS system entirely. It’s not ideal, and I don’t recommend it lightly, but sometimes it’s the honest truth. Safety systems are fantastic, but not if the repair is going to bankrupt you.
Keeping It From Happening Again: My Best Advice
Prevention starts with some basic, common-sense maintenance. A stable electrical system is absolutely critical. Check your battery and alternator voltage regularly; voltage spikes are a leading cause of ADAS module failure. Keep that radar sensor lens clean—mud, ice, bug splatter, or even tinted vinyl on the bumper can block the signal and cause overheating or false faults. During every oil change, I make it a habit to quickly inspect the sensor housing and bracket for any cracks or misalignment. And if your vehicle supports it, use a scan tool to check for pending ADAS codes every few months, even before a warning light comes on. Catching an issue early can save you from a complete system shutdown down the road.
One last thing: if you’re ever replacing your windshield, know this—some ADAS cameras are mounted right behind the glass. Improper installation can knock them out of alignment. Always make sure the shop performs a post-replacement calibration. The same goes for any front-end work; anytime the radar sensor is removed or the bumper is realigned, recalibration is mandatory. It’s not a luxury; it’s a safety requirement.
