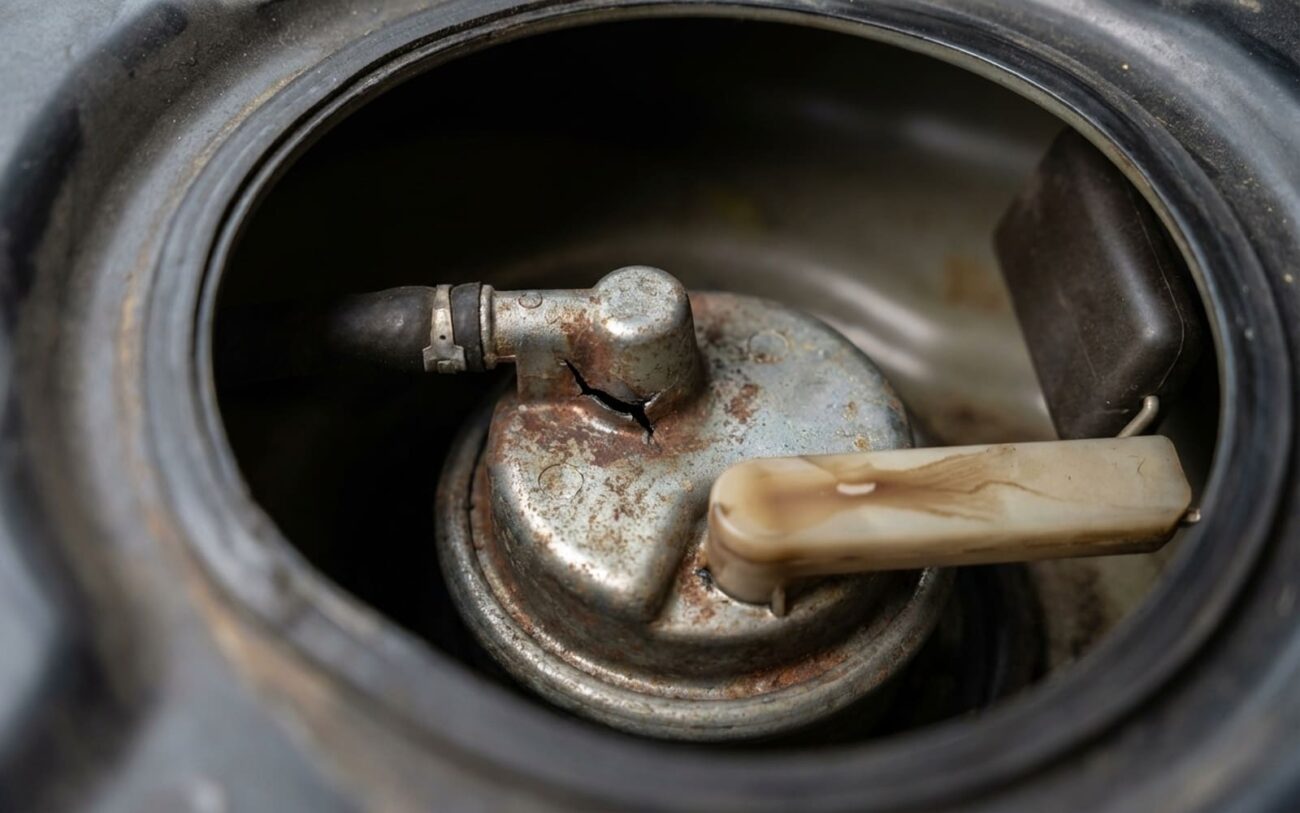
Alright, let’s talk fuel pumps. After 25+ years in this business, I can tell you one thing for sure: they rarely just up and die without a warning. But you gotta know what to look and listen for. Too many folks, even some younger techs, jump straight to replacing the pump, and that’s usually a waste of time and money if you haven’t done your homework. My goal here is to walk you through how I diagnose these things in my shop, so you don’t make those costly mistakes.
What a Dying Fuel Pump Sounds and Feels Like
The first thing I usually hear about is the extended cranking. The engine spins over fine, strong even, but it just won’t fire up right away. You crank and crank, and then maybe it sputters to life. What’s happening there? Most often, the fuel system lost its prime overnight. This is classic for a failed internal check valve in the pump. It’s supposed to hold pressure in the lines, but when it’s shot, all that fuel drains back to the tank. You might even catch a whiff of raw gas near the back of the car after a few failed attempts – that’s the fuel bleeding off, not exhaust.
Then there’s the “start-and-stall.” Fires right up, runs for a second or two, then dies. The pump can build enough initial pressure to get it going, but it can’t sustain it. Again, could be that check valve, or the pump motor itself is just too weak to keep up. It’s like trying to run a marathon on a single breath.
But where a weak pump really shows its true colors is under load. Car runs fine idling, puttering around town. But you hit the highway, try to pass someone, or climb a hill, and it hesitates, surges, or just flat-out loses power. That’s the engine screaming for more fuel, and the pump just can’t deliver. It’s running lean, and if you ignore that, you’re looking at misfires, detonation, and potentially melting pistons or cooking your catalytic converter. Trust me, you don’t want to replace a cat because of a $300 fuel pump.
And listen up when you turn the key to “on” (before cranking). A healthy pump makes a distinct, brief whine – maybe 1 to 2 seconds – as it primes the system. If you hear a high-pitched whine that’s louder than normal, or a grinding/buzzing sound coming from the tank area? That’s a huge red flag. Usually means worn motor bearings or some internal component is failing. Don’t ignore that noise; it’s the pump telling you it’s on its last legs.
How I Diagnose a Fuel Pump: Don’t Guess, Test!
Look, I’ve seen it a thousand times: someone replaces a fuel pump based on a hunch or a symptom, only to find the problem was a $15 relay or a clogged fuel filter. That’s just throwing money away. Before you even think about dropping the tank, you have to confirm the pump is actually the problem. A bad fuel pump mimics a lot of other issues, so testing is non-negotiable in my shop. Here’s my process:
Step 1: Check the Basics (Before You Touch the Fuel System)
First things first, let’s rule out the easy stuff. If you’ve got a no-start or extended cranking:
- Check the fuses: There’s almost always a dedicated fuse for the fuel pump. Pull it, check it. Quick and easy.
- Check the relay: Most vehicles use a fuel pump relay. You can often swap it with a known good relay (like the horn relay, if it’s the same type) to see if that solves your problem. If the car starts, you’ve found your culprit.
- Listen for the pump: Turn the key to “on” (don’t crank). You should hear that brief, familiar whine from the rear of the vehicle. If you hear nothing, it’s either an electrical issue (fuse, relay, wiring) or a dead pump.
- Scan for codes: Always, always plug in your OBD2 scanner. Codes like P0087 (Fuel Rail/System Pressure – Too Low) or P0171 (System Too Lean) are big indicators of fuel delivery issues. But remember, a code tells you what is happening, not always why. It points you in the right direction, but it doesn’t automatically mean the pump is bad.
Pro Tip: If you’re not hearing the pump prime, check for power and ground at the pump’s connector. A simple test light or multimeter can tell you if the pump is getting juice. If it is, and it’s not running, then yeah, the pump itself is likely dead.
Step 2: Fuel Pressure and Volume Tests (The Real Confirmers)
These are the tests that really separate a weak pump from other problems. You need a good fuel pressure gauge for this. Don’t cheap out on tools here; accuracy matters.
For Extended Cranking / No-Start / Start-and-Stall: Fuel Pressure & Leak-Down
If the engine cranks forever or starts and dies, I’m looking at pressure. Connect your fuel pressure gauge to the Schrader valve on the fuel rail (most modern vehicles have one). Cycle the key to “on” a few times without starting the engine. The pressure should build quickly to the manufacturer’s spec – usually somewhere between 55-62 PSI for many systems. Then, here’s the critical part: it needs to hold that pressure for at least 10-15 minutes after you turn the key off. If it bleeds down quickly, that’s a classic sign of a failed internal check valve in the pump, or possibly a leaking injector, but the pump is the prime suspect.
For Loss of Power Under Load: Fuel Volume Test
When a car hesitates or loses power under acceleration, it’s not just about pressure; it’s about flow. The pump can make pressure, but can it deliver enough fuel when the engine demands it? This is where a fuel volume test comes in. You’ll need to disable the ignition (to prevent starting) and then activate the fuel pump (often by jumping the relay or using a scan tool’s bi-directional controls). Run the pump for a specific time – typically 15-30 seconds – and collect the fuel it delivers into a graduated container. Compare that volume to the OEM specifications (usually found in a service manual). Most vehicles should deliver around 0.75 to 1 pint in 15 seconds. If it’s significantly less, your pump is weak and can’t keep up with demand.
For Abnormal Pump Noise: Stethoscope & Current Draw
If you’re hearing a loud whine, grinding, or buzzing from the tank, that’s usually the pump motor itself. Use a mechanic’s stethoscope (or even a long screwdriver to your ear) on the fuel tank to pinpoint the noise. You want to make sure it’s actually the pump and not something else vibrating against the tank. To confirm the pump’s internal health, I’ll often do a current draw test with a DC clamp meter on the pump’s power wire. A worn-out pump motor will often draw excessive current, indicating internal resistance or failing bearings. Compare your reading to the manufacturer’s spec – usually 5-7 amps, but it varies.
Why Fuel Pumps Give Up the Ghost
So, you’ve confirmed it’s the pump. But why did it fail? It’s usually a mix of electrical wear, mechanical fatigue, and environmental factors. Knowing this helps you understand the symptoms and even prevent future failures.
Internal Wear and Tear
Most in-tank pumps use brush-type motors. Over time, those carbon brushes wear down. Once they get too short or lose good contact with the commutator, the motor can’t spin consistently. You get intermittent power, or it just stops altogether. The armature windings can also short out internally, especially if moisture or fuel contaminants get in there.
Then there’s the mechanical side: the impeller, which is the actual part that moves the fuel, can degrade. Ethanol-laced fuels can be tough on rubber components, causing them to swell or deteriorate, which reduces flow efficiency. And like any motor, the bearings wear out, leading to that increased noise, vibration, or even a full rotor seizure.
The Sneaky Check Valve
This is a big one, and it’s often misdiagnosed. Inside the pump assembly is a small, spring-loaded check valve. Its job is to keep the fuel lines pressurized after the engine shuts down. When this little guy fails, all the fuel bleeds back into the tank. The pump might still run and deliver fuel just fine once it’s going, but without that residual pressure, the engine struggles to start, leading to those extended cranking symptoms we talked about earlier.
Contamination: The Silent Killer
Dirt, rust, or debris from a corroded fuel tank is like sandpaper to a fuel pump’s internal parts. It grinds away at the impeller and motor components, drastically shortening its life. This is why, on older vehicles, I always inspect the inside of the fuel tank when I’m replacing a pump. If that tank is full of crud, putting in a new pump without cleaning or replacing the tank is just asking for the new pump to fail prematurely. Don’t skip that step.
It’s Not Always the Pump Itself
Just to reiterate: a blown fuse, a bad relay, or a wiring fault isn’t a fuel pump failure. That’s a circuit issue. Same goes for a cracked fuel tank or a faulty fuel gauge sender. These are related problems, sure, but they’re separate from the pump itself. That’s why you diagnose the circuit first – power, ground, relay operation – before you ever think about pulling the pump out of the tank.
Okay, It’s the Pump. Now What?
If your testing confirms the pump is truly dead or critically weak, your only real option is replacement. Modern in-tank fuel pumps are usually sold as a sealed assembly – that includes the pump motor, the strainer (the “sock” filter), and often the fuel level sender. They’re not designed to be taken apart and repaired. Even if just the check valve is bad, you’re replacing the whole unit.
Now, can a capable DIYer tackle this? Yes, absolutely, if you’ve got the right tools, a good service manual, and you follow safety procedures to the letter. This isn’t a job you want to rush or cut corners on. You’re dealing with gasoline, after all.
Tools You’ll Need (Don’t Skimp Here)
-
Fuel line disconnect tools (these are specific to your vehicle’s quick-connect fittings)
-
A good socket set and wrenches for the tank straps and mounting hardware
-
A sturdy floor jack and jack stands (or a lift, if you’re lucky enough to have one)
-
A fuel transfer pump or siphon to get the gas out of the tank safely
-
A new OEM or quality aftermarket fuel pump assembly (I usually stick with Delphi, Denso, or Walbro for reliability)
-
A new fuel tank seal and locking ring – never try to reuse the old ones. They will leak.
The “Tank Tap” Trick (Last Resort Only!)
Yeah, there’s an old trick where you give the bottom of the fuel tank a sharp whack with a rubber mallet when the pump is acting up. Sometimes, that can free a stuck brush or get a dying motor to spin for a little while. But let me be crystal clear: this is not a repair. It’s a risky, last-ditch effort to get you off the side of the road and to the shop, or at least home. If you do this, replace the pump immediately. Don’t fool yourself into thinking you’ve fixed anything.
Did You Actually Fix It? How to Know for Sure.
Alright, new pump’s in. Don’t just assume it’s fixed because the car starts. You need to validate your work. This is where a lot of DIYers, and even some pros, get lazy. But skipping these steps can lead to comebacks or, worse, safety issues. I always run through these three checks:
The Functional Test (Before Lowering the Tank)
The Leak Test (Crucial!)
The Operational Road Test
Fuel Pump Replacement: What It’ll Cost You
Alright, let’s talk brass tacks: cost. This is a major factor, especially if you’re driving an older vehicle where the repair might start to outweigh the car’s value.
| Repair Type | DIY Cost (Parts Only) | Shop Cost (Estimated) | Typical Success Rate | Common Secondary Risks |
|---|---|---|---|---|
| Fuel Pump Assembly Replacement | $150 – $500 | $600 – $1,200 | >95% (if diagnosed and installed correctly) | Fuel leak from improper seal, no-start due to loose connector, incorrect pump orientation, or damaged fuel lines. |
My “40% Rule” for Older Cars
Here’s a rule of thumb I’ve used for years in the shop: if the estimated repair cost is going to exceed about 40% of the car’s current market value, you really need to sit down and think about whether that investment makes sense. Dropping $900 on a new fuel pump for a car that’s only worth $1,800? That’s a tough pill to swallow, and sometimes, it’s smarter to put that money towards a newer, more reliable vehicle. Just something to consider.
Keeping Your Fuel Pump Happy: My Best Advice
Fuel pumps are wear items, no getting around that. But you can definitely extend their life significantly with a few simple habits. I tell all my customers this:
1. Keep that tank above a quarter full. This is probably the single biggest thing you can do. The fuel surrounding the pump acts as a coolant and a lubricant for the electric motor. Running on fumes, especially on hot days or long drives, overheats the pump. And heat is the enemy of electronics and motors. It’s a guaranteed way to shorten its lifespan.
2. Pay attention to that priming sound. That brief whine you hear when you turn the key to “on” is your pump’s heartbeat. If it starts to sound different – louder, quieter, more strained, or it just takes longer – that’s an early warning sign. Don’t wait for it to die completely; investigate it early.
3. Never ignore a Check Engine Light. Those P0087 or P0171 codes aren’t just random lights; they’re your car telling you something’s wrong with fuel delivery. Address them quickly. A failing pump causing a lean condition can quickly lead to much, much more expensive repairs down the line, like a melted catalytic converter or even damaged engine internals. Trust me, replacing a fuel pump is a whole lot cheaper than replacing an engine or a cat.
