The Dreaded No-Start: Pinpointing the Problem
Alright, let’s get straight to it. You hop in your car, turn the key or hit the button, and… nothing. Or maybe you get a sad little click, a slow grind from the starter, or it fires up for a second and then just dies. After more than 25 years under the hood, I can tell you these symptoms usually scream “battery” or “alternator.” But knowing which one, and why, is where the real work begins.
Classic Battery Trouble
If your engine cranks sluggishly, the dashboard lights look like they’re having a seizure, or all you hear is a rapid-fire clicking sound when you try to start it, that’s almost always a dead or severely weak battery. See, the starter motor needs a massive jolt of electricity—we’re talking 200 amps or more—and a tired battery just can’t deliver. Sure, I’ve seen corroded terminals, a failing starter, or even a seized engine mimic these symptoms, but honestly? Nine times out of ten, it’s the battery. It’s the easiest thing to check first, too.
Textbook Alternator Failure
Here’s a scenario I run into every single week: a customer calls, “My car started with a jump, but then it died as soon as I took the cables off!” That, my friends, is the clearest sign of a failed alternator. Once the engine starts, it’s supposed to run off the alternator, which also recharges the battery. If the alternator isn’t doing its job, the engine is running solely on whatever juice is left in the battery. And trust me, that battery drains fast—often in under 10 minutes. A massive parasitic draw can sometimes look similar, but if the car won’t stay running without external power, your charging system is the prime suspect.
The Gray Zone: Intermittent Issues
Then there’s the “intermittent dead battery” problem. You know, needing a jump every few days, even with regular driving. This one’s tricky. It could be a battery that’s just plain worn out from age or too many deep discharges. Or maybe the alternator is undercharging, putting out a weak 12.5-12.8 volts instead of the healthy 13.5-14.8V range. And don’t forget the sneaky parasitic drain—some module or accessory that never fully shuts down, slowly sucking the life out of your battery overnight. You can’t just guess your way out of this one; you absolutely need to do some proper testing.
Pay Attention to That Dashboard Light
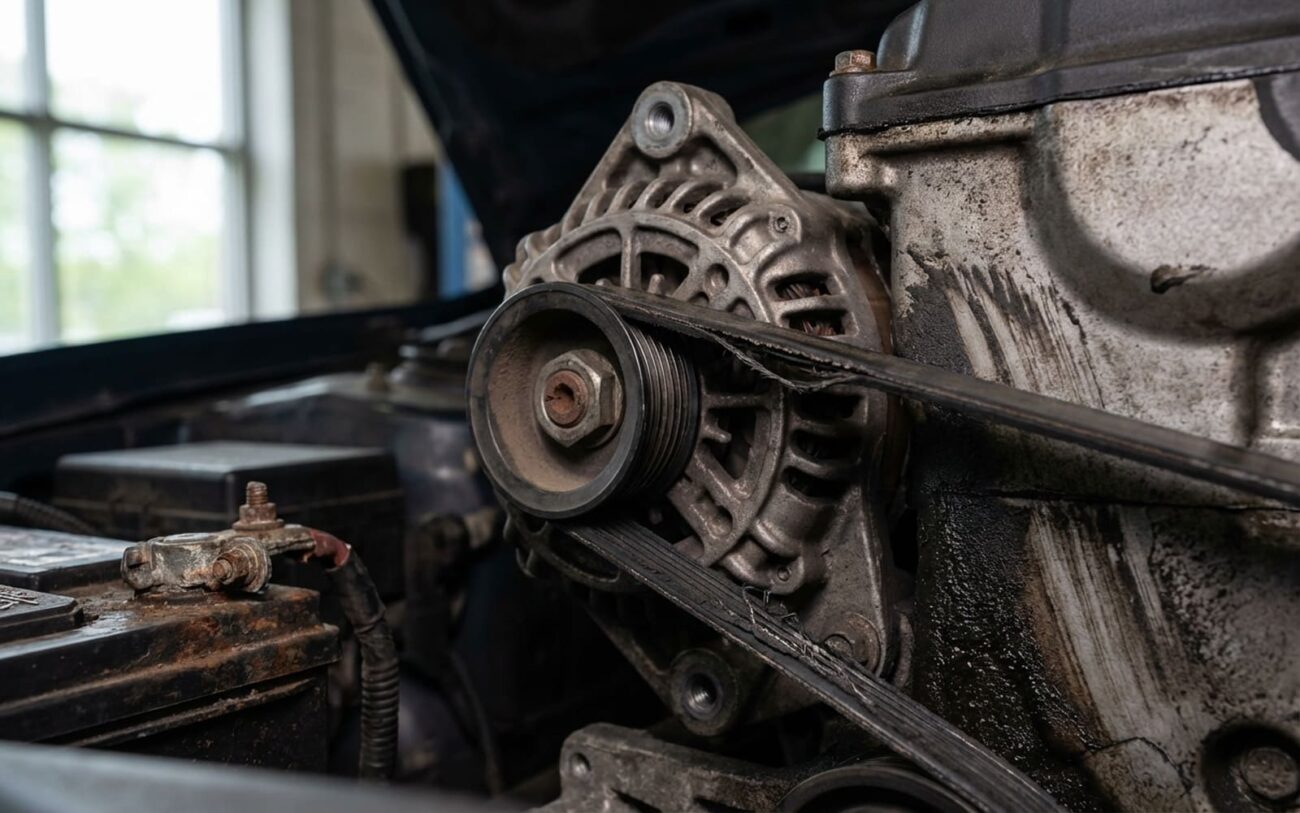
Your car is pretty smart, and that battery-shaped warning light on your dash? It’s not just for show. It’s your car’s way of screaming, “Hey! The charging voltage is too low!” If that light stays on while you’re driving, you’ve got a problem with the alternator, its internal voltage regulator, or the serpentine belt that drives it. Pop the hood and take a look at the belt first. If it’s broken or missing, well, there’s your problem—no belt, no alternator spin, no charge. Simple as that.
Don’t Guess, Test: Your Diagnostic Toolkit
Look, I’ve seen too many people—and even some greenhorn techs—throw parts at a problem hoping it sticks. Guessing gets expensive, fast. Before you replace anything, you need to confirm the fault. And for that, a digital multimeter isn’t just a nice-to-have; it’s your most important tool. Without it, you’re just working blind, and that’s a recipe for frustration and wasted money.
Here’s a breakdown of common symptoms, what they usually mean, what else might be faking you out, and the definitive tests I use in my shop to get to the bottom of it.
| Symptom | Most Likely Culprit | Common Mimics (Don’t Get Fooled!) | The Definitive Test |
|---|---|---|---|
| No crank, no lights, totally dead | Battery completely discharged or internally failed. | Loose or corroded battery terminals, a blown main fuse, or a disconnected ground cable. |
Grab your multimeter and check battery voltage. Anything below 10.5V means it’s dead. If it’s 12.6V or higher, try a voltage drop test across the battery terminals while someone tries to crank the engine. If you see a big drop, check those connections. |
| Slow crank, dim lights, maybe a rapid click | Weak battery, or high resistance in the starter circuit (cables, connections, ground straps). | Engine mechanical problems (like a partially seized engine or worn bearings), or a failing starter motor itself. |
Get a proper battery load test done—most auto parts stores can do this for free with a conductance tester. If the battery passes, then you need to perform a voltage drop test on both the positive and negative battery cables during cranking. More than a 0.2V drop on either side means you’ve got a bad connection or cable. |
| Charging warning lamp (battery light) stays on while driving | Faulty alternator, an internal voltage regulator issue, or a problem with the rotor/stator windings. | A broken or slipping serpentine belt, a wiring fault to the alternator, or even a false signal from the Powertrain Control Module (PCM). |
With the engine running at idle, measure the voltage directly at the battery terminals. A healthy charging system should show 13.5–14.8V. If it’s consistently below 13V or jumps above 15V, you’ve got a charging system fault. Don’t forget to visually inspect the serpentine belt and its tensioner, too. |
| Battery dies overnight or after sitting a day or two | A parasitic electrical draw (something staying on) or the battery itself has a high internal self-discharge rate. | No common external mimics for this specific symptom; it’s almost always an internal battery fault or a drain. |
You need to perform a parasitic draw test. This means disconnecting the negative battery terminal and measuring current (amps) between the terminal and the battery post with your multimeter. Crucially, you need to wait 20–45 minutes after shutting the car off for all the computer modules to “go to sleep.” Anything consistently over 50 milliamps (0.05A) indicates an active circuit causing the drain. |
These tests? They’re non-negotiable if you want to avoid misdiagnosis and throwing money away. A basic multimeter is great for voltage checks, but for a true picture of your battery’s health, you really need a proper load test. Most auto parts stores have conductance testers that can simulate a load and tell you if the battery’s internal health is good or bad. And here’s a pro tip: don’t just assume that battery light always means a bad alternator. I’ve seen plenty of PCM software glitches—especially on some older Chrysler and GM models—that trigger false warnings. That’s why you always, always verify with your own voltage test. Never trust a warning light alone.
Why They Fail: A Look Inside
It’s one thing to know what’s failed, but understanding why it failed can help you prevent it next time. We’re talking about internal component wear and design limits here, not just a loose cable or a broken belt.
The Battery: A Chemical Time Bomb
Your car battery is essentially a chemical reaction in a box, and that reaction degrades over time. The main culprit? Sulfation. When a battery sits undercharged, lead sulfate crystals harden on the plates. This reduces the surface area that can react, killing its capacity. Vibration and heat are also big enemies; they cause the active material to flake off the plates (what we call plate shedding), collecting at the bottom of the cell and eventually shorting it out. Overcharging, often from a faulty voltage regulator, can warp the plates or boil off the electrolyte. Most modern batteries are sealed, so once that damage is done, there’s no fixing it. In my experience, age is the biggest factor—most batteries are good for 3 to 5 years, even if you treat them perfectly.
The Alternator: Many Moving (and Electrical) Parts
Inside that alternator housing, there’s a lot going on, and several components are prone to wear. First, you’ve got the carbon brushes. They press against rotating slip rings to deliver current to the rotor. Over time, these brushes simply wear down, lose contact, and then you get no excitation field, which means no power output. Then there’s the diode trio, part of the rectifier bridge. Its job is to convert the AC power generated by the stator into the DC power your car needs. If even one of these diodes fails, you’ll get AC ripple on your DC line. That ripple can cause flickering lights, interfere with sensitive ECUs, and even damage other electronics. The stator windings themselves can short out, usually from excessive heat—especially if the alternator is constantly working overtime to power a bunch of aftermarket accessories. And don’t forget the bearings. They fail from dirt, moisture, or just plain old age, leading to grinding noises or, even worse, a seized alternator. And yes, high under-hood temperatures are a killer. I’ve pulled alternators that were literally baked, their insulation cracked and brittle, from environments well over 200°F.
Time to Fix It: Your Repair Options Explained
Once you’ve done your due diligence and confirmed the fault, it’s time to get your hands dirty—or pay someone else to. Your approach really depends on the specific component, what tools you have, and how much space you’ve got to work with.
Battery Replacement DIY-FEASIBLE
Alternator Replacement DIY-FEASIBLE to PROFESSIONAL-ONLY
Emergency Only: Limping Home TEMPORARY / LAST-RESORT
Verify the Fix: Post-Repair Checks
Alright, you’ve swapped the part. Don’t just close the hood and call it a day! Replacing something isn’t the end of the job. You absolutely must verify that your repair actually fixed the problem—and, just as important, that you didn’t accidentally introduce any new ones. This step is crucial, and it’s what separates a good tech from a parts changer.
After a New Battery
The success criteria here are pretty straightforward: the engine should crank quickly and fire right up on the first try. Once it’s running, with the engine at idle and minimal electrical loads (radio off, AC off), grab your multimeter and measure the voltage at the battery terminals. It should read a solid 13.5–14.8V. This tells you the alternator is charging. Next, and this is important, perform a voltage drop test. Connect your multimeter between the battery terminal and the cable end (not the post) while someone cranks the engine. You want to see less than 0.2V drop on both the positive and negative sides. If you see a higher drop, you’ve got poor connections—clean or tighten them until that drop is gone.
After an Alternator Replacement
First thing’s first: that battery warning light on your dash must extinguish immediately after startup. If it stays on, you’ve still got a problem. Next, confirm your charging voltage. Measure at the battery terminals at idle, and then again at around 2000 RPM. Both readings should consistently stay within that 13.5–14.8V range. If it’s too low or too high, something’s still wrong. Finally, and this is a test many DIYers skip, check for AC ripple. Switch your multimeter to AC volts and measure across the battery terminals with the engine running. A healthy alternator should produce less than 0.1V AC. Anything more than that indicates a failing diode (or diodes) inside the alternator, and that AC ripple can seriously mess with your car’s sensitive electronics. If all these tests pass and all your accessories are working normally, then, and only then, is your repair complete.
The Bottom Line: Costs, Risks, and When to Walk Away
Alright, let’s talk real numbers and make some judgment calls. Here’s a realistic breakdown of costs based on what I see in the shop and common repair scenarios. Remember, these are estimates, and your mileage may vary depending on your specific vehicle and location.
| Repair Type | DIY Cost (Parts Only) | Shop Cost (Parts & Labor) | Typical Success Rate | What Can Go Wrong (Secondary Risks) |
|---|---|---|---|---|
| Battery Replacement | $100 – $300 | $200 – $400 | 99% | Poor terminal connections can lead to intermittent starting issues or voltage spikes that can damage sensitive electronics. Using a battery with incorrect Cold Cranking Amps (CCA) might leave you stranded in cold weather. |
| Alternator Replacement | $150 – $600 | $400 – $1000+ | 95% | Misdiagnosis is the biggest money-waster here. Incorrect belt tension will cause noise, premature belt wear, or even bearing failure. A faulty installation can damage pulleys, brackets, or even the new alternator itself. |
My “Walk Away” Rule
Here’s a rule of thumb I’ve used with countless customers over the years: if the repair cost starts creeping up towards 40% of your car’s private-party value (you can check sites like KBB or Edmunds for a realistic estimate), you really need to take a hard look at the vehicle’s overall condition. Is it a clean, low-mileage car with a solid body and a healthy transmission? Then, yeah, the repair probably makes sense. But if it’s got rust bubbling up, the transmission is slipping, or you’ve got major suspension wear, you could be throwing good money after bad. It’s not just a mechanical decision; it’s an economic one, and sometimes, the smartest move is to cut your losses.
Keep It Running: Prevention and Monitoring
Look, the best repair is always the one you never have to do. A little bit of preventive care goes a long way, and it’s a whole lot cheaper than getting stranded.
Battery Care
If your car sits unused for more than, say, two weeks, hook it up to a battery maintainer. This prevents sulfation and keeps the charge stable, extending its life significantly. Also, make it a habit to clean your battery terminals every few months. That white, powdery buildup (corrosion) acts like an insulator, increasing resistance and causing all sorts of starting issues. A simple mix of baking soda and water with a wire brush will do the trick. And just keep the battery case itself dry and free of dirt; even a thin layer of grime can create a conductive path and cause a slow surface discharge.
Monitoring for Early Warning Signs
Get into a routine. Once a month, after a good 20-minute drive, check the voltage at your battery. It should be between 13.5 and 14.8 volts. If you ever notice the starter sounding a little sluggish, or the engine cranking slower than usual, don’t wait! Test that battery immediately before it leaves you stranded somewhere inconvenient. If your car has a built-in voltage display on the dash, use it—it’s a quick, easy way to keep an eye on things. And if that battery light ever comes on while you’re driving, pull over safely as soon as you can and check your serpentine belt. No belt, no charge, and you’re on borrowed time.
Staying ahead of these failures isn’t rocket science. A few minutes a month with a multimeter and a quick visual check can save you from a cold, dark morning in a parking lot with a dead battery and a clicking starter. And trust me, that’s the kind of failure no one wants to explain to roadside assistance.
