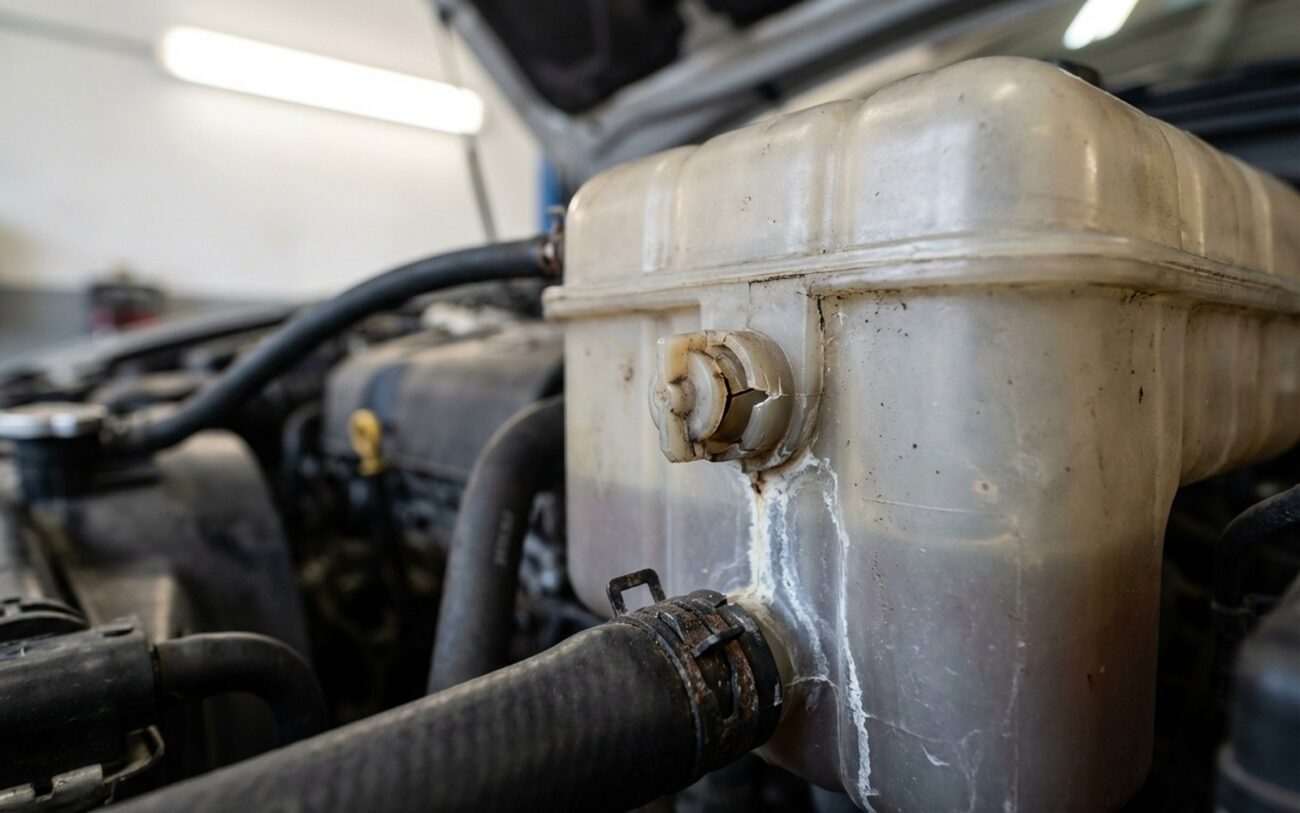
Alright, let’s talk about that coolant overflow tank. Most folks just see a plastic bottle under the hood, but in my 25+ years turning wrenches, I’ve seen firsthand how critical that little valve inside it can be. It’s not just a passive container; it’s actively managing your cooling system’s pressure and vacuum cycles. When that valve acts up, your whole system can go sideways, and if you don’t catch it, you’re looking at some seriously expensive repairs.
What You’ll See: Symptoms of a Failing Overflow Tank Valve
When a customer comes in with cooling system issues, one of the first things I check is that overflow tank. Here’s what I typically look for:
- Tank full or bulging when cold: This is a classic sign the valve is stuck closed. When the engine heats up, coolant expands and pushes into the tank. As it cools, the system should pull that coolant back into the radiator. If the tank is still pressurized and full when the engine is stone cold, that valve isn’t letting the pressure out or the coolant back in. I’ve seen tanks bulge so much they look like they’re about to burst.
- Tank empty when cold, but radiator is full: This points to the opposite problem—the valve is stuck open. It can’t create the vacuum needed to draw coolant back from the tank into the radiator as things cool down. So, the coolant just sits there, or worse, air gets sucked in instead.
- Consistent coolant leaks from the overflow hose: A small drip after a hard run isn’t always a death sentence, especially if someone overfilled it. But if you’re constantly seeing puddles, it means the system is venting pressure incorrectly. It’s pushing coolant out when it shouldn’t be, usually because the valve is stuck closed or opening too early.
Don’t Guess, Test: How I Diagnose the Real Problem
Here’s the deal: a lot of things can cause similar symptoms. A bad radiator cap, a leaking head gasket, or even just the wrong coolant mix can mimic a faulty overflow tank valve. That’s why I never just throw parts at it. You need to be methodical. My go-to tools are a cooling system pressure tester, a vacuum pump (often part of the same kit), and a combustion gas detection kit (a “Block Check” kit).
My Diagnostic Steps:
- Initial Visual Check: Before I even grab a tool, I’m looking at the tank, hoses, and radiator cap. Any obvious cracks, bulges, or crusty coolant residue? Is the radiator cap seal degraded?
- Pressure Test the System: This is step one for almost any cooling issue.
- Attach the pressure tester to the radiator neck.
- Pump it up to the pressure specified on your radiator cap (usually 16-20 psi).
- Crucial point: Clamp off the overflow hose that goes to the tank. This isolates the tank from the rest of the system.
- Monitor the pressure for 10-15 minutes.
- If the pressure holds steady (no more than 1-2 psi drop), the main system (radiator, hoses, water pump, head gasket) is likely okay. This points suspicion squarely at the overflow tank valve or the radiator cap.
- If pressure drops quickly, you’ve got a leak somewhere else. Start looking for external leaks, or move to the next test if you suspect an internal leak like a head gasket.
- Test the Radiator Cap Independently: A lot of pressure issues actually come from a bad cap, not the overflow tank. Most pressure testers come with an adapter to test the cap itself. Make sure both the pressure relief and vacuum valves in the cap are working correctly.
- Check for Combustion Gases (Head Gasket): If the system is over-pressurizing but holding pressure when the overflow tank is isolated, or if you see consistent bubbling in the radiator neck, a head gasket leak is a strong possibility. I use a combustion gas tester (it changes color if exhaust gases are present in the coolant). This test is non-negotiable if I suspect a head gasket.
- Vacuum Test for Coolant Return Issues: If the tank is empty when cold, but the radiator is full, the system isn’t pulling coolant back.
- With the engine cold, remove the radiator cap.
- Start the engine and watch for bubbling.
- Then, try clamping the overflow hose and repeat. If coolant now stays in place and returns properly after cooling, the tank valve was likely stuck open, allowing air in and preventing vacuum.
- You can also use a vacuum pump to test the system for external air leaks in hoses or connections.
I’ve seen too many techs replace overflow tanks unnecessarily because they skipped that critical step of isolating the tank or testing the radiator cap first. Take the extra five minutes; it saves hours of comebacks and wasted parts.
Why Do These Valves Fail?
If you’ve confirmed it’s the overflow tank valve, it’s usually one of a few things:
- Material Degradation: The internal seals and diaphragms are typically made of rubber compounds. They’re constantly exposed to hot coolant (often over 200°F) and go through thousands of heat/cool cycles. Over time, that rubber hardens, cracks, or loses its elasticity. Once that happens, the valve either sticks shut (can’t vent pressure) or stays open (can’t create vacuum).
- Contamination: Scale from hard water, rust particles from corrosion, or debris from deteriorating components (like a water pump impeller) can lodge in the valve seat. And don’t even get me started on “stop-leak” products—those things are notorious for solidifying in small passages and jamming delicate valves. I’ve seen them cause more problems than they solve.
- Manufacturing Defects: Less common, but it happens. Sometimes there are slight molding imperfections in the valve bore that cause binding. For example, on some early 2010s GM models, I saw a few service bulletins about poor sealing due to casting variations in the tanks.
The Fix: Replacing the Tank (and Why Bleeding is Everything)
Professional Territory Only
If you’ve confirmed the overflow tank valve is faulty, your repair path depends almost entirely on whether the valve is serviceable. On nearly all modern vehicles, it’s not. You’re replacing the whole assembly.
For most cars built since the early 2000s, that valve is integrated right into the tank body or its cap. You can’t just swap out the valve; you replace the whole tank. On older vehicles (think pre-2000 or some specific European models), you might find a threaded valve plug that can be replaced individually. But those are rare these days.
What You’ll Need:
- A new OEM or high-quality aftermarket overflow tank assembly (make sure it includes the cap if the valve is in there).
- The correct type of coolant specified by your manufacturer (don’t cheap out here).
- Distilled water for mixing coolant (if not pre-mixed 50/50).
- A spill-free funnel kit (trust me, it makes bleeding much easier).
- Basic hand tools (sockets, screwdrivers, hose clamps).
- A drain pan.
The Replacement Process:
It’s usually pretty straightforward: drain some coolant (often from the radiator petcock to avoid disturbing sediment in the tank), disconnect the hoses and any coolant level sensor wiring, unbolt the old tank, and install the new one. But that’s the easy part.
The Critical Step: Bleeding the System
This is where most DIYers—and even some new techs—mess up. Air trapped in the system is your enemy. It creates hot spots, prevents proper coolant flow, and can lead to overheating even with a brand-new tank. You absolutely have to follow the manufacturer’s bleed procedure exactly. I can’t stress this enough.
Many modern systems require a spill-free funnel, running the engine with the heater on high (to open the heater core valve), and patiently waiting for all the air bubbles to escape. Some cars, especially newer ones with electric coolant pumps or complex thermostatic valves, even need a scan tool to activate components during the bleed process. If you don’t have the right tools or the procedure, take it to a pro. What starts as a $150 part can become a $2,000 engine repair if you don’t bleed it right.
Confirming the Repair: My Post-Fix Checks
Just because you put a new tank in doesn’t mean the job’s done. You need to verify it actually fixed the problem. I always do two key checks:
- Thermal Cycle Test:
- Start with a completely cold engine and cold coolant.
- Run the engine up to normal operating temperature. You should see the coolant level in the overflow tank rise as the system expands.
- Shut the engine off and let it cool completely—ideally overnight.
- When cold, the coolant level in the radiator should be back to the “full” mark, and the overflow tank level should be between “min” and “max.” If the radiator is still low, the vacuum side of the valve isn’t working, or you still have air trapped.
- Pressure Hold Test:
- Attach your cooling system pressure tester to the radiator neck.
- Pressurize the system to the cap’s specified pressure (e.g., 16-20 psi).
- First, clamp off the overflow hose and monitor for 2-3 minutes. Pressure should hold steady (no more than 1 psi drop).
- Then, reconnect the hose and retest. The system should still hold pressure, confirming the new tank valve seals correctly under pressure and only opens when it’s supposed to.
- While testing, visually inspect all connections, hoses, and the new tank for any leaks.
If both these tests pass, then you’re good to go. If not, double-check your bleeding procedure, look for any hidden air pockets, or reevaluate for external leaks or cap issues. Don’t assume “new part = fixed.”
Keeping It Healthy: Prevention and Long-Term Care
Preventing these issues is a lot easier (and cheaper) than fixing them. It boils down to good cooling system hygiene:
-
Use the Right Coolant: Always follow the manufacturer’s recommendation. OEM-spec fluids are formulated to protect all the metals, plastics, and elastomers in your specific system. Using the wrong type, or mixing incompatible coolants (like OAT with IAT), can cause gel formation, corrosion, and accelerate the aging of rubber components like those delicate valve seals.
-
Maintain the Correct Mix: Stick to a 50/50 mix of coolant and distilled water. Tap water introduces minerals that form scale, especially in hot areas like the overflow chamber. That scale buildup restricts flow and can jam small valve mechanisms over time.
-
Regular Visual Checks: This is your best early-warning system. Every few weeks, glance at the overflow tank when the engine is cold. The coolant level should be between the “min” and “max” marks. If it’s consistently full or bulging, suspect a stuck-closed valve. If it’s empty but the radiator is full, the valve may not be creating vacuum. Also, check around the cap and neck for white, green, or pink crusty deposits—those are signs of repeated pressure venting, meaning the system is working harder than it should.
Catching a failing valve early means replacing a relatively inexpensive part. Wait too long, and you’re dealing with overheating, potential engine damage, or even secondary issues in related systems. Stay ahead of it with simple observation and proper maintenance.
The Bottom Line: Cost, Risk, and When to Walk Away
Replacing a coolant overflow tank is usually a moderate-cost repair, but cutting corners can lead to much bigger expenses. Here’s my perspective:
| Repair Type | DIY Cost | Shop Cost | Success Rate | Secondary Risk if Failed |
|---|---|---|---|---|
| Replace non-serviceable overflow tank assembly | $80–$200 (part + coolant) | $250–$450 (labor-intensive on some models) | 95% when proper bleeding and refill procedures are followed |
Poor bleeding leaves air pockets, causing localized overheating, potential head gasket failure, or warped cylinder heads.
|
The biggest risk here isn’t the part itself; it’s the procedure. Failing to properly bleed the cooling system after opening it up is the most common mistake I see. That trapped air blocks coolant flow in critical areas, creating hot spots that can trigger premature head gasket failure. What starts as a $150 fix can easily spiral into a $2,000+ engine repair. I’ve seen it happen too many times.
Economically, you’ve got to ask yourself: Is this repair worth it for your vehicle? As a general rule, if the cost of the repair exceeds about 30% of the vehicle’s current market value—especially if it’s got high mileage or other aging systems—it might be time to reconsider. Also, a failed overflow valve can sometimes be a symptom of broader neglect. If the coolant hasn’t been changed in years, you might be facing water pump, thermostat, or heater core issues soon. This repair could just be the tip of the iceberg, and it’s worth a hard look at the vehicle’s overall condition.
