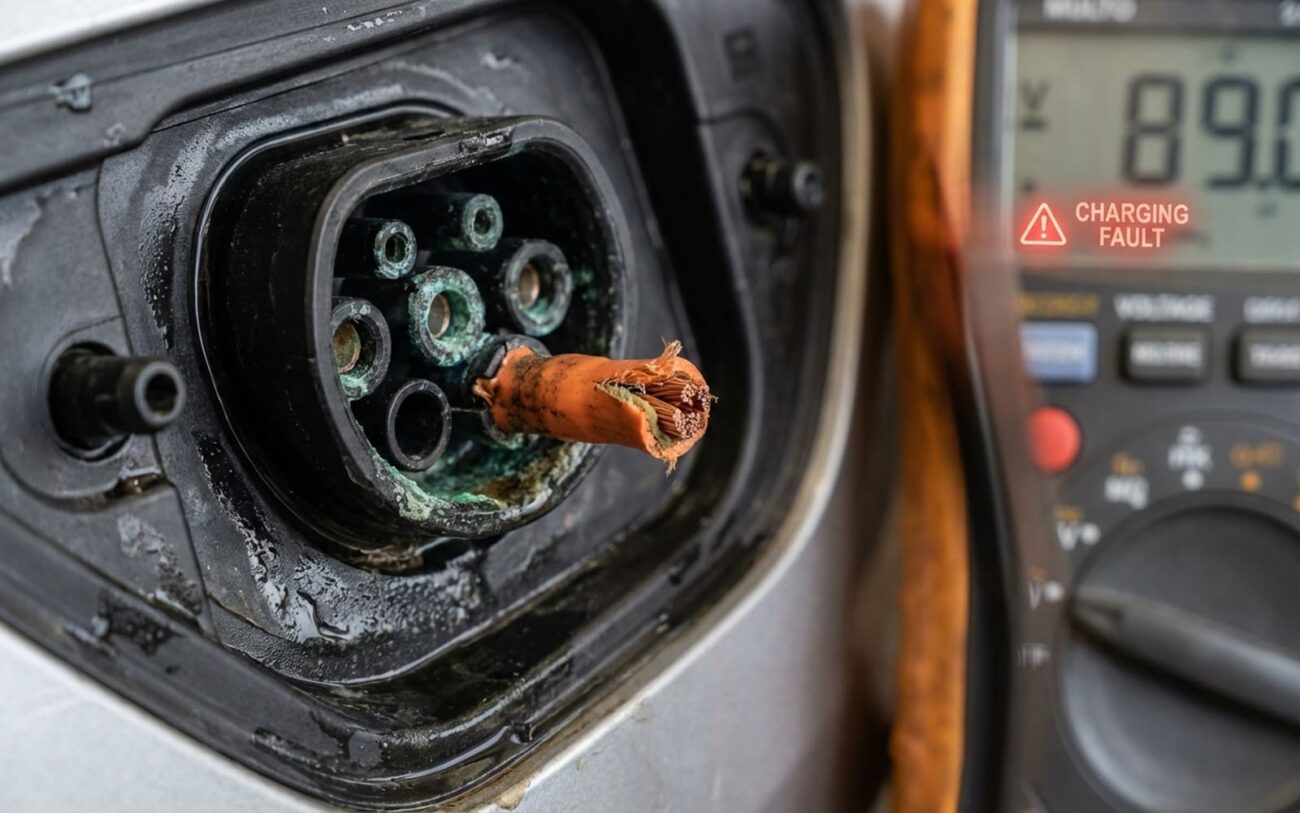
When Your EV Won’t Charge: My Approach to “Charging Faults”
Look, when an EV throws a “Charging Fault” message, and it either won’t start drawing power or cuts out after a few seconds, that’s the car telling you it’s got a serious problem. This isn’t just an inconvenience; it’s a safety shutdown. The vehicle’s high-voltage system has detected something it can’t ignore, and it’s protecting itself, and you, by slamming the brakes on the charge cycle.
In my 25+ years, I’ve seen a lot of things, and with EVs, this kind of fault usually points to an internal issue within the vehicle’s own charging components. It’s rarely the external charger or the power grid, though we always rule those out first. And here’s a common telltale sign I’ve observed repeatedly:
What I Hear in the Bay
“You plug it in, hear a solid ‘click’ or a ‘thunk’ from under the car, and then almost immediately, that fault message pops up.”
That click? That’s the high-voltage contactors trying to close, trying to energize the circuit. But the car’s brain, the Battery Management System (BMS), almost instantly commands them back open. It’s an interlock behavior, meaning the system is talking, but it’s found a fault—maybe an isolation fault, an overtemperature, or a communication breakdown with the charger. Ignoring this and repeatedly trying to charge? That’s just asking for more trouble. You risk damaging sensitive electronics, pitting the contactor surfaces, or putting thermal stress on the On-Board Charger (OBC). The car might still drive for a bit, but once that battery runs low, you’re stuck. No amount of plugging in will help until we find the root cause.
Here’s what the car’s dashboard might be showing you when it throws a charging fault. This particular example points to an isolation issue, which is a common culprit.
Status: LOW
The Usual Suspects: What’s Really Going On Inside
When that “Charging Fault” lights up, the problem almost always boils down to one of a few key components in the vehicle’s internal charging system. These are the main players, and if any of them report an out-of-spec condition—voltage, current, temperature, or isolation resistance—the BMS will shut the whole thing down.
- On-Board Charger (OBC): This is the workhorse. It takes the AC power from your wall or public charger and converts it into DC power the battery can use. It gets hot, it works hard, and it’s often the first point of failure.
- Battery Management System (BMS): Think of this as the charging system’s brain and bodyguard. It constantly monitors the battery’s health and safety, making sure everything is within safe operating parameters. If it sees a problem, it pulls the plug.
- High-Voltage Contactors: These are basically heavy-duty, high-speed switches. They connect and disconnect the main high-voltage battery from the rest of the car, including the charging system. They’re critical for safety and system isolation.
- Charging Port: This is your car’s physical connection point. While it seems simple, any damage, corrosion, or debris here can break the communication handshake required for charging.
My First Step: Is It the Car, or the Charger?
Before I even think about cracking open a high-voltage system, my first job is to rule out external factors. You wouldn’t believe how many “major internal failures” turn out to be a faulty charging station or a bad cable. So, here’s my systematic approach:
- Try a Different Charger: Start with your home Level 1 charger. If that fails, try a public Level 2 station. If you have access to another home charging point, use that too. The goal is to test the car on at least two or three known-good EVSEs (Electric Vehicle Supply Equipment).
- Inspect the Charging Port: Take a good look at the J1772 (or CCS/CHAdeMO) port on your car. Are the pins bent? Is there corrosion, dirt, or debris? Sometimes a simple cleaning can fix it. (We’ll get to how to clean it safely later.)
- Check the EVSE Cable: Inspect the charging cable itself. Any cuts, kinks, or signs of damage? A compromised cable can lead to communication errors or even safety faults.
If the fault appears on every known-good charger you try, then we can be pretty confident the problem is vehicle-side. If it only happens on one specific charger or cable, then your focus should shift to that external unit.
My Toolkit: What You Need to Diagnose an EV
This isn’t your grandpa’s carburetor. To diagnose these systems right, you need specialized gear. A basic OBD-II scanner won’t cut it. You’re dealing with complex high-voltage electronics, and guessing is dangerous and expensive.
- EV-Specific Scan Tool: You need a diagnostic tool that can talk to the EV-specific modules: the On-Board Charger (OBC), the Battery Management System (BMS), and the contactor controller. An OEM-level tool is always best, but a high-end aftermarket J2534 pass-through device can often get you where you need to be. This is how we pull those crucial Diagnostic Trouble Codes (DTCs) and monitor live data streams.
- High-Voltage Digital Multimeter (HV DMM): This is non-negotiable. It needs to be rated for high-voltage work—CAT III, 1000V minimum. We use this to check pilot and proximity signals at the charging port, as well as for general electrical troubleshooting.
- Insulation Resistance Tester (Megohmmeter): For deeper troubleshooting, especially if you suspect an isolation fault (like a P0AA6 code), a megohmmeter is essential. It helps identify ground faults within the high-voltage system by measuring resistance between HV components and chassis ground.
- Infrared Thermal Camera: This is a handy tool. During a charging attempt, an IR camera can quickly reveal hot spots in the OBC, DC-DC converter, or even the charging cable. Overheating is a common cause of charge termination.
- Proper PPE: And I can’t stress this enough: always have your Class 0 insulated gloves, face shield, and other appropriate personal protective equipment ready. High voltage is no joke.
My Diagnostic Flow: What to Check When
Once we’ve confirmed the fault is internal to the vehicle, here’s how I typically break down the diagnosis based on the symptoms. This is where your specialized tools earn their keep.
| What You See | Likely Internal Culprit | Common External Mimics | How I Confirm It |
|---|---|---|---|
| “Charging Fault” message, no charge | OBC failure, Isolation fault, BMS logic issue | Faulty EVSE, damaged J1772, ground fault in extension cord |
First, test on 2–3 known-good EVSEs. Then, pull DTCs with a scan tool—look specifically for P0AA6, which screams isolation fault. |
| No HV battery voltage rise after plug-in | HV contactors not closing (BMS interlock), failed contactor coil, open control circuit | EVSE communication failure (Pilot/Proximity signal loss) |
Verify 12V pilot/proximity signals at the charging port with your HV DMM. Then, use the scan tool to monitor the BMS “Contactor Close Request” parameter. |
| Charging starts, then stops with thermal warning | OBC overheating, DC-DC converter shutdown, blocked coolant flow to OBC | Overheated EVSE cable, poor ventilation at public station |
Monitor OBC coolant inlet/outlet temps via scan tool. Physically check for debris in OBC fins and verify coolant flow through the OBC’s dedicated loop. An IR camera helps here, too. |
Digging Deeper: Common Internal Failure Points
Once you’ve narrowed it down to the vehicle, it’s time to get specific. Here’s what I typically find failing in these systems:
On-Board Charger (OBC)
This unit lives a tough life, constantly handling thermal cycling and massive electrical loads. Inside, you’ve got power semiconductors like IGBTs or MOSFETs that just degrade over time, especially if cooling isn’t perfect. I’ve pulled units where the circuit board had literally delaminated from the heatsink, creating a thermal hotspot that eventually fried the components. Moisture intrusion is another big one—a cracked or poorly sealed OBC housing can let water in, corroding the high-current AC input terminals. That corrosion increases resistance, which then triggers overtemperature or voltage drop faults. And don’t forget the OBC’s own dedicated coolant loop (using dielectric fluid); a clogged radiator or a failed pump in that system will absolutely cause chronic overheating and eventual failure.
Battery Management System (BMS)
The BMS is the real gatekeeper for charging safety. It’s constantly monitoring the isolation resistance between the high-voltage system and the chassis ground. If that resistance drops below, say, 500 kΩ (many systems flag it at 1 MΩ), it’ll throw a P0AA6 code and immediately stop charging. This can mean there’s a real ground fault somewhere in the HV battery or wiring. But I’ve also seen cases where the BMS’s own isolation monitoring circuit fails—a bad opto-isolator or a faulty capacitor can cause it to incorrectly report a low isolation resistance, even when everything else is fine.
A Quick Note on BMS Software:
Don’t always assume a hardware failure. Software glitches are a very real possibility with these complex systems. I’ve seen situations where a BMS incorrectly reports low isolation resistance because of a firmware bug, not an actual physical fault. Many EV platforms have known service bulletins where a simple software reflash resolves repeated charging faults. So, always check for updates before you start tearing into hardware.
High-Voltage Contactors
These are the mechanical relays that connect and disconnect the high-voltage battery. They’re designed for heavy-duty switching, but over time, their contacts can get pitted or carbon-tracked from arcing, especially if the charging process is frequently interrupted. A contactor that’s welded shut or stuck open will absolutely prevent proper charge initiation. And sometimes, it’s simpler: the low-voltage control coil that operates the solenoid can just fail—either an open circuit or a short—preventing the contactor from engaging at all.
The Fix: Getting Your EV Charging Again
⚠️ HIGH VOLTAGE SAFETY WARNING ⚠️
Let me be absolutely clear: most of these repairs are strictly for trained professionals. High-voltage systems carry lethal current. You must follow manufacturer-specific de-energizing procedures, use proper lockout/tagout, and always wear Class 0 insulated PPE. Don’t even think about attempting these repairs yourself unless you are certified.
OBC Replacement Professional Only
BMS Reprogramming Professional Only
Charging Port Cleaning DIY Feasible
HV Contactor Replacement Professional Only
Proving the Fix: Post-Repair Validation
Replacing a part and clearing codes isn’t the end of the job. Not by a long shot. You absolutely have to validate the repair under real-world conditions. Otherwise, that car’s coming right back to your bay.
For contactor work, use your scan tool to verify “Contactor Status: Closed” during charging and “Open” when unplugged. I also check for voltage drop across the contactor terminals while charging; if it’s more than 0.5V, those contacts might still be pitted or corroded, and you’ll have issues again soon. A successful test also means confirming that the pre-charge circuit operates correctly—that’s what prevents huge inrush current spikes when the main contactors close.
Prevention, Costs, and Smart Decisions
Nobody wants a charging fault, so a little proactive care goes a long way. And if you do end up with a problem, you need to know what you’re getting into financially.
Economic Decision: When to Repair, When to Walk
Here’s my rule of thumb: if the total repair cost starts to creep up past 50% of the car’s current market value, you really need to question if it’s worth it. But before you even get there, remember this: most EVs come with an 8-year/100,000-mile warranty on the high-voltage battery and its associated charging system components. ALWAYS check that coverage before you authorize any out-of-pocket repairs. You might be surprised.
BMS Reprogramming
High success rate if it’s truly a software bug; much lower if there’s underlying hardware damage.
OBC Replacement
Generally a 95% success rate, assuming the diagnosis was spot-on and the cooling system is properly addressed.
HV Contactor
Expect significant labor costs here; accessing these often means getting into the HV battery pack itself.
Smart Charging Habits to Keep You Rolling
-
Follow the Service Schedule: Pay attention to the manufacturer’s recommended service interval for your dielectric cooling system. That’s what protects your OBC from frying.
