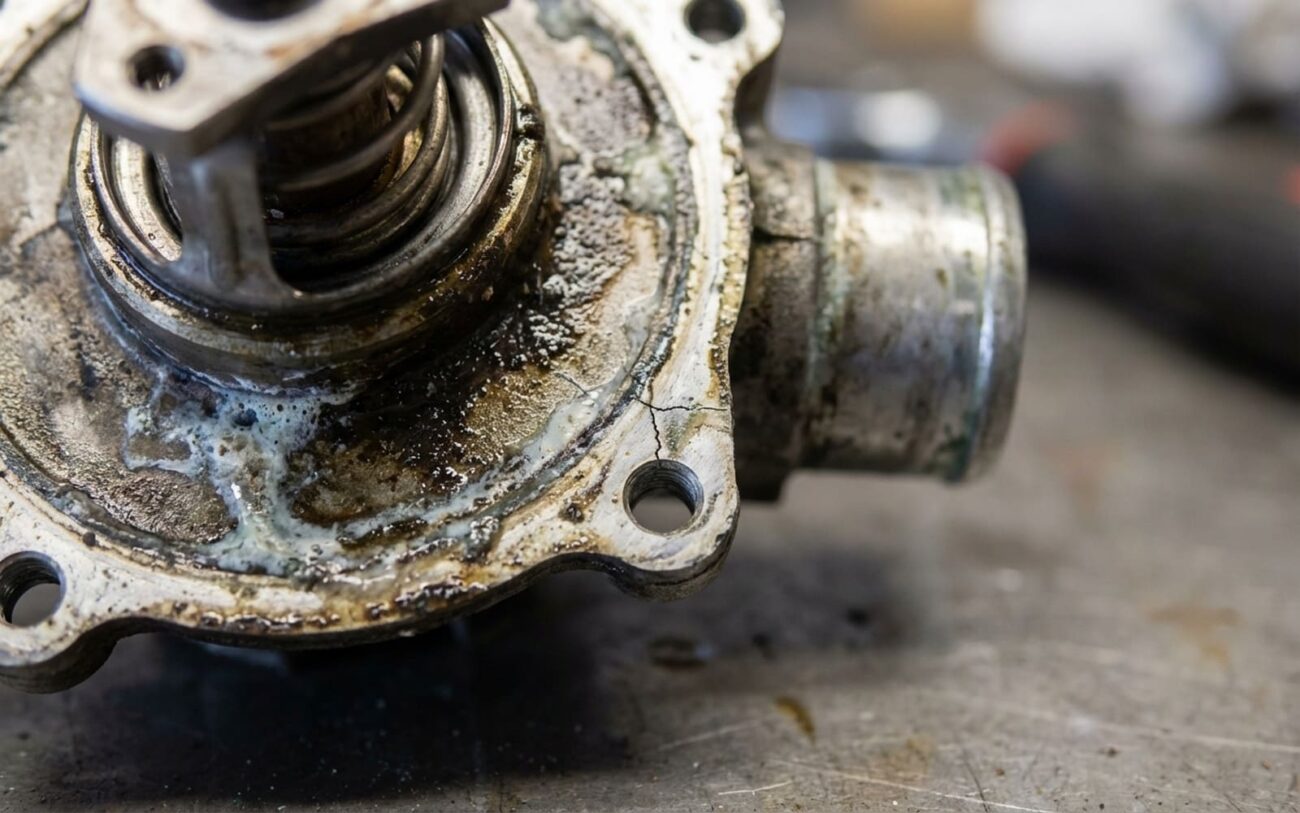
Alright, let’s talk about one of the most frustrating problems a car can have: an internal coolant leak. This isn’t your typical leaky hose or radiator. We’re talking about coolant that’s vanishing without a trace, often causing serious engine damage if not caught early. After 25 years under the hood, I can tell you these leaks are tricky, but they usually fall into two main categories: either the coolant is getting burned in the combustion chamber, or it’s making its way into the cabin through the heater core. And sometimes, a blown head gasket can throw you a curveball that mimics both. The key here is knowing what the symptoms really mean, and then how to properly test for them.
Spotting the Signs: What Your Car is Telling You
The first thing most folks notice is that they’re constantly topping off the coolant reservoir, but there are no puddles on the ground. That’s your primary red flag for an internal leak. But there are other, more specific clues that point us in the right direction.
Overheating Under Load, Then Normal at Idle
If your temperature gauge starts climbing when you’re pushing the engine – say, going up a long hill on the highway – but then settles back down when you ease off or idle, that’s not usually a simple thermostat or water pump issue. What it tells me is that the cooling system is losing volume and, more importantly, pressure. When coolant escapes internally, the system can’t maintain its designed pressure. This lowers the boiling point of the remaining fluid. So, under load, you get hot spots, localized boiling, and sudden steam pockets causing those spikes in temperature. A stuck thermostat will cause overheating, sure, but it won’t explain why your coolant level keeps dropping.
Sweet-Smelling White Exhaust Smoke
This is a dead giveaway for coolant entering the combustion chamber. If you see thick, white exhaust smoke that smells sweet – kind of like maple syrup or antifreeze – you’ve got a problem. Unlike normal condensation, which clears up quickly, this steam hangs around and has that distinct odor. That smell is combustion gases mixing with coolant, and it almost always means a breach in the head gasket, cylinder head, or sometimes, the engine block itself. Don’t ignore this; it’s serious.
Coolant Smell in the Cabin or Damp Floors
If you’re getting a sweet, chemical smell inside the car, especially when the heater is on, or if you notice the passenger side floor mat is damp and sticky, you’re almost certainly looking at a leaking heater core. This is where coolant circulates through your dashboard to provide heat. A leak here means coolant is dripping into the HVAC system and onto your carpet. It’s not usually an engine-killer, but it’s a messy, expensive fix and can lead to mold and a persistent smell.
Immediate Danger Signs: Shut Down NOW
There are two symptoms that mean you need to shut the engine off immediately and get the car towed. No exceptions.
-
Overheating with Misfiring: If the engine starts misfiring while it’s overheating, that could mean coolant is pooling in a cylinder. This is a recipe for hydro-lock, where the piston tries to compress liquid – which it can’t do – and you end up with a bent connecting rod. That’s usually game over for the engine.
-
Milky Residue on the Dipstick or Oil Cap: This is what we call “milkshake oil.” It means coolant has mixed with your engine oil. Coolant destroys oil’s lubricating properties. I’ve seen engines ruined in under 50 miles once this happens. Your bearings will be toast, and the engine will seize. Stop driving, period.
My Diagnostic Approach: Finding the Real Culprit
You can’t just guess with internal leaks. Relying on symptoms alone is how you end up throwing money at the wrong parts. My approach is methodical: use the observable clues to narrow things down, then confirm with the right tools. Here’s how I typically isolate the true source.
Step 1: The Cooling System Pressure Test
This is my go-to first step for any unexplained coolant loss. I’ll connect a pressure tester to the radiator or expansion tank and pump the system up to its cap rating, usually around 16 psi. Then I let it sit for at least 20 minutes, sometimes longer if it’s a slow leak. If the pressure drops and I can’t find any external leaks – no drips, no wet spots on hoses or the radiator – then I know the coolant is going somewhere internal. This test alone won’t tell me where, but it confirms an internal problem.
Pro Tip: Sometimes, a small crack or porosity only leaks when the engine is hot and components expand. If the cold pressure test is inconclusive but you’re still losing coolant, I’ll run the engine to operating temperature, then shut it off and immediately pressure test it again.
Step 2: Pinpointing Combustion Leaks
If I suspect coolant is entering the combustion chamber (white smoke, sweet smell, or confirmed pressure drop without external leaks), my next move is a combustion leak tester, often called a “block tester.” This tool uses a chemical dye that changes color if it detects hydrocarbons (combustion gases) in the coolant. It’s pretty definitive. If it turns yellow, you’ve got combustion gases getting into your coolant. I might also use a 5-gas analyzer for a more precise reading; anything over 100 ppm of hydrocarbons in the coolant confirms the intrusion.
Once I confirm combustion gas intrusion, I’ll follow up with a cylinder leak-down test. This involves pressurizing each cylinder with compressed air while the piston is at Top Dead Center. If I hear air bubbling in the coolant reservoir, or see the coolant level rise, that tells me which cylinder has the breach. A borescope – a tiny camera – can then be snaked into the cylinder to visually inspect the cylinder walls and head for cracks or damage, especially during pressurization.
Step 3: Isolating Heater Core Leaks
For that sweet smell in the cabin or damp floor, the heater core is the prime suspect. Here’s how I check it:
-
First, I’ll pressurize the cooling system again, just like before. But this time, I make sure the heater controls are set to “Hot” and the blower is on high. This ensures maximum flow through the heater core.
-
Then, I get under the dash with a mirror and a bright light. I’m looking for any signs of seepage or drips from the heater core itself or its connections. It can be tight in there, so a good mirror is essential.
-
For added accuracy, I often add UV dye to the coolant. After letting it circulate for a bit, I’ll scan the HVAC drain tube (usually under the car) and the area around the core with a UV light. Coolant will glow brightly, making even tiny leaks obvious.
-
Also, check the HVAC drain tube. It’s designed to let condensation out. If you see coolant-colored fluid dripping from it, that’s a definite sign of a heater core leak.
Why It Happens: Root Causes I’ve Seen
Understanding why a component fails helps in both diagnosis and prevention. Internal leaks usually aren’t random; there’s a reason behind them.
Engine Block Leaks: The Deep Dive
When the engine block itself is leaking coolant internally, it’s almost always one of three things: casting defects, severe thermal stress, or long-term corrosion. I’ve seen some aluminum engines, especially certain turbocharged models, come out of the factory with thin or porous cylinder walls. It’s a manufacturing variance, a quality control issue. For example, there was a TSB on some Ford EcoBoost engines for this exact problem – porosity in the coolant passages between cylinders. These defects often don’t show up until high mileage or after the engine has experienced an overheating event that stresses the weak points.
Thermal stress cracks are another common culprit. Aluminum expands and contracts a lot with temperature changes. If an engine severely overheats – maybe from coolant starvation or a blocked passage – one area can get much hotter than another. The stress from this uneven expansion can exceed the material’s limits, leading to a crack. These cracks usually form between cylinder bores or from a cylinder wall into a water jacket. Unlike a head gasket, you can’t fix a block crack by just re-torquing bolts or replacing a gasket; the metal itself is compromised.
And then there’s corrosion. It’s a slow killer, especially in aluminum blocks. Using the wrong type of coolant, mixing different types, or topping off with tap water (which contains minerals) can create electrolytic conditions. Over years, this eats away at the metal from the inside, creating pinholes or thinning the walls until they eventually fail. I’ve seen blocks ruined this way on engines that were otherwise mechanically sound but chemically neglected.
Heater Core Failures: A More Predictable Problem
Heater cores tend to fail in more predictable ways. Most are made of aluminum or brass, often with plastic end tanks. They’re constantly subjected to thermal cycling (hot to cold) and engine vibration. Over time, the solder joints where the inlet/outlet tubes connect to the core can weaken and crack. The core can also corrode internally, especially if old or contaminated coolant has been sitting in it for too long. When a heater core leaks, the coolant usually drips into the HVAC housing and finds its way out the drain tube, or it soaks into the carpet. The good news is that, unlike engine block issues, a leaking heater core rarely threatens the engine’s integrity. The bad news is it can make a real mess of your car’s interior.
The Fix: What It Takes to Make It Right
This is NOT a DIY Job. Seriously.
Let me be absolutely clear: fixing internal coolant leaks is not for the home mechanic. You’re dealing with engine internals or complex HVAC systems, which means specialized tools, proper safety training, and the right PPE are non-negotiable. There are no safe shortcuts here.
External Block Epoxy Repair Professional Only
Rear Freeze Plug Replacement Professional Only
Block Replacement / Engine Swap Professional Only
Heater Core Replacement Professional Only
Post-Repair Validation: Trust, But Verify
A good technician never assumes a repair worked without thorough testing. Once the work is done, my job isn’t finished until I’ve validated the fix. This step is critical to ensure you don’t end up back in the shop a week later.
For External Block or Hose Repairs
If it was an external block repair (like an epoxy patch, or a freeze plug) or a hose connection, I always perform a pressure test. I’ll pressurize the system to 16 psi (or whatever the cap’s rating is) and monitor it for at least 30 minutes. No drop on the gauge means success. If I used UV dye during diagnosis, I’ll shine that UV light over the repair area again – tiny seeps are easy to miss with the naked eye.
For Engine Internal Leaks (Head Gasket, Block, Cylinder Head)
After replacing a cylinder head, head gasket, or even the block due to a combustion leak, proper validation is non-negotiable. I’ll run the engine to full operating temperature, then use a combustion leak tester (that block tester with the chemical dye) or a 5-gas analyzer to check the coolant for hydrocarbons. A clean result – 0 ppm HC – is what we’re looking for. I also use coolant test strips to confirm there’s no oil contamination remaining in the system. You want to make sure the oil cooler wasn’t compromised and that all traces of the “milkshake” are gone.
For Heater Core Replacements
Heater core jobs require a multi-pronged approach for validation:
-
First, I’ll run the heater on high for a good long while. There should be absolutely no sweet smell coming from the vents. If there is, something’s still leaking.
-
Second, I’ll check the HVAC drain tube under the car. It should only be emitting clear water (condensation). Any coolant-colored fluid means the new core, or its connections, are leaking into the housing.
-
Third, I’ll pressure-test the entire cooling system again. This confirms there are no leaks at the new core’s connections under the dash, which can be tricky to get right.
Making the Call: Cost, Risk, and Value
Repair costs for internal coolant leaks vary wildly, and the decision often boils down to the car’s value versus the repair investment. My rule of thumb for customers is this: if the repair cost exceeds 60% of the car’s private-party value in “Fair” condition, you really need to consider replacement. Putting $7,000 into a $10,000 car leaves very little room for the inevitable unexpected repairs that pop up on older vehicles. It’s not just about this one fix; it’s about the overall remaining service life of the transmission, suspension, electrical system, and everything else.
External Block Epoxy Repair
DIY: $50 (epoxy, prep tools). Success Rate: Around 60% in my experience (highly dependent on location, surface prep, and the technician’s skill). Secondary Risk: A sudden failure can lead to rapid coolant loss, severe overheating, and catastrophic engine damage.
Block Replacement / Engine Swap
DIY: $2,500+ (remanufactured block, specialized tools, hoist). Success Rate: 95% (when performed by an experienced technician following all procedures). Secondary Risk: Assembly errors, overlooked secondary damage, or improper break-in can lead to premature failure of the new engine.
Heater Core Replacement
DIY: $150 (part only, but requires specialized tools and patience). Success Rate: 98% (when done by an experienced technician). Secondary Risk: Damage to delicate dash components, HVAC housing, or critical airbag systems during the extensive removal and reinstallation process.
Cost-Saving Tip: Find a Specialist
If your car is out of warranty, don’t automatically go to the dealership. Independent specialists often offer internal coolant leak diagnosis and repair services at competitive costs. But you absolutely must verify their experience – this isn’t a job for a general mechanic who mostly does oil changes. A qualified indie shop, especially one known for engine work, might save you thousands without compromising quality.
Prevention is Key: Don’t Let it Happen to You
Most internal coolant leaks are absolutely preventable. After all these years, I can tell you the single biggest factor is proper coolant chemistry. Always use the OEM-specified type – whether it’s Honda Type 2, Toyota Long Life, GM DEX-COOL, or whatever your manufacturer calls for. And always, always mix it 50/50 with distilled water. Tap water is full of minerals that accelerate corrosion, especially in aluminum components. Mixing different coolant types can lead to chemical reactions, gel formation, or galvanic corrosion, which will eat away at your heater core and block passages from the inside out.
And don’t believe the “lifetime” coolant hype without verification. Extended-life coolants still degrade over time. I’ve seen coolant turn acidic after 10 years, leading to internal erosion. A simple pH test strip, available at any auto parts store, can tell you if it’s time for a flush and refill, even if the mileage isn’t quite there yet.
Key Prevention & Monitoring Steps I Recommend
-
Monthly Visual Inspections: When the engine is cold, pop the hood and look for dried white, pink, or rust-colored residue. Pay close attention to the engine block, especially around freeze plugs, cylinder heads, and the valley of V-style engines. These are often early signs of external seepage that can turn internal.
-
Heater Core Vigilance: At the very first hint of that sweet smell from the vents, or any dampness on the passenger floor, investigate immediately. Check the HVAC drain tube – if you see anything other than clear water, you’ve got a problem. Catching a small heater core leak early can save you from mold, persistent odors, and a much more costly interior cleanup down the road.
-
Coolant Level Checks: Make it a habit to check your coolant reservoir level regularly, especially before long trips. A consistently low level without obvious external leaks is your primary indicator of an internal issue.
