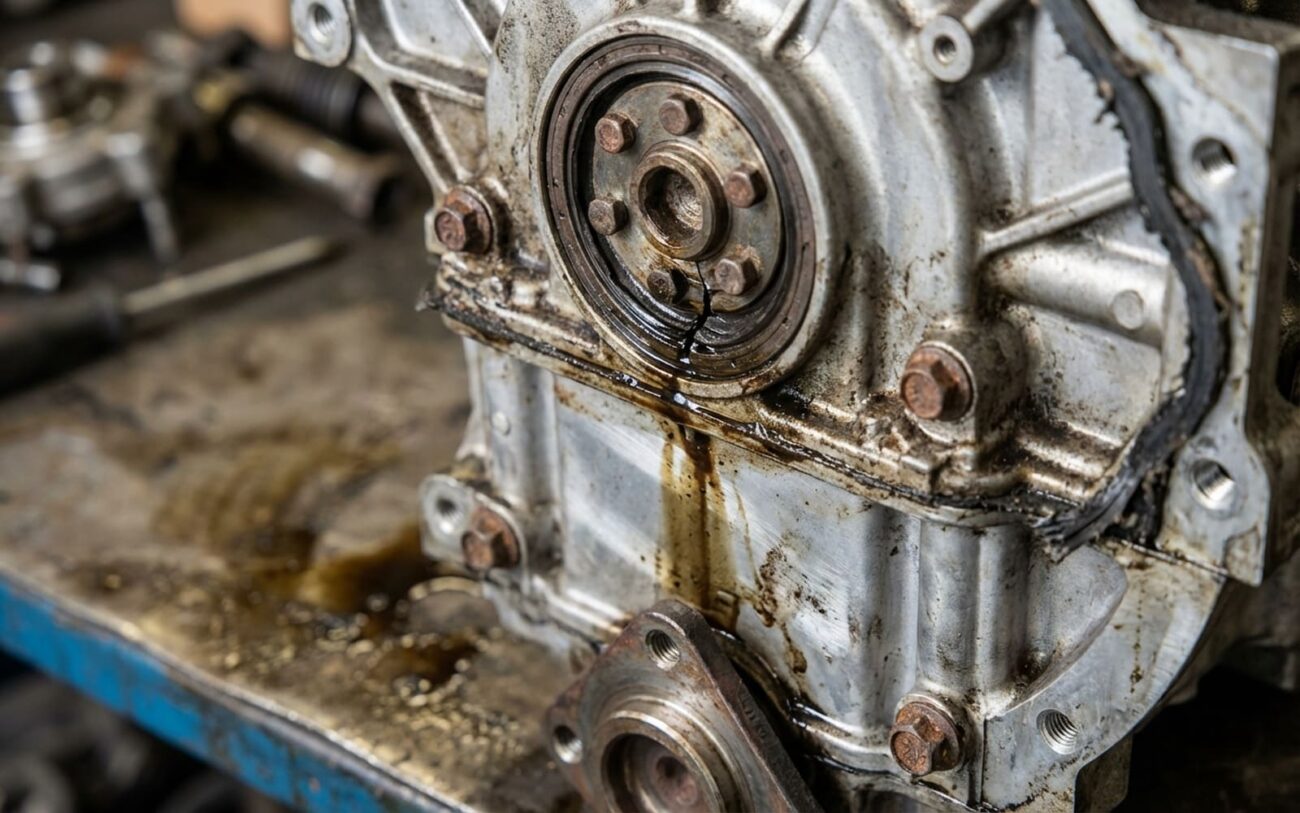
Alright, let’s talk about something that makes every mechanic’s stomach drop: low oil pressure. Specifically, on those GM 2.0L and 2.4L Ecotec engines. If that red oil can light pops up on your dash, especially when the engine’s hot and idling, you need to pay attention. This isn’t your average “check engine” light you can put off. This is a “pull over now, shut it down, or you’re buying a new engine” kind of light. I’ve seen too many Ecotecs come in making expensive noises because someone thought they could drive it home.
What Your Engine’s Telling You: Symptoms of Trouble
Beyond that terrifying red light, you’ll often hear it before you see anything else. Listen for a rhythmic tapping or knocking, usually from the lower end of the engine, near the oil pan. It’ll speed up with RPM. That’s the sound of metal-on-metal, typically your connecting rod bearings screaming for oil. I’ve had plenty of these Ecotecs roll into my bay with that distinct knock, and once you hear it, you know the damage is already done, and the clock is ticking.
Another thing I look for is a slow oil leak. If you see seepage high on the front cover, above the oil pan gasket line, that’s a red flag. On these engines, the oil pump is actually cast right into that front cover. A crack or a porous spot in the pump housing itself can lead to a persistent leak along the seam where the cover meets the block. It’s not always obvious, but it’s a tell-tale sign.
Now, your computer might throw some codes, like P0521 (oil pressure too low) or P06DD (oil pressure control solenoid performance). These are helpful, sure, but they don’t tell the whole story. They just confirm the PCM sees a problem. They don’t tell you why the pressure is low or what part of the pump system is actually failing. That’s where real diagnostic work comes in.
Diagnosis: Is It Really the Oil Pump, Or Something Else?
Okay, so you’ve got the light, maybe the noise, possibly a leak. The very first thing I do—and this is non-negotiable—is verify the actual oil pressure with a mechanical gauge. Don’t trust the dashboard light, don’t just trust what your scan tool says the sensor is reading. Those electrical sensors can lie, and you need to know the true pressure at the source.
Here’s how: I pull the oil pressure sensor out and thread in a good mechanical test gauge. Fire up the engine and watch that needle. I check it at hot idle, and then again at around 2,000 RPM. If your hot idle pressure is consistently below 20 psi—or it just doesn’t build up properly when you rev it—then you’ve absolutely confirmed a serious oil delivery problem. That’s your starting point.
Now, just because you have low pressure doesn’t automatically mean the pump itself is shot. There are a few common culprits that can mimic a bad pump. I’ve seen plenty of cases where it was:
- A faulty oil pressure sensor or wiring: This is the easiest fix, but you can only rule it out with that mechanical gauge.
- A clogged oil pickup tube: This is surprisingly common, especially if someone’s been sloppy with RTV sealant during a previous repair, or if there’s a lot of sludge in the pan. It starves the pump of oil.
- Excessive main or rod bearing clearance: If the engine has high mileage, or has been poorly maintained, the bearings themselves can wear out. When the clearances get too big, even a perfectly good oil pump can’t maintain proper pressure. The oil just leaks out of the clearances too fast.
To help you sort through the possibilities, here’s a quick breakdown of what I look for:
| Symptom | Likely Oil Pump Issue | Common Mimics | My Definitive Test |
|---|---|---|---|
| Low oil pressure warning | Worn pump gears, stuck pressure relief valve, cracked or porous pump housing. | Faulty oil pressure sensor, clogged oil pickup screen, excessive main/rod bearing clearance. |
Hook up a mechanical gauge. If pressure is low with the right oil and level, you’ve got a delivery problem. Then you isolate the source. |
| Rod bearing knocking noise | Secondary damage from oil pump failure leading to inadequate lubrication. | Timing chain slap, wrist pin noise, piston slap. |
That knock will get louder under load and be strongest near the oil pan. Confirm with your mechanical oil pressure test. If pressure is low and you hear this, you’ve got internal engine damage. |
| DTC P06DD | Failed oil pressure control solenoid (integrated into the pump assembly). | Open/short in wiring harness, poor ECM connection, low system voltage. |
Check solenoid resistance to spec and use a capable scan tool for a bidirectional control test. If the electrical side is good, the solenoid likely has a mechanical issue. |
| Front cover oil leak | Crack or casting porosity in the aluminum pump housing. | Front crankshaft seal, front cover gasket, oil pan gasket, or timing cover seal. |
Clean the area like your life depends on it, add UV dye to the oil, and run the engine through several heat cycles. A leak above the crank, but below the timing chain cover, often points to the pump housing itself. |
Why These Ecotec Oil Pumps Fail (The Nitty-Gritty)
Okay, so you know the symptoms and how to confirm low pressure. But why do these Ecotec oil pumps give up the ghost? A lot of it comes down to their design. On the Gen I and Gen II Ecotec engines (we’re talking LEA, LUK, and their cousins), the oil pump isn’t a separate, bolt-on unit. It’s actually cast right into the front engine cover. This saves space and parts, but it also means when the pump fails, you’re often replacing the whole cover assembly.
I’ve seen a few common failure points:
- Casting Porosity: This is a manufacturing flaw. Sometimes, tiny voids or weak spots in the aluminum casting of the front cover can lead to internal pressure leaks, or even external oil seepage right from the pump housing itself. GM has had service bulletins on this for certain production runs, so it’s not just a random thing—it’s a known issue that can pop up.
- Stuck Pressure Relief Valve: Inside the pump is a small piston, the pressure relief valve. Its job is to open up and dump excess oil back to the pan if pressure gets too high. But if your oil changes have been stretched out, or if you’re not using the right Dexos1-approved full synthetic oil, sludge and varnish can build up. That gunk can cause the valve to stick open, letting oil bypass the system and killing your pressure.
- Worn Pump Gears: The gears inside the pump are tough, but they’re not invincible. If your engine has seen any kind of abrasive contamination—maybe some clutch material from a failing dual-mass flywheel, residual casting sand from the factory, or even metal shavings from other internal wear—those particles will grind down the pump gears. Once the gears wear, they can’t move as much oil.
- Timing Chain System Issues: The oil pump is driven by a short chain off the crankshaft. If there are problems with the timing chain tensioner, guides, or if the front cover wasn’t installed perfectly straight during a previous repair, that can put undue stress on the pump drive chain, accelerating wear on the pump gears or even causing misalignment.
- Cracks in the Housing: Thermal cycling (engine heating up and cooling down repeatedly) or improper torque during assembly can lead to stress cracks in the aluminum front cover, especially around the pump cavity. Remember, aluminum and cast iron expand and contract at different rates, so proper torque is critical.
It’s worth reiterating: sometimes the pump is just a victim. A completely clogged oil pickup tube will starve even a brand-new pump. And if an engine has 180,000 miles on it and the main bearings are worn out, you’ll have low pressure regardless of how good the pump is. In those cases, the pump is doing its job; it’s the engine that’s worn out.
The Fix: Your Repair Options & What’s Really Involved
Alright, so you’ve confirmed the oil pump is the problem. Now for the bad news: because that pump is integrated into the front cover, this isn’t a quick or easy job. We’re talking major engine disassembly here. You’ve got to get the timing chain, crankshaft sprocket, and all the associated bits out of the way just to get to the cover. This demands precision, especially when it comes to re-timing the engine correctly.
Here are the paths you can take, and what I’ve learned about each:
- Sealing a Minor External Leak: If you’ve got a small, external crack or some porosity causing a slow leak on the housing face, some guys try to seal it up with a high-strength anaerobic sealant, like Loctite 638. You have to clean the area absolutely perfectly, get it bone dry and oil-free, and sometimes even machine the surface a bit. In my experience, this is a temporary fix at best, and only for non-structural leaks. I wouldn’t rely on it for anything critical.
- Oil Pump Repair Kit: If the internal gears are worn, or the pressure relief valve is stuck, you can get a repair kit. These usually come with new gears, relief valve components, and seals. This is a viable option, but you absolutely must measure the gear-to-housing clearances with feeler gauges. Even a tiny bit of wear can drastically reduce the pump’s output. And if the oil pressure control solenoid is the culprit (P06DD code), that’s usually part of the pump module, so replacement is often the only reliable way to go.
- Replacing the Entire Front Cover Assembly: If you’ve got a significant crack in a critical area, or if the internal porosity is truly affecting pressure, then replacing the whole front cover assembly is the only safe and reliable repair. Quality varies wildly with aftermarket units—some even replicate the original casting flaws. For peace of mind, I always recommend going with an OEM GM cover or a high-reputation remanufactured one. Used covers? That’s a roll of the dice unless you can personally verify its condition and mileage.
I’ve heard people talk about chemical flushes to free up a stuck relief valve. And yeah, in a rare, borderline case where pressure is just slightly off and there’s no knocking noise, a really good solvent additive might help. But honestly, it’s a long shot. If that valve is gummed up enough to cause a fault, it’s not coming clean without taking things apart. Don’t waste your time or money on chemicals if you’re already seeing low pressure or hearing engine noise—you’re just delaying the inevitable teardown.
Reassembly Tips That Matter
When you’re putting this whole thing back together, cleanliness is absolutely critical. One tiny speck of dirt in that pump cavity can ruin brand-new gears. Before you even think about starting the engine, you need to prime the oil pump. You can do this manually with a drill-driven tool, or by cranking the engine with the fuel disabled until you see oil pressure build. This ensures oil gets to all those critical bearings before the engine fires up for real. And for the love of all that’s holy, follow GM’s torque specs and sequence exactly—especially for those front cover bolts. Many use a torque-to-yield (TTY) or torque-plus-angle method. Get it wrong, and you’re looking at a warped cover or a new leak, or worse, timing issues.
Making Sure the Fix Actually Worked
You’ve done the hard work, everything’s buttoned up. Don’t just assume it’s fixed because the warning light is off. That’s a rookie mistake. You need to verify everything.
First, a thorough leak check. Run the engine up to full operating temperature, shut it down, and let it cool completely. Do this two or three times. If you used UV dye, grab your black light and inspect that front cover area like a detective. Small seeps might not show up until the third heat cycle, trust me.
Next, and this is crucial, retest that oil pressure mechanically. Put your gauge back in. Verify pressure at hot idle—you’re looking for at least 20-25 psi. Then check it at 2,000 RPM; typically, that should be 40-60 psi, depending on your oil viscosity and ambient temperature. Always compare these numbers to the factory specs for your specific engine and model year. If those numbers are still low, you haven’t fixed it. Don’t drive it.
Finally, clear any lingering codes with a scan tool. Make sure P0521 or P06DD don’t come back. While you’re there, monitor the live oil pressure data on your scan tool. It should closely match what your mechanical gauge is telling you. If the PCM is still reading low, but your mechanical gauge shows good pressure, then you’ve likely got a faulty sensor or a wiring issue to chase down.
The Bottom Line: What This is Going to Cost You
Let’s not sugarcoat it: this isn’t a cheap repair. The biggest factor here isn’t necessarily the parts, it’s the labor. That front cover is buried deep in the timing system, so getting to it and putting it back together correctly is a solid 8 to 12 hours of work, sometimes more depending on what else needs to be addressed. Here’s what you can realistically expect:
| Repair Type | DIY Parts Cost | Professional Shop Estimate | My Take on Success Rate | Risk if It Fails |
|---|---|---|---|---|
| Pump Kit/Seal Repair | $150 – $300 | $900 – $1,500 | High, but only if the housing is perfect and there’s no bearing damage. | You’re looking at continued oil starvation, which means spun bearings, piston damage, or a completely seized engine. |
| Entire Front Cover Assembly Replacement | $400 – $600 | $1,500 – $2,200 | Very high, assuming it’s installed by someone who knows what they’re doing. | Incorrect reassembly can lead to timing misalignment (valve-to-piston contact, bent valves) or rapid timing chain wear. |
This kind of repair often becomes a “financial decision point” for car owners. My rule of thumb is this: if the repair cost is more than 50% of what the vehicle is worth (private-party value, not dealer retail), and the car has north of 120,000 miles on it, you really need to consider your options. Sometimes, biting the bullet and putting in a good used or remanufactured long-block engine makes more sense in the long run, especially if you suspect internal damage has already occurred. It’s a tough call, but one I’ve helped many customers make.
Prevention: How to Keep Your Ecotec’s Oiling System Healthy
While you can’t really prevent a manufacturing defect like a porous casting, you can drastically reduce the risk of oil pump and engine failure through diligent maintenance. This isn’t just “good practice” on Ecotecs; it’s absolutely essential.
The Golden Rule: Oil Matters!
You absolutely must use only Dexos1-approved full synthetic 5W-30 oil. I can’t stress this enough. This isn’t optional. It’s specifically formulated for these engines, offering superior high-temperature stability and sludge resistance. And don’t cheap out on the filter—a quality filter like an AC Delco PF48 or its equivalent is part of the package.
Change that oil every 5,000 miles. Period. Don’t listen to what the oil life monitor says if it’s telling you to go longer. These Ecotec engines are particularly sensitive to oil degradation, and extended intervals are a direct path to varnish buildup in that critical relief valve and the oil control solenoid.
If your vehicle has an oil pressure readout in the driver information center, keep an eye on it. Get to know what “normal” looks like for your specific car. A gradual, subtle drop in pressure over time can be an early warning sign of bearing wear or pump degradation, long before that scary red light ever comes on.
And finally, a word of caution about modifications. Avoid aftermarket tunes or things like EGR deletes that significantly increase engine load or underhood temperatures without corresponding improvements to the oiling system. More heat and more carbon buildup are just asking for trouble with these engines. Keeping it clean and within factory parameters is your best bet for a long, healthy engine life.
