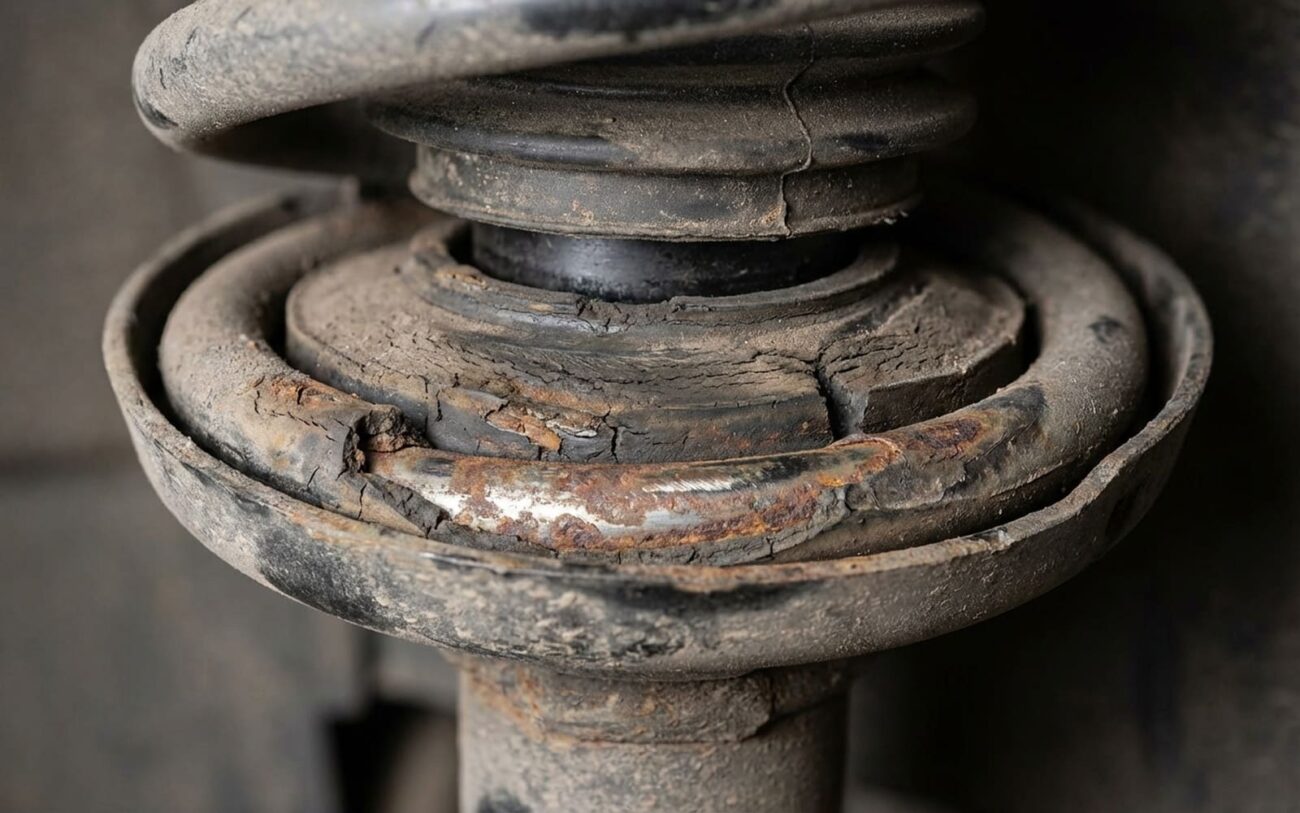
After 25 years under the hood, I can tell you that few suspension noises are as common—or as potentially dangerous—as a failing coil spring seat. If you’re hearing a persistent squeak or a sharp clunk when you hit bumps, especially after the car’s been sitting overnight, your spring seat is likely talking to you. And when it talks, you better listen. This isn’t just an annoyance; it’s a critical safety issue that can lead to catastrophic failure if ignored.
Squeak or Clunk? What Your Suspension is Telling Me
Let’s break down those noises, because they tell me different things about the problem. A high-pitched, rhythmic squeak or creak, especially noticeable at low speeds over speed bumps or driveway curbs, usually means you’ve got metal-on-metal contact. This happens when the protective rubber isolator pad between the coil spring and its seat wears out, or when corrosion (we call it fretting corrosion) builds up on the contact surfaces. Road salt, moisture, and general crud work their way in there, eating away at the metal. Every time the suspension moves, that rough, pitted surface grinds against the spring. It’s an early warning sign, but don’t let it fool you into thinking it’s minor.
Now, if you hear a sharp, distinct clunk or knock, that’s a whole different ballgame. That’s not just rubbing; that’s slack, movement, or actual physical damage. I’m talking about a collapsed, cracked, or severely corroded spring seat that’s allowing the spring to shift or even impact the chassis or strut body during compression. You’ll often hear this as a single, sharp “clunk” when you hit a pothole or a significant dip. In my shop, I’ve seen this misdiagnosed as everything from a bad sway bar link to a blown strut cartridge more times than I can count. But if that spring seat is compromised, it’s not just noise—it’s a serious safety hazard.
Why These Things Break: It’s a Tough Life Down There
The spring seat is one of the most abused, yet often overlooked, components in your suspension. It’s essentially a simple stamped steel cup, usually with a rubber isolator, designed to hold the end of your coil spring. Think about it: it’s under constant load, supporting hundreds of pounds, every single time your car moves. And where is it located? Right in the splash zone – low, exposed, and directly in the path of every bit of road grime, salt, and standing water your tires kick up.
The Concept
I often tell customers to think of the spring seat like the foundation of a house built on a salt marsh. Constant pressure and corrosive elements are just going to eat away at its structural integrity over time. It’s not a matter of if, but when.
Corrosion is the number one killer here. Saltwater gets into that tiny gap between the spring and the seat, leading to galvanic and fretting corrosion. This literally eats the metal from the inside out, thinning the walls until they just can’t handle the stress anymore and crack. Physical damage is the second big cause. Hit a deep pothole or curb hard enough, and that impact can bend the seat’s retention lip. That creates a new stress point, and eventually, you get a crack.
My Diagnostic Approach: Pinpointing That Pesky Noise
Diagnosing suspension noise is all about eliminating possibilities. Lots of things can sound like a bad spring seat—dry strut bearings, worn control arm bushings, loose sway bar links, even a failing strut cartridge. That’s why I always use a methodical approach, not just throwing parts at it until the noise stops.
Visual Inspection (First Things First)
The Bounce Test (Listen Closely)
Stethoscope Isolation (Get Specific)
The Lubricant Trick (The Final Confirmation)
My Take: Don’t overlook the obvious. On some vehicles, like older Ford Explorers or certain GM trucks, the lower spring isolator is just a rubber pad that sits in the seat. Those can dry out, crack, or even fall out entirely. Always check for that first. And if you’re hearing a clunk, don’t just assume it’s a sway bar link; the spring seat is a common culprit that gets missed.
Fixing It Right: This is NOT a DIY Job
Professional Territory Only
Let me be absolutely clear: repairing spring seats involves handling high-tension coil springs. These springs store immense energy, and if they’re not compressed and released correctly with the right tools, they can cause severe injury or even death. This work requires professional-grade spring compressors, specialized tools, and precise torque procedures. Don’t even think about tackling this without proper training and equipment.
Lower Spring Seat Replacement Professional Only
Upper Strut Mount & Seat Assembly Professional Only
Unibody Structural Repair Body Shop Required
Did We Fix It? My Post-Repair Checklist
Every good repair needs a proper sign-off. Here’s what I always do:
-
Torque Under Load: I make sure all fasteners, especially those for control arm bushings or strut mounts, are torqued with the vehicle’s full weight on its wheels. This prevents premature wear on rubber bushings (a common mistake I see).
-
Visual Confirmation: I double-check that the coil spring is seated fully and squarely against its stop in the new seat. No gaps, no twists.
-
Road Test: I always take the car for a road test on a known route with some bumps and dips, usually around 15–25 mph. I’m listening for any residual squeak, creak, or clunk. If it’s still there, we missed something.
What’s This Going to Cost Me?
Costs can vary quite a bit depending on your vehicle’s make and model, and where the spring seat is located. Here’s a general idea of what I see in my shop:
Lower Spring Seat Replacement
This is per corner. The parts themselves are usually pretty cheap ($40-$100), but the labor involved in safely compressing that spring and doing the swap is significant.
Upper Strut Mount/Seat
Again, per side. This includes removing the entire strut assembly, disassembling the strut tower, and replacing the mount, bearing, and seat. It’s more labor-intensive.
Unibody Frame Repair
This is body shop territory. It involves structural welding and often requires a full alignment afterward. If this repair approaches 40% or more of your car’s current market value, I’d strongly suggest reconsidering the investment.
A Word on Prevention
The best defense is a good offense. I always tell my customers to get a thorough undercarriage wash every spring to get rid of all that road salt. Also, when you’re doing seasonal tire swaps, take a flashlight and shine it into the spring pocket. Look for rust buildup, any signs of cracked rubber isolators, or deformation. Catching it early can save you a lot of headache—and money—down the road.
