What to Do When Your Battery Thermal Management System Won’t Turn On the Cooling Pump
Alright, let’s talk about the EV battery cooling pump. If yours isn’t kicking on, you’ve got a problem. And I mean a real problem, not just a minor inconvenience. This isn’t about comfort; it’s about the lifeblood of your electric vehicle’s high-voltage battery. That pump is responsible for circulating coolant, keeping the battery pack from overheating. Without it, the Battery Management System (BMS) is going to see trouble coming a mile away. It’ll throw up warnings, limit your power, or even shut down charging entirely to protect itself. Trust me, I’ve seen plenty of EVs towed in or limping into the shop with a “Battery Temperature High” message, and almost every time, the cooling pump was the silent culprit.
You might not even realize it at first. The symptoms can be subtle. The first thing I tell folks is to listen. When you’re DC fast charging or after a hard drive, get near the battery pack – usually under the floor or behind the rear seats – and listen for a soft hum or vibration. That’s the pump doing its job. If it’s silent when it should be working, that’s your first red flag.
Then there are the diagnostic trouble codes (DTCs). These are your confirmation. Codes like P1E00 or P1E01 are common. They mean the BMS sent a command to the pump but didn’t get any feedback. Sometimes you’ll see a P0C2F00, too, depending on the manufacturer.
Flow: 0.0 L/min
Diagnosing the Real Culprit
Now, before you go ripping out the pump, we need to be sure it’s actually the problem. I’ve seen too many people—and even some less experienced techs—just throw parts at an issue. That’s a waste of time and money. The pump isn’t an island; it needs power, a good signal from the BMS, proper coolant levels, and intact wiring. We need to figure out if the pump itself is dead, or if something upstream is telling it not to work.
My approach is always systematic. We’ll check the easy stuff first: fuses, relays, connectors, and the coolant level. Only then do we directly test the pump. Here’s how I break it down in the shop:
| Symptom | Indicates Pump Failure | Common External Causes | Definitive Test |
|---|---|---|---|
| Pump does not run when commanded | Seized rotor, failed motor windings, internal electrical fault. | Blown fuse, failed relay, wiring damage, BMS software fault, low coolant. |
Direct power test: Apply system voltage directly to pump terminals. |
| DTC for pump circuit low/high current or open | Internal open circuit or short in motor windings. | Corroded connector pins, chafed wiring, failed driver circuit in BMS. |
Resistance test: Measure across pump terminals (typically 0.5–5.0 Ω). |
| Pump runs but no coolant flow detected | Detached impeller, clogged internal passages, seized shaft. | Airlock, collapsed/kinked hose, clogged filter, low coolant level. |
Flow verification: Isolate pump and bench-test with temporary coolant source. |
Why These Pumps Give Up the Ghost
So, you’ve done your tests, and you’re sure the pump itself is bad. Happens. These are sealed, designed-for-life DC pumps, but “life” has a way of finding its limits. Knowing why they fail can sometimes help prevent it from happening again. In my 25+ years, here’s what I typically see:
-
Bearing failure: The internal rotor bearings just wear out. This is especially true if the coolant gets contaminated with debris or moisture over time.
-
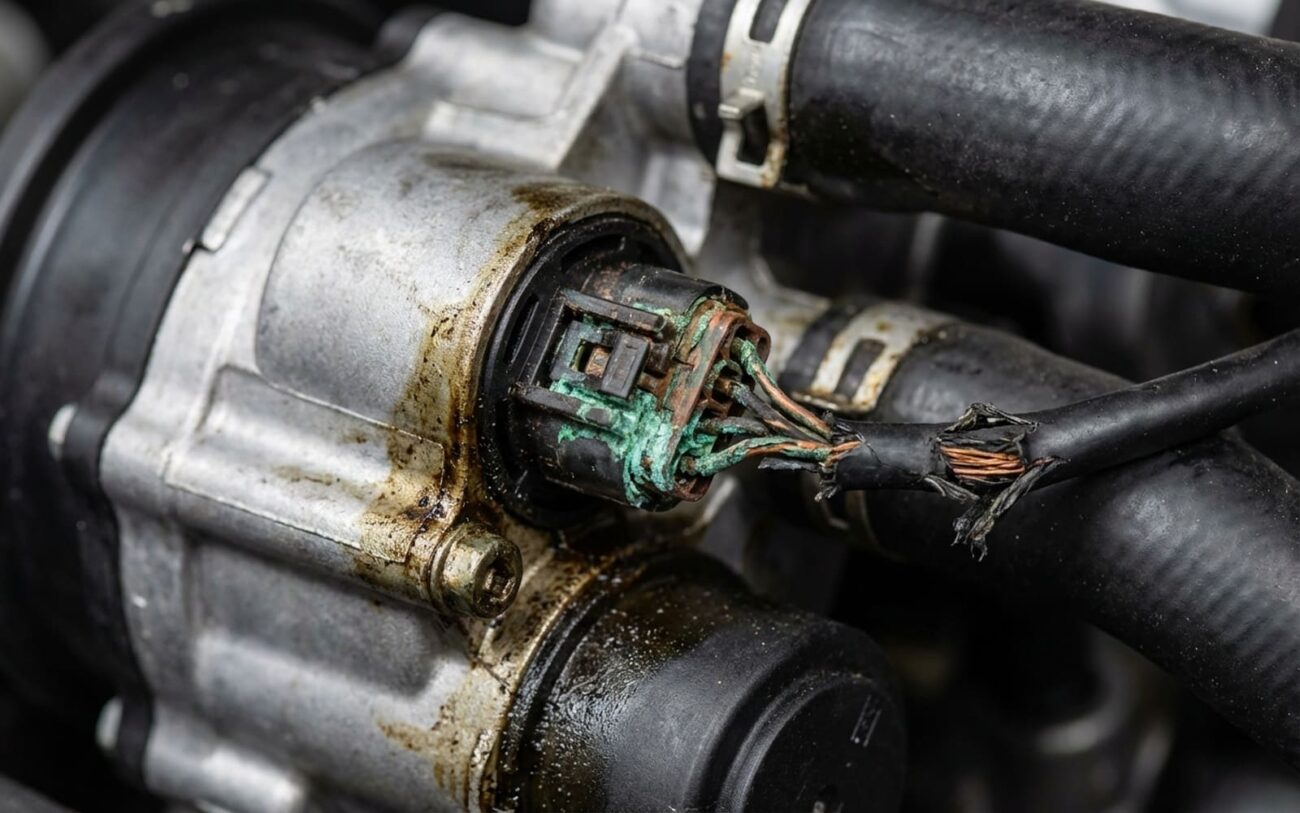
Electrical failure: A degraded shaft seal can let moisture creep in, leading to corrosion or short circuits inside the motor windings.
-
Impeller damage: The plastic impeller can crack from constant thermal cycling or simply detach from the motor shaft. If the pump’s spinning but not moving fluid, this is often why.
-
Winding burnout: Running under continuous high load, or getting hit with voltage spikes, can overheat and fry the stator windings.
Critical Distinction:
A pump that’s just dry or cavitating because of low coolant isn’t “failed” in the same way a seized one is—it’s starved. And if the BMS isn’t even sending a command, that’s not a pump issue at all. Always, always validate the entire system before you condemn the hardware.
Your Options for Repair (And What I Recommend)
HIGH-VOLTAGE SAFETY IS NO JOKE.
Look, I can’t stress this enough: working around high-voltage components in an EV demands specialized training, the right personal protective equipment (PPE), and a healthy respect for electricity. One wrong move can be fatal. And without a proper vacuum fill tool and a bi-directional scan tool, you simply can’t bleed or test this system correctly. This isn’t a DIY job for the inexperienced.
Professional Repair – Full Replacement Recommended
Internal Failure – Replace, Don’t Rebuild
Emergency Workaround Caution
How I Confirm the Job’s Done Right
After all that work, you need to be absolutely sure the system is functioning perfectly. This isn’t just about clearing a code; it’s about protecting that expensive battery. Here’s my checklist in the shop:
-
Command the pump ON: I use a bi-directional scan tool to send an active command to the pump. You should hear it kick on within a few seconds. If not, something’s still wrong.
-
Check pump speed PID: While it’s running, I monitor the “Battery Coolant Pump Speed” in the BMS data stream. It should be in the manufacturer’s specified range, usually somewhere between 2000–6000 RPM.
-
Verify actual flow: Grab an infrared thermometer and check the temperature difference between the inlet and outlet hoses. A healthy system should show a 5–15°C difference, confirming coolant is actually moving and exchanging heat.
-
Listen for gurgling: Check the coolant reservoir. If you hear gurgling, you’ve still got trapped air in the system. That’s a sign the vacuum fill wasn’t done correctly, or there’s a leak somewhere. You need to re-bleed it.
What This Repair Will Cost You
Let’s talk money. Nobody likes unexpected repairs, but it’s better to know what you’re getting into. Here’s a general idea of the costs involved, based on what I see:
| Repair Type | DIY Cost | Shop Cost | Success Rate | Risks of Improper Repair |
|---|---|---|---|---|
| Pump Replacement | $300–$800 (Seriously, not recommended) | $500–$1,500 | >98% (When done right by a pro) | Airlock leading to pump cavitation and rapid re-failure, or worse, battery overheating and permanent damage. |
How to Keep This From Happening Again
Alright, so you’ve fixed it. Now, how do you prevent a repeat performance? It all comes down to coolant maintenance. This isn’t your grandpa’s old engine coolant that you just top off. And it’s definitely not a “fill-for-life” system, no matter what some folks might tell you. Most manufacturers recommend replacing the battery coolant every 10 years or 150,000 miles. Skipping that service is a surefire way to introduce contamination, encourage corrosion, and wear out that pump prematurely.
My Maintenance Wisdom:
Always, always use the specified fluid. I’ve seen too many systems gummed up with sludge and deposits because someone used the wrong glycol coolant—that stuff will destroy bearings in a hurry. Some vehicles, like the early Nissan Leaf (2013–2017), are notoriously sensitive to their thermal management health, so pay extra attention there.
