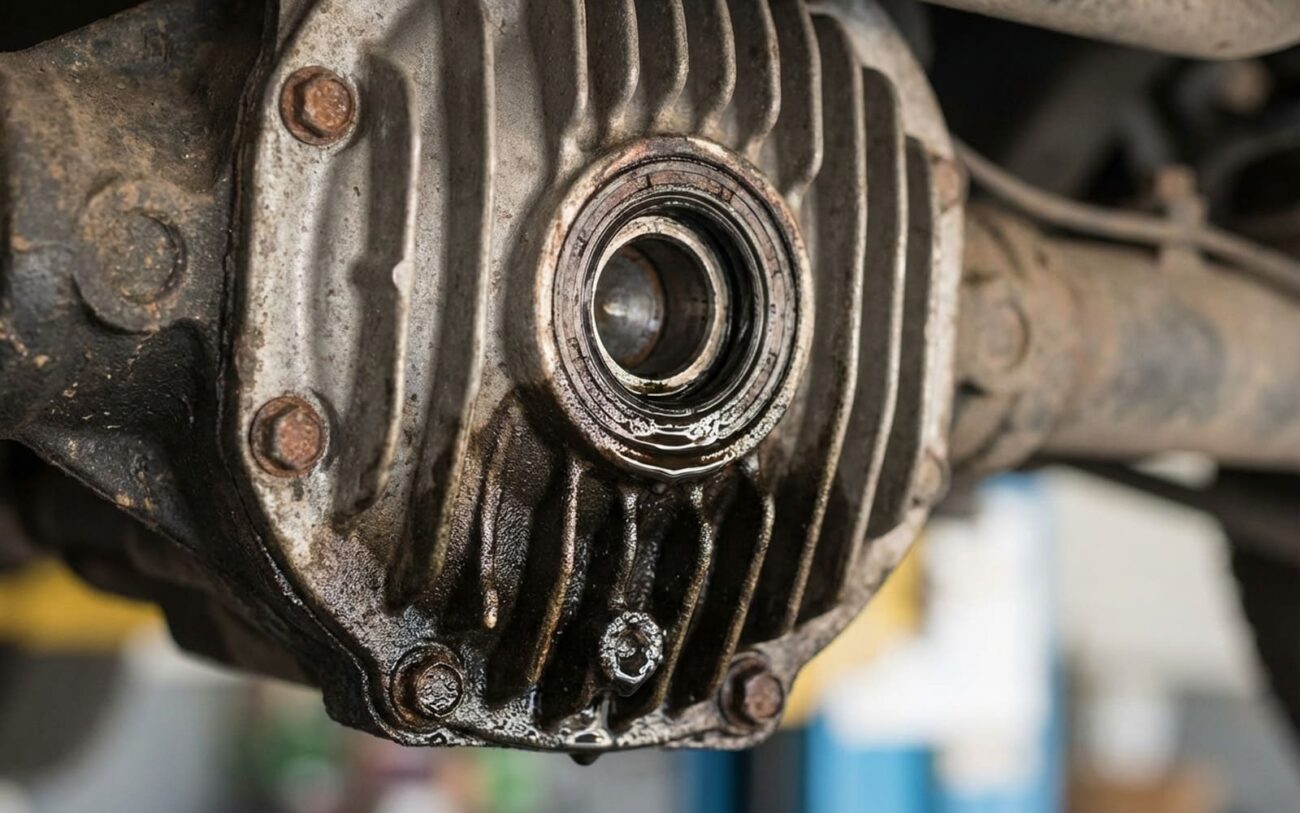
Alright, let’s talk differentials. If you’re hearing or seeing trouble back there, it’s usually because that gear oil is low, or worse, gone. I’ve been wrenching on these things for over 25 years, and I can tell you, a differential begging for fluid isn’t subtle. It’ll give you clear warnings, but you gotta know what to listen for and where to look. Ignoring it? That’s how a small fix turns into a big, expensive headache – or even leaves you stranded.
What Your Differential is Trying to Tell You
When the gear oil level drops, the first thing most folks notice is a noise. It’s usually a consistent whine coming from the back end, not a high-pitched squeal like a belt. This whine changes with your road speed. You’ll hear it loudest when you’re lightly accelerating or just coasting, especially between 30-60 MPH. The faster you go, the higher the pitch, because those ring and pinion gears are spinning quicker, and without proper lubrication, they’re making more metal-on-metal contact. And it’s not just the gears; the bearings inside the carrier or on the pinion shaft start to wear out fast, adding to that symphony of impending doom.
Another big one is a clunk or shudder. You’ll feel this right through the chassis, typically when you let off the gas or hit it suddenly. What’s happening there is excessive backlash – too much play between the gear teeth. As the gear oil breaks down or leaks out, those gear teeth wear away, creating slack. So when you apply torque, those worn gears literally slam into each other. It’s not a subtle feeling, and I promise you, it only gets worse.
The Dreaded Leak: Is it a Simple Fix or a Major Problem?
Now, about leaks. If you spot gear oil pooling under your vehicle or coating the rear differential housing, don’t just assume it’s a simple gasket or seal. Yeah, pinion seals and cover gaskets are common failure points, and those are usually straightforward repairs. But sometimes, that leak is coming straight from the housing itself. That’s a whole different ballgame.
Here’s how I check it in the shop: First, I clean the entire differential housing thoroughly – I mean spotless – with some brake cleaner. Then I drive it for a bit, or sometimes, if it’s a slow seep, I’ll add some UV dye to the gear oil. After a few days, I put it on the lift and hit it with a UV light. If I see oil seeping from a spot that’s not near a seam, a seal, or a bolt hole – if it’s coming right out of the bare metal casting – then you’re dealing with a porous housing or even a crack. That’s a far more serious issue than just replacing a seal, and it means the housing itself is compromised.
Pinpointing the Real Source: Differential or Something Else?
Before you jump to conclusions and start tearing into the differential, you’ve got to rule out other components. A lot of noises get misdiagnosed as differential problems when they’re actually coming from somewhere else entirely. I’ve seen it countless times. Here’s how I narrow it down:
Whining Noise from the Rear
If you’re hearing that characteristic whine from the center of the axle, it often points to worn ring and pinion gears or failing carrier/pinion bearings, usually because of low or degraded gear oil. But here’s the kicker: a bad wheel bearing or hub assembly can sound almost identical. To tell the difference, I put the vehicle on a lift, get it in gear (carefully!), and use a mechanic’s stethoscope. If the noise peaks right at the differential housing, it’s an internal issue. If it’s loudest at a wheel hub, then you’re probably looking at a wheel bearing. It’s a simple test, but it saves a lot of grief.
Clunk or Shudder on Acceleration/Deceleration
That rotational clunk or shudder can definitely be worn gear teeth or damaged carrier bearings inside the differential, especially after running low on fluid for too long. But don’t forget about worn U-joints in the driveshaft, a loose transfer case yoke, or even broken engine or transmission mounts. These can all mimic a differential problem. What I do is measure the rotational play at the pinion flange with a dial indicator. Most differentials should have about 0.005–0.010 inches of backlash. If you’re outside that range, you’ve got internal wear. While you’re under there, always grab and twist the driveshaft to check for play in the U-joints. If they’re sloppy, that’s your clunk.
Why the Differential Housing Itself Gives Up
Most of the time, low fluid takes out the internal guts first – gears, bearings, maybe the clutches in a limited-slip unit. But when the housing itself is the problem, it’s usually one of a few things. The most common I see is casting porosity. This is especially true with aluminum differentials, like some of the units you find on GM and Ford trucks. During manufacturing, tiny air pockets or impurities can get trapped in the metal. Over time, these create microscopic channels, and that gear oil, under heat and pressure, slowly seeps right through the housing wall. It looks like a perpetual slow leak that never quite dries up, even after you clean it.
Cracks are less common, but they’re a lot more serious. These usually start at stress points, like the mounting ears or around the pinion support. Heavy towing, hitting a pothole hard, or sudden driveline shocks (think about spinning one wheel in mud then suddenly getting traction) can cause these fractures. Once a crack starts, the internal pressure and heat from the fluid can make it spread surprisingly fast.
And here’s one people often overlook: internal corrosion. If water gets into the differential – maybe through a clogged or damaged vent, or from driving through deep water – it mixes with the gear oil. That emulsified fluid, over time, starts to attack the precision-machined bearing bores inside the housing. As those surfaces erode, the bearings lose their proper support, which leads to misalignment, more noise, and eventually, total failure. This kind of damage is irreversible, and it completely compromises the structural integrity of the housing. You can’t just slap a new bearing in there if the bore it sits in is eaten away.
Let me be absolutely clear on this:
A leaking cover gasket or a pinion seal is not a housing failure. Those are routine maintenance items, part of owning a vehicle. But if that fluid is seeping right out of the solid metal of the housing, you’ve got a different problem entirely – one that no new gasket or seal is ever going to fix.
Your Repair Options: From a Band-Aid to a Big Job
This Ain’t a DIY for Most Folks
Let’s be real: fixing differential housing issues usually demands specialized tools, precision measurements, and a good chunk of advanced technical knowledge. This isn’t a weekend warrior job, especially when you’re talking about structural integrity or gear alignment. If you get it wrong, you’re looking at a much bigger bill down the road.
Proving the Repair Actually Worked
After any repair – especially an epoxy fix or a full housing replacement – you absolutely have to validate the work. For a sealed housing repair, I always tell customers to drive the vehicle for at least 300–500 miles under mixed driving conditions. Then, clean the area again and inspect it under UV light if you used dye. Any sign of seepage means the repair didn’t hold, and you’re back to square one.
For a full differential rebuild or replacement, the real test is on the road. Take it for a good 30-minute drive that includes accelerating, coasting, and steady cruising at highway speeds. Listen carefully for any howls, whines, or grinding. A properly set-up differential should be quiet – you might hear a faint gear hum at highway speeds, but nothing more. If it’s noisy, something’s wrong with the setup.
When you get back, check the housing temperature. It should be warm, but not so hot you can’t keep your hand on it. I use an infrared thermometer; if it’s consistently over 200°F, that’s a red flag for internal drag, incorrect preload, or poor lubrication. And always, always recheck the fluid level after that test drive. Overfilling can cause foaming and overheating, especially in trucks that tow or performance applications.
The Cold, Hard Numbers: What This Will Cost You
Alright, let’s talk brass tacks. Here’s a realistic breakdown of what you’re probably looking at, based on what I see in my shop and common failure patterns. Remember, these are estimates, and shop rates vary wildly.
| Repair Type | DIY Cost (Parts Only) | Shop Cost (Parts & Labor) | My Success Rate Estimate | Worst Case if It Fails |
|---|---|---|---|---|
| External epoxy repair | $40–$70 | $300–$500 | ~60% (for minor porosity) | The repair fails without warning, fluid drains out, and you rapidly destroy the gears and bearings. You could even get a driveline seizure. |
| Housing replacement & setup | $1,000+ (for parts) | $1,500–$3,000+ | Over 95% (if done right) | Improper setup leads to noise, rapid wear, or catastrophic gear failure. Fixing it means another big bill. |
How to Keep This From Happening Again
My Preventative Maintenance Checklist
-
Change that fluid! Follow your manufacturer’s recommended service interval – usually every 60,000 miles, or sooner if you’re towing heavy or off-roading. Always use the correct viscosity and type of gear oil. This isn’t a place to cheap out.
-
Inspect it regularly. Every time you’re under the vehicle for an oil change, take a minute to look at the differential. Are there fresh oil stains? Is it just around the seals, or is it weeping from the housing itself? Catching a small leak early can save you thousands.
-
Feel the heat. After a normal drive, just put your hand on the differential housing. It should be warm, not scorching hot. Excessive heat is a surefire sign of low fluid or internal friction, and it’s cooking your gears.
-
Check the vent. Make sure the differential vent is clear and not clogged with mud or debris. A clogged vent builds up pressure inside the housing, which then forces fluid past seals and can accelerate any existing leaks. It’s a tiny part, but it plays a big role.
Tech Tip: Look for Known Issues
Some differentials are just more prone to issues than others. For example, certain Ford 8.8 or GM 10-bolt units, especially those with aluminum housings, have documented porosity problems. I’ve seen these leaks come in weekly. A quick online search for your specific vehicle’s make, model, and “differential leak” can often reveal known patterns or even service bulletins from the manufacturer. While I can’t cite specific TSBs here, it’s always worth checking dealer resources if you’re chasing a stubborn leak. You might find it’s a known design flaw, not just bad luck.
