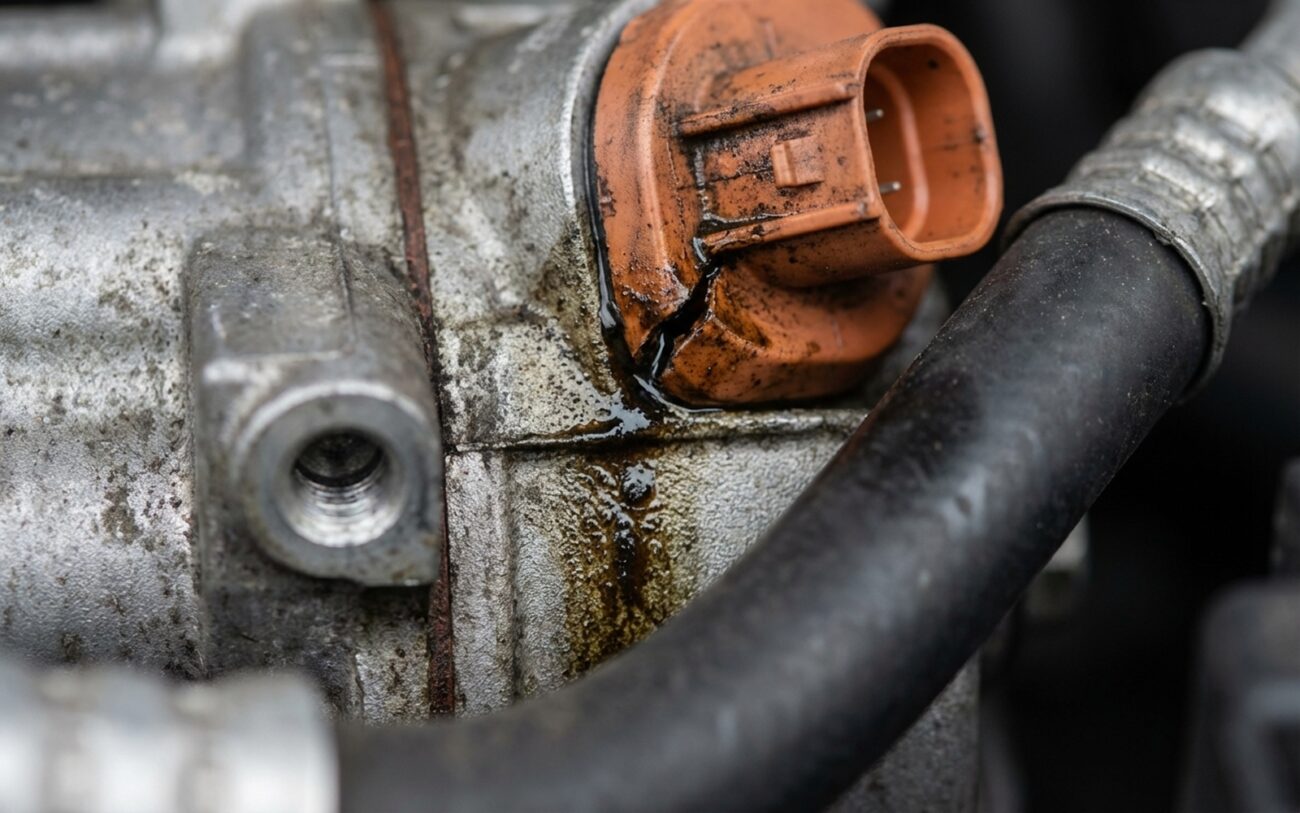
Alright, let’s talk electric AC compressors. If you’re driving a hybrid or an EV, your air conditioning system is a whole different beast than what folks are used to in a gas car. No serpentine belt, no clutch, no simple fixes. We’re dealing with a high-voltage unit that runs independently, and when it starts to go south, it throws some curveballs. I’ve been turning wrenches for over 25 years, and these electric systems require a completely different mindset. Let me walk you through what I’ve seen, what to listen for, and how we really diagnose these things in the shop.
First Signs: What Your Car is Telling You
The most obvious sign, the one everyone notices first, is a complete lack of cabin cooling or heating. You turn on the AC, and you get nothing but warm air. Or it’s winter, and the heat just isn’t there. Your dash might light up with messages like “AC Off,” “Climate Control Unavailable,” or the dreaded “Check EV System.”
Now, these messages usually come with a diagnostic trouble code (DTC). You might see codes in the P0A7F range or specific manufacturer codes for the compressor. But here’s the kicker: a code pointing to the compressor circuit doesn’t automatically mean the compressor itself is dead. I’ve seen the same code for low refrigerant, a bad pressure sensor, a hiccup on the CAN bus, or even a faulty HVAC control module. The code tells us where to look, not always what broke.
Beyond the dash warnings, pay close attention to sounds. A healthy electric AC compressor is pretty quiet—just a faint, smooth hum. But when things start to fail internally, that noise changes dramatically. I’ve heard a high-pitched electrical whine that almost always means bearing wear or rotor imbalance. A grinding sound? That’s usually metal-on-metal contact inside the scroll assembly. And a sharp “clunk” when the system tries to engage often points to a seized rotor or some serious mechanical binding. Unlike the old belt-driven units, these noises aren’t from external pulleys or clutches; they’re coming from inside that sealed, high-voltage unit. If you keep running it after hearing these sounds, you’re just asking for a catastrophic internal failure. I’ve seen metal fragments circulate through the entire refrigerant loop, contaminating everything. What could have been a $2,500 repair quickly turns into a $4,000+ headache.
Another major red flag is when using the AC triggers a broader vehicle fault. If you turn on the AC and suddenly get a “Propulsion Power Reduced” message or a “High-Voltage System Fault,” that’s a serious concern. This typically happens when the compressor’s built-in inverter develops a ground fault or starts drawing unstable current from the high-voltage battery. The vehicle’s main computer sees this as a threat to the entire electrical architecture and starts shutting down systems for safety. It can sometimes mimic a failing 12V battery or a bad DC-DC converter, but the timing—specifically tied to AC activation—is your big clue. I’ve even seen these high-voltage faults mess with module communication, causing bus errors that look like gateway module issues.
Some codes demand immediate attention. A “Compressor Locked” code (like Toyota’s P1604) means the motor or scrolls are mechanically seized. Damage is happening right now, and you need to stop running it. Other codes, like repeated P0532 (Low Pressure) or P0533 (High Pressure), might not directly blame the compressor, but when they show up with temperature-related codes (e.g., “Compressor Over Temperature”), it often points to internal motor winding degradation. Those windings have a thin varnish coating for insulation. Repeated overheating breaks that insulation down, causing shorts. The compressor might work on and off for a while, but eventually, it just quits. At that point, replacement is your only option.
My Diagnostic Process: No Guesswork Allowed
Look, you can’t afford to guess with these systems. Replacing an electric AC compressor without a proper diagnosis is like throwing money out the window. It’s expensive and risky. I always tell my guys to think of the compressor as the heart of the thermal management system. It needs clean refrigerant (the “blood”) and proper electrical signals (the “nerves”) to do its job. Before I even think about condemning the compressor, I verify both.
My first step is always to hook up a factory-level diagnostic scan tool. We’re talking live data here. I’m checking CAN bus communication between the HVAC control module and the compressor control unit. I need to confirm that the high-voltage contactor is closing and that the compressor is actually receiving a valid run command. Then, I’m measuring actual refrigerant pressure against the requested pressure. If all those external checks pass, and the compressor still isn’t doing its job, then the fault is almost certainly inside the unit itself.
| Symptom I See | What It Usually Means (Internal) | Common Misdiagnoses (External) | How I Confirm It |
|---|---|---|---|
| No cooling, compressor DTC present. | Internal motor failure (open/short windings), inverter module failure, seized scroll mechanism. | Low refrigerant, bad pressure sensor, HVAC module glitch, high-voltage contactor failure. |
Using a good scan tool, I’ll command the compressor to run at, say, 10% duty cycle. I’ll verify refrigerant pressure with my gauges, confirm the “Command On” status in live data, and then check the feedback RPM. If I see zero RPM despite a valid command and correct pressure, that compressor is internally failed. |
| Loud noise from the compressor area. | Failed motor bearings, damaged scroll plates, unbalanced rotor. | Loose mounting hardware, debris rattling nearby, adjacent coolant pump noise. |
I grab my mechanic’s stethoscope (or a long screwdriver, in a pinch) and place the probe directly on the compressor body. If the noise is loudest right there, it’s internal damage. For a mechanical seizure, with the HV system safely disabled, I’ll try to rotate the compressor shaft via the service port. Resistance, grinding, or no movement at all confirms an internal seizure. |
| Vehicle fault during AC activation (e.g., propulsion shutdown). | Inverter ground fault, internal short causing excessive current draw. | Weak 12V battery, failing DC-DC converter, BMS communication error. |
After isolating high-voltage power (safety first, always), I use a megohmmeter to test the insulation resistance between the compressor terminals and chassis ground. Readings below 1 Megohm (or whatever the OEM specifies) tell me the internal insulation is compromised, confirming a ground fault. |
Why These Compressors Die From the Inside Out
Once the diagnosis points to the sealed unit, it’s important to understand what actually failed. These aren’t just simple pumps; they’re complex electromechanical assemblies. You’ve got a brushless electric motor, an inverter, a scroll mechanism, and an oil circulation system—all packed into a compact, hermetically sealed housing. Most failures I see boil down to one of four core issues:
Electrical Insulation Breakdown: The stator windings use incredibly fine magnet wire, coated in insulating varnish. If there’s any manufacturing defect—say, impurities in the wire or an uneven coating—the constant thermal cycling over time can cause micro-cracks. Once that insulation fails, the windings short, leading to partial or complete motor failure. I’ve seen this pattern quite a bit in certain Denso and Mahle units, especially in earlier production runs of some EV platforms. The manufacturers often address these batch-specific issues later through internal service advisories.
Thermal Stress on the Inverter: Most modern electric compressors integrate the inverter (which contains sensitive IGBTs or MOSFETs) directly into the housing. This saves space, but it also creates a heat trap. These power electronics rely on thermal paste and a cooling plate to dissipate heat. If that thermal interface degrades, or if the internal coolant passages get restricted—often from debris circulating in the larger thermal management system—the inverter overheats. Repeated thermal cycling cracks solder joints and causes transistors to fail. It’s usually a slow, cumulative process, often showing up as intermittent P0532 codes or over-temperature warnings before it finally gives up the ghost.
Mechanical Wear and Lubrication Loss: Even though it’s electric, the compressor still has moving parts: the scroll pair, rotor, and bearings. They all depend on refrigerant oil—usually PAG or POE—for lubrication. If moisture gets into the system (from improper service, a leak, or a failed desiccant in the receiver/drier), it mixes with the oil and forms acidic sludge. This sludge attacks bearing surfaces and degrades the oil’s viscosity. Over time, you get metal-on-metal contact, leading to scoring, seizure, or imbalance. I’ve also seen cases where a rotor wasn’t perfectly balanced at the factory, which just accelerates bearing wear, producing that familiar whine or grind.
Contamination and Corrosion: While external corrosion is rare, internal corrosion is a real threat. Moisture ingress—often from a small leak that went unrepaired—leads to acid formation inside the system. This acid then attacks the winding insulation, bearing races, and electrical connections from within. By the time you see symptoms, the damage is usually irreversible. This is exactly why any repair involving compressor replacement must include a full refrigerant circuit flush and a new filter/drier.
It’s crucial to distinguish a true compressor failure from external issues. A leaking service valve seal? That’s an O-ring, not the compressor. A failed pressure sensor on the refrigerant line? That’s a sensor. A dead 12V battery preventing the high-voltage system from waking up? That’s an electrical supply issue. The failure has to be inside that sealed housing to justify replacing the whole unit.
Your Repair Options: Almost Always Full Replacement
Let’s be honest: this isn’t a DIY job for the average person. High-voltage systems, specialized refrigerant handling, and precision procedures make this one of the most technically demanding repairs on modern vehicles. Here’s what we’re looking at:
External Leak Reseal Professional Only
Full Assembly Replacement Non-Repairable → Replace
- A full system flush using an approved solvent.
- Replacement of the receiver/drier or accumulator.
- Replacement of the expansion valve or orifice tube.
- Exact refill of the specified PAG or POE oil (e.g., ND-8, ND-11) by weight.
- A precise refrigerant charge (e.g., 525g ± 25g of R-1234yf).
Skip any of these steps, and you’re just buying time before another failure. Trust me, I’ve seen it too many times.
Temporary Workaround Temporary / Last-Resort
My Post-Repair Checklist: Making Sure It Actually Works
Installing a new compressor is only half the battle. Validation is where many shops—and especially DIYers—fall short. A proper repair isn’t complete until I’ve confirmed the system is clean, sealed, and functioning exactly as designed.
First, a deep vacuum. After reassembly, I pull the system down to below 500 microns and let it hold for at least 15 minutes. Any rise in pressure tells me there’s still moisture or a leak I missed. This step is non-negotiable. Moisture in the system will lead to acid formation, which will eventually destroy your new compressor.
After charging, I don’t just turn the dial to “Max AC.” I use a factory-level scan tool to command the compressor through its full operating range—from 10% to 100% duty cycle. I’m monitoring live data: the feedback RPM should closely match the commanded RPM, usually within about 50 RPM. Any lag or failure to spin up indicates a control or power issue that needs to be addressed.
I also measure high-voltage current draw with a clamp meter. At a mid-range setting (say, 50% duty cycle), the current should be steady and within OEM specifications—typically 4 to 8 amps, depending on the model. A reading of 15+ amps suggests internal resistance or a short, and that’s a problem. If you don’t have access to a high-voltage current probe or a factory scan tool, you’re not truly validating the repair—you’re just hoping it works.
The tools required for this aren’t cheap, but they’re essential: refrigerant manifold gauges, an electronic vacuum gauge, a precision scale for refrigerant and oil, high-voltage PPE (Personal Protective Equipment), and a scan tool capable of bidirectional control. Without them, you’re flying blind, and that’s a dangerous game to play with high-voltage systems.
The Hard Truth: Cost and Your Options
Let’s be realistic: repairing an electric AC compressor is expensive. The part alone can cost more than many complete AC systems in older internal combustion engine (ICE) vehicles. Add in labor, refrigerant, oil, and all the required ancillary components, and the bill adds up fast. Here’s a rough breakdown:
| Repair Type | DIY Cost (Parts Only) | Professional Shop Cost | My Expected Success Rate | Major Risk if Done Wrong |
|---|---|---|---|---|
| Compressor Replacement (with full system flush) | $1,200 – $2,500+ | $2,500 – $4,500+ | 95% if flush is performed and all procedures are followed. | Residual debris contaminates the new compressor, causing rapid re-failure and voiding the warranty. |
Always check your EV battery warranty status before authorizing repairs. Sometimes, the thermal management system, including the AC compressor, is covered under the longer battery warranty.
The DIY cost covers only parts: compressor, receiver-drier, expansion valve, oil, and refrigerant. It assumes you already own or can access thousands of dollars in specialized equipment—a refrigerant recovery machine, a vacuum pump, high-voltage disconnect tools, and a capable scan tool. Most owners don’t, which makes professional repair the only realistic option.
Shop pricing reflects not just labor but also liability, the extensive training required for HV systems, and the significant investment in specialized equipment. Luxury EVs—like a Porsche Taycan or a Tesla Model S—often command the highest rates due to complex access and proprietary procedures. Remember, these systems are part of the vehicle’s broader thermal management circuit, which also cools the battery and power electronics, so errors can have cascading, expensive effects.
That 95% success rate is only achievable if the entire system is thoroughly cleaned after a mechanical failure. Skipping the flush to save a few hundred dollars is what I call a “false economy.” One metal particle recirculated into the new compressor can destroy it within days. You’ll end up paying the full price again—and you’ll lose trust in the repair process. It’s just not worth it.
My Advice on Saving Money
If you’re out of warranty, an independent EV specialist shop can often save you a significant amount compared to a dealership. I’ve seen them offer services at 30–50% below dealership pricing. But you have to verify their experience and equipment. This isn’t a job for a general mechanic. Ask about their high-voltage training, their specific EV tools, and their experience with AC systems on your make and model. A qualified indie shop can save you thousands.
When you’re facing this repair, you’re not just replacing a part. You’re restoring the integrity of a high-voltage, high-precision system. Cut corners, and you’ll almost certainly pay more in the long run. Do it right, follow the procedures, and you’ll have reliable climate control for years—which is critical for both cabin comfort and battery efficiency in any extreme weather.
