Thinking About an EGR Delete? Let’s Talk Straight.
Alright, let’s cut to the chase. I’ve been turning wrenches for over 25 years, and I’ve seen more EGR systems than I care to count. When that check engine light pops on or the truck starts acting funny, the EGR often gets blamed first. And yeah, especially on turbo diesels, the idea of just yanking the whole system out — the part that clogs, leaks, and fails — seems like a quick win. More reliability, more power, right? Not so fast.
While the symptoms you’re seeing are real, deleting the EGR system is rarely the right solution. I’m talking serious technical headaches, legal trouble, and long-term reliability nightmares. Before you even think about grabbing a block-off plate, let me walk you through what the EGR actually does, how to properly diagnose its failures, what “deleting” it really means, and why it’s almost always a bad move for your engine and your wallet.
First, What Does the EGR System Even Do?
Before we talk about taking it out, it’s important to understand why it’s there. The Exhaust Gas Recirculation (EGR) system is an emissions control device, but it actually plays a critical role in engine health too. It routes a small amount of exhaust gas back into the engine’s intake manifold. Why? Because that exhaust gas is inert — it doesn’t burn. Mixing it with the incoming air-fuel mixture effectively lowers the combustion temperature in the cylinders.
Lower combustion temperatures mean less Nitrogen Oxides (NOx) are formed, which are nasty pollutants. But here’s the kicker: those lower temperatures also reduce the thermal stress on internal engine components. Running an engine without a functioning EGR, or with a poorly tuned delete, can push combustion temperatures sky-high, leading to pre-ignition, detonation, and eventually, melted pistons or cracked cylinder heads. I’ve seen it happen.
Signs Your EGR System is Failing (and How I Diagnose It)
Before you even think about modifying anything, you absolutely have to confirm the EGR system is the real problem. I’ve seen countless times where folks jump to conclusions, replace the EGR valve, and the issue persists because something else was mimicking the symptoms. That’s just throwing good money after bad.
The most obvious sign is a check engine light, usually with codes like P0401 (insufficient EGR flow) or P0402 (excessive flow). But here’s my first rule of thumb: a code tells you what is happening, not always why. A P0401 doesn’t automatically mean the valve is dead. It could be a clogged passage, a bad sensor, or even a vacuum leak.
You might also notice a rough idle, especially when the engine’s cold. That’s a classic symptom of an EGR valve stuck open. Exhaust gas is getting into the intake when it shouldn’t, messing up the air-fuel mixture and making the engine stumble. On the flip side, a valve stuck closed might not cause immediate drivability issues, but it will lead to higher combustion temperatures and increased NOx emissions, which can cause long-term engine damage.
If you’re seeing coolant disappear without any external leaks, or if you’ve done a head gasket and still have coolant in the oil, the EGR cooler should be your primary suspect. It’s a common culprit, especially on certain Ford Powerstroke and GM Duramax engines.
My Diagnostic Approach: Don’t Guess, Test.
This is where experience really pays off. You can’t just assume. Here’s how I typically confirm an EGR fault:
- For P0401 (Insufficient Flow): I grab my bi-directional OBD2 scanner. I’ll command the EGR valve open at idle and watch the MAP sensor or engine load PID. If the MAP reading doesn’t change, or the engine doesn’t stumble, that tells me the flow isn’t happening. But then I need to figure out why. Is the valve physically stuck? Are the passages in the intake manifold completely caked with carbon? (On some Ford 3.5L EcoBoosts, those passages are notorious for clogging up, even if the valve is fine.)
- For Coolant Loss (No External Leak): This is critical. First, pressure test the cooling system to the manufacturer’s spec. I’ll let it sit for at least 30 minutes, sometimes longer. Any pressure drop means a leak. Then, I’ll use a borescope to inspect the EGR cooler’s exhaust side outlet. Look for any signs of coolant residue or crusty white deposits. You can also add UV dye to the coolant and run the engine, then inspect with a black light.
- For Excessive Soot Buildup or Exhaust Leaks: If you see black soot around the EGR valve or cooler flanges, it’s an exhaust leak. I’ll often apply some talcum powder around the suspected gaskets, then run the engine under load. The soot will leave clear trails in the powder, showing you exactly where the leak is. Don’t ignore these; they can throw off sensor readings and cause other issues.
Remember, replacing an EGR valve because of a P0401 code without proper testing is a rookie mistake. I’ve had customers come in after replacing their own valve, only for the code to return because the real problem was a split vacuum hose or a failing differential pressure feedback EGR (DPFE) sensor.
Why These Systems Break Down in the First Place
The EGR system lives a tough life. It’s constantly handling exhaust gas that can be over 1,000°F, full of soot, and mixed with acidic condensation. That’s a perfect recipe for wear, corrosion, and clogging.
The most common failure I see is carbon buildup. The EGR valve’s pintle and seat get caked with carbon, acting like glue and preventing the valve from opening or closing properly. I’ve pulled valves out that were completely seized solid; no amount of cleaning would save them.
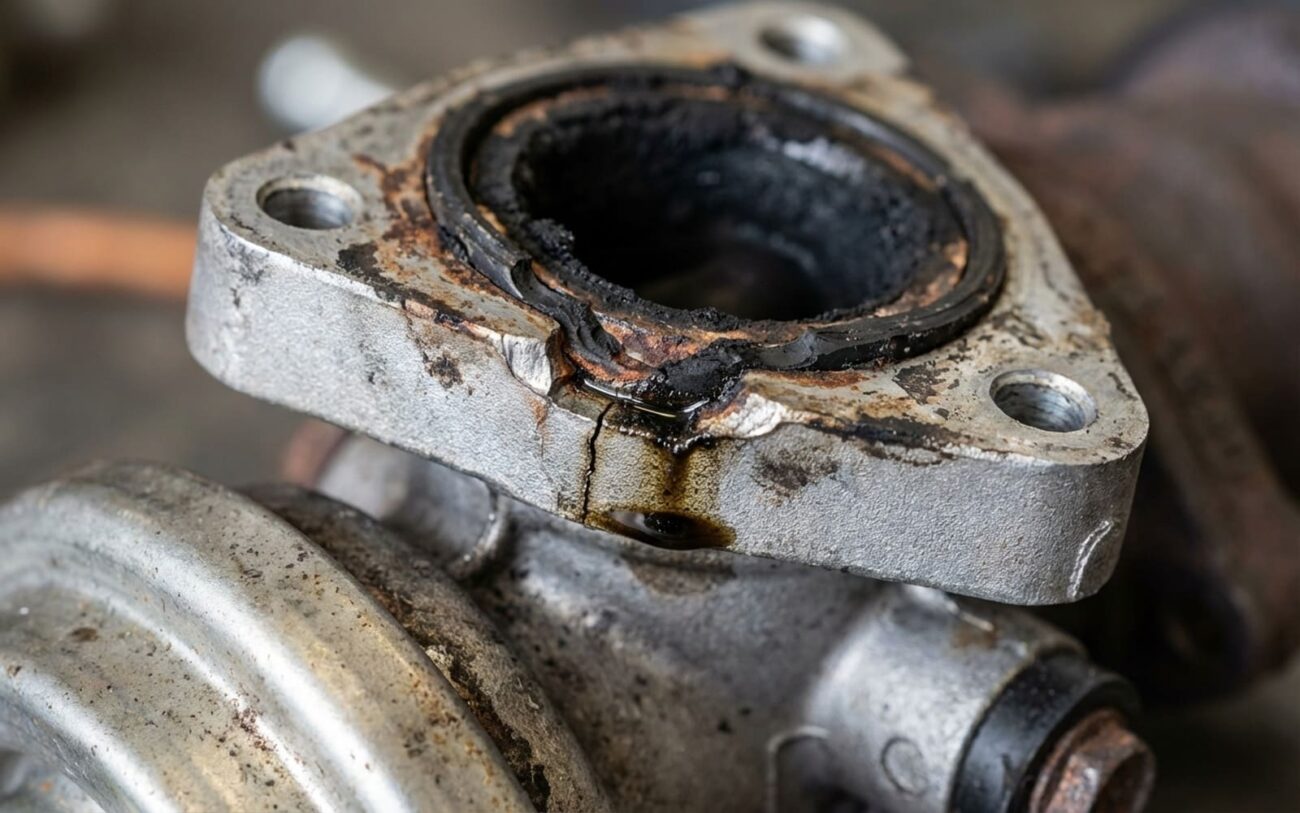
The EGR cooler is another big one. It’s essentially a miniature radiator, using engine coolant to cool those hot exhaust gases. This constant heating and cooling (thermal cycling) causes metal fatigue over time. Add in the acidic condensation from the exhaust, and those internal tubes can corrode and crack. Once that happens, coolant and exhaust gases mix, leading to contamination, loss of coolant, or that dreaded hydrolock I mentioned.
Passage blockage is also a major culprit, especially in gasoline direct injection (GDI) engines and diesels. Since fuel is injected directly into the cylinder, it doesn’t “wash” the back of the intake valves or EGR passages. This allows oil vapor from the PCV system and exhaust soot to build up. I’ve seen EGR passages in intake manifolds that were 80-90% restricted, completely choking off flow. It’s a huge problem on many modern engines.
And then there’s the self-inflicted wound: the EGR delete. While not a mechanical failure in the traditional sense, a poorly executed delete can cause real, permanent damage. Aggressive tuning files that disable EGR monitoring often mess with other critical engine parameters like injection timing, boost pressure, and exhaust gas temperatures (EGTs). I’ve personally seen engines with melted pistons because a bad EGR delete tune pushed EGTs far beyond safe limits. It’s not just about getting rid of a part; it’s about messing with a finely calibrated system.
Your Options: Fix It Right (or Face the Consequences)
So, you’ve diagnosed the problem, and it’s definitely the EGR system. Now what? You’ve got a few choices, but only some of them are smart ones.
EGR Valve Replacement [DIY-FEASIBLE with proper tools]
Intake Manifold Removal & Carbon Cleaning [PROFESSIONAL-LEVEL JOB]
EGR Cooler Replacement [PROFESSIONAL-LEVEL JOB]
EGR Delete [ILLEGAL FOR STREET USE / OFF-ROAD ONLY]
Making Sure the Fix Actually Worked
This step is non-negotiable. A repair isn’t done until you’ve verified it. Don’t skip it, or you’ll be doing the job twice.
- After an EGR Valve Replacement: Use a capable scan tool to command the valve open and closed. Watch the “desired” vs. “actual” position PIDs. They should track within 5% of each other. Then, you need to complete a full drive cycle — cold start, warm-up, highway cruising, deceleration. This allows the ECU to run its EGR monitor and set its status to “ready.” If it stays “not ready” after a few cycles, you still have an issue.
- After an EGR Cooler Replacement: Pressure test the cooling system to the spec on the radiator cap (usually 16–22 psi). I’ll hold that pressure for at least 30 minutes. Any drop means a leak. You can also add UV dye to the coolant and inspect around the cooler fittings with a black light. And always, always remove the intake tube downstream of the EGR and visually inspect for coolant residue, especially after the first few startups.
- After Carbon Cleaning: Monitor your long-term fuel trims. They should stabilize within ±10% at idle and under load. If they’re still way off, you might have an air leak from improper reassembly or the cleaning wasn’t complete. Clear any codes and drive the vehicle normally. The EGR monitor should complete within two to three drive cycles.
What’s This Going to Cost, and Is It Worth It?
Money talks, especially on an older vehicle. Here’s a realistic breakdown of what you can expect for common EGR repairs, based on what I see in my shop. Keep in mind, these are averages; some vehicles are much easier or harder than others.
- EGR Valve Replacement:
- DIY Cost (Parts): $150 – $400 (for a good quality part)
- Shop Cost (Parts & Labor): $350 – $700
- Success Rate (2-Year): 95% (with an OEM part). Aftermarket valves can be hit or miss.
- Secondary Risk if Failed: Cheap aftermarket valves fail early. Improper torque or reusing old gaskets can lead to exhaust leaks and more codes.
- Intake Manifold Removal & Carbon Cleaning:
- DIY Cost (Chemicals, Media): $100 (if you have the tools)
- Shop Cost (Parts & Labor): $800 – $1,500
- Success Rate (2-Year): 90% (if the PCV system is also addressed or updated).
- Secondary Risk if Failed: Broken sensors, warped manifold during reassembly, or vacuum leaks from incorrect installation can cause major drivability issues.
- EGR Cooler Replacement:
- DIY Cost (Parts): $300 – $600
- Shop Cost (Parts & Labor): $1,200 – $2,500
- Success Rate (2-Year): 98% (when done correctly).
- Secondary Risk if Failed: An undetected coolant leak can contaminate your engine oil or lead to hydrolock. Reworking this job is incredibly labor-intensive and expensive.
My personal rule of thumb: if the repair cost exceeds 40% of the vehicle’s fair market value (as a functional, road-ready unit), you really need to consider if the investment makes sense. A $2,500 EGR cooler job on a truck that’s only worth $6,000 is a tough financial pill to swallow. But, if you rely on that vehicle every day and plan to keep it for years, a proper repair can significantly extend its life and save you headaches down the road. Just don’t let the repair cost push you into an illegal delete.
Keeping It From Happening Again
Prevention is Critical
Once you’ve fixed an EGR problem, you don’t want to see it again. A little preventative maintenance goes a long way:
-
For diesel owners: Use Top Tier diesel fuel. These fuels have robust detergent packages that significantly reduce soot and carbon buildup in your engine and exhaust system.
-
For gasoline direct injection (GDI) engines: Consider periodic walnut shell blasting of the intake valves and passages, especially around 60,000 to 80,000 miles. It’s the most effective way to remove hard carbon deposits.
-
Strict Oil Change Intervals: Stick to the manufacturer-specified oil and change intervals. The wrong viscosity or poor-quality oil increases PCV system blow-by, which means more oil vapor getting into your intake and turning into carbon.
-
Don’t Forget the PCV Valve: If your vehicle has a serviceable PCV valve, replace it at the recommended intervals. It’s a cheap part that’s often overlooked, but a failing PCV can contribute heavily to carbon buildup.
Finally, invest in an OBD2 scanner that can read live data. Monitor your EGR position, flow rate, and related parameters during normal driving. You’ll quickly learn what “normal” looks like for your specific engine. This way, you’ll spot small deviations or early signs of trouble before they turn into major faults and expensive repairs. Early detection is almost always simpler and cheaper — and it helps you avoid that tempting, but ultimately disastrous, idea of just deleting the system altogether.