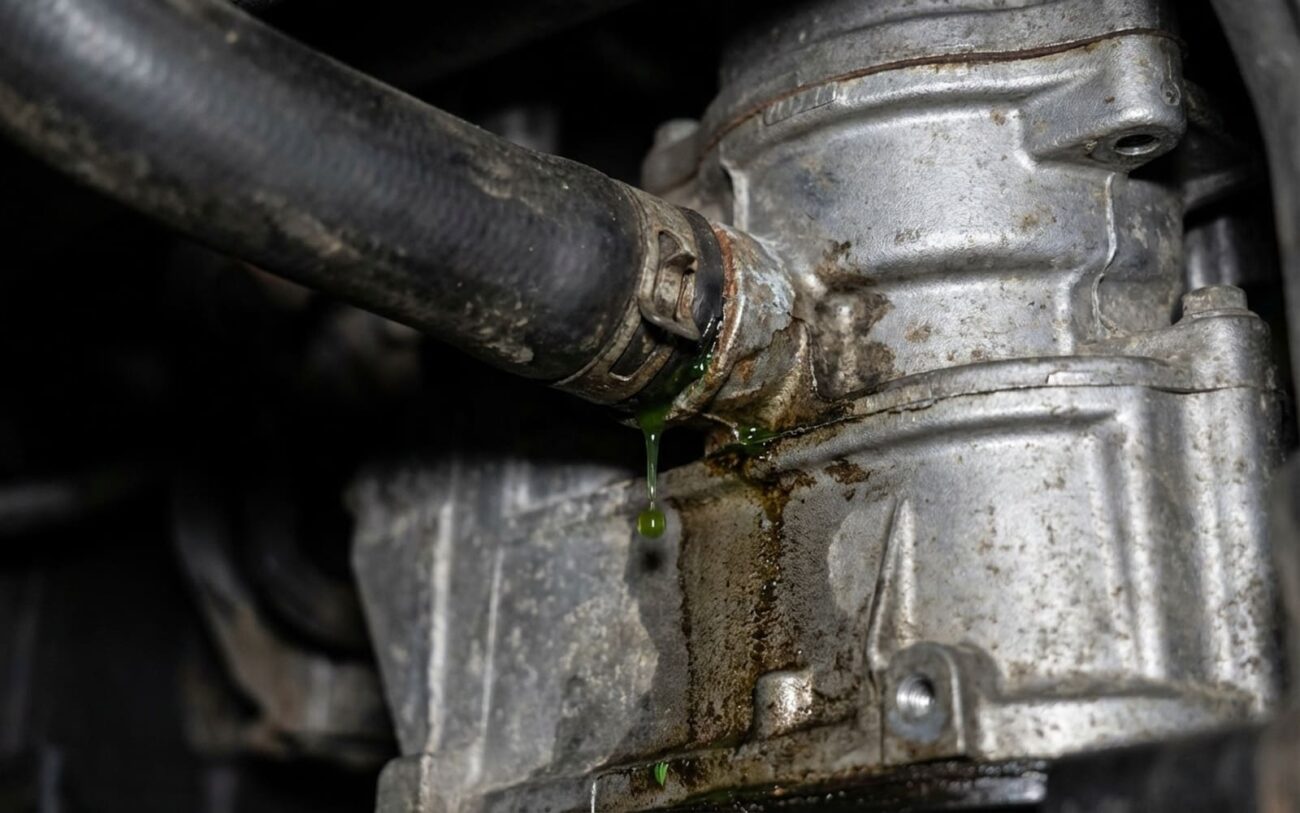
So, you just had a coolant flush, and now you’re seeing drips under the car. Your first thought? “They messed something up!” I hear that a lot in my shop. But after 25+ years turning wrenches, I can tell you this: a proper coolant flush rarely causes a leak. What it usually does is reveal a problem that was already brewing.
Think about it: over time, corrosion, scale, and even sludge can act like temporary plugs in tiny cracks or porous spots in your cooling system. When we flush that gunk out, those weak points get exposed. The real question then becomes, is it a simple gasket that gave up, or are we looking at something far more serious, like a compromised engine block?
Spotting the Red Flags: Real Block Leaks vs. Just a Drip
The engine block is the core of your powertrain—the big, heavy casting (usually aluminum or iron) that holds the cylinders, coolant passages, and oil galleries. When a leak truly comes from the block itself, it’s a major problem. Here’s what I look for:
- External Seepage: If you see coolant weeping directly from the side of the block casting, especially midway along the cylinder bank or near where the oil pan bolts on, that’s a serious red flag. It’s not from a gasket or a bolt hole, but right out of the metal itself.
- Constant Coolant Loss, No Visible Leak: This is the sneaky one. If your coolant level keeps dropping but you can’t find any drips on the ground, that often points to an internal leak. Coolant could be seeping into a cylinder and burning off as steam (sometimes visible as white exhaust smoke) or, worse, mixing with your engine oil.
- Milky Sludge: Check your dipstick and under the oil filler cap. If you see a milky, frothy, or brownish sludge, that means coolant and oil are mixing. This is a classic sign of an internal failure, and it’s almost always catastrophic if not addressed immediately.
- Over-Pressurized Cooling System: If your radiator hoses are rock hard even when the engine isn’t fully hot, or if the coolant reservoir is overflowing, combustion gases might be leaking into the cooling system through a crack in the block or cylinder head.
My Diagnostic Playbook: Pinpointing the Actual Source
Before you jump to conclusions and assume the worst (a cracked block), we need to systematically rule out the usual suspects. Many common leaks can mimic a block issue, but they’re far less catastrophic and much cheaper to fix. I’ve seen customers panic over what turned out to be a $30 freeze plug.
Here’s the approach I use in the shop to narrow down the problem:
| Symptom | Likely a Block Casting Issue | Common External Mimics | My Definitive Test to Confirm |
|---|---|---|---|
| External coolant weep on block surface | Casting porosity, micro-crack in the metal, or a thermal stress fracture. | Failed freeze plug, head gasket seepage tracking down, timing cover gasket leak, water pump seal. |
Test: First, clean the suspected area meticulously with brake cleaner and let it dry completely. I mean spotless. Then, use a cooling system pressure tester. Pump it up to the cap’s rated pressure (usually 15–18 psi) and let it sit for 20-30 minutes. Use a bright flashlight and look very closely. If the leak appears directly from the casting, not from a seam, a plug, or a component bolted to the block, then you’re likely dealing with a block issue.
|
| Coolant loss, no external leak, system over-pressurizes | Internal crack allowing combustion gases into the coolant jacket, or coolant into a cylinder. | Cracked cylinder head, failed EGR cooler, leaking transmission cooler (if in radiator), blown head gasket. |
Test: Perform a cooling system pressure test while the engine is running and cold, then again when hot. Watch for pressure spikes. Next, use a combustion gas “block tester” kit. If it shows hydrocarbons in the coolant, you’ve got combustion gas getting in—usually a head gasket or cracked head. If the block tester is negative but you still have pressure spikes and coolant loss, then I suspect a cylinder-to-coolant crack in the block. Confirm this with a cylinder leak-down test: remove the radiator cap, pressurize each cylinder (one at a time) to about 100 psi, and listen for bubbles in the coolant.
|
| Coolant in engine oil (milky emulsion) | Crack or porosity connecting a coolant passage to an oil gallery inside the block. | Blown head gasket (especially at oil/coolant crossover points), failed engine oil cooler, leaking transmission cooler. |
Test: Start by performing a cylinder leak-down test to check the head gasket. Also, if your vehicle has an engine oil cooler (many do), pressure test that unit separately—they can fail internally and mix fluids. If both of those pass, and you’re still seeing coolant in the oil, then it’s time to suspect the block. My next step is often a borescope. I’ll snake it through the oil drain plug hole or a main oil gallery plug to visually inspect the internal oil passages for coolant residue or corrosion near coolant jackets. Direct visual confirmation is the best evidence here.
|
Why Blocks Fail (and Why Your Flush Might Have Revealed It)
Like I said, a coolant flush almost never causes a healthy block to crack. What happens is that it strips away years of accumulated protective scale, especially in older aluminum engines. This scale was often the only thing holding a weak spot together. Modern OAT (Organic Acid Technology) coolants, like Dex-Cool, form a stable silicate layer to protect metal. But if the wrong coolant was used, or if the system wasn’t maintained, that layer can break down. Aggressive chemical flushes, particularly acid-based ones, can strip this layer completely, leaving bare metal vulnerable.
Once that protection is gone, several failure paths open up:
- Corrosion: This is a big one for aluminum blocks. Electrolytic corrosion can eat through thin spots, especially between cylinders or near coolant passages.
- Casting Porosity: This is a factory defect. Tiny voids or sand inclusions in the metal can remain sealed for years under that protective scale. Once the scale is gone, these weak spots open up. I’ve seen this frequently on certain GM aluminum V6 engines (like the 3.4L and 3.8L) where porosity issues were common in the lower block area.
- Thermal Stress Cracks: These form when an engine overheats severely. The uneven expansion and contraction of the metal can cause cracks, often between cylinder bores or near coolant jackets. The flush didn’t cause the crack, but by cleaning out the residue, it made the leak visible.
Important distinction:
Always remember to distinguish a true block leak from more common, and easier-to-fix, failures. A leaking water pump seal, a cracked thermostat housing, a burst heater core, or a degraded radiator hose are all separate components. They fail independently and are usually straightforward repairs. Also, a leak from higher up—like an intake manifold gasket—can run down the block and appear to come from the casting. Always trace the leak upward to find its true origin.
Your Repair Options Explained (and My Honest Take)
So, you’ve confirmed it’s a block leak. Now what? Your options vary wildly in cost and effectiveness. Here’s what I tell my customers:
Making Sure the Fix Actually Worked
After any cooling system repair, especially one involving a leak, proper validation is key. You don’t just fill it up and send it. Here’s my process:
- Pressure Test (Again): After the repair is complete and the system is refilled, I always perform another static cooling system pressure test. I’ll pressurize it to the cap rating and let it sit for at least an hour, sometimes overnight, checking for any drops in pressure.
- Run and Monitor: Once the static test holds, I start the engine, bring it up to operating temperature, and run it for a good 20-30 minutes, watching the temperature gauge like a hawk. I’m looking for the thermostat to open, the fans to cycle, and no signs of overheating. I also keep an eye on the coolant level in the reservoir.
- Visual Inspection: With the engine hot and running, I do another thorough visual inspection of the repaired area and all surrounding components. Any new drips? Any signs of steam?
- Post-Repair Fluid Checks: If the original issue was coolant in the oil, I’ll recommend an oil change immediately after the repair. Then, I tell the customer to drive it for a few days, maybe 100-200 miles, and bring it back for another oil check. I’ll pull the dipstick and check under the oil cap again for any signs of milky emulsion. This confirms the internal seal is holding.
The Hard Numbers: Cost, Risk, and The “Is It Worth It?” Question
Let’s talk real-world economics. A block leak is never cheap, but some fixes are certainly better investments than others. Here’s a breakdown of common repair paths, including what they cost and how reliable they are:
| Repair Type | DIY Cost (Parts) | Shop Cost (Parts & Labor) | Success Rate (My Experience) | Secondary Risk if Failed |
|---|---|---|---|---|
| External Epoxy Patch | $50 | $300–$600 | Low (30-50%) | Sudden coolant loss, rapid overheating, bearing failure, or hydro-lock. |
| Freeze Plug Replacement | $20–$50 | $150–$500 (accessible) to $1000+ (engine/trans removal) | High (95%) | Same as above if improperly installed; rare but possible if plug seal fails under pressure. |
| Block Replacement (with labor) | N/A | $4,000–$8,000+ (for a remanufactured long block) | High (near 100%) | Assembly errors, incorrect torque, or overlooked components can lead to new issues. |
| Used Engine Swap | N/A | $3,000–$6,000 | High (90%) | Unknown maintenance history, potential internal wear, or hidden damage in the replacement unit. |
Cost-Saving Tip: The 60% Rule
Here’s a rule I use every day in the shop: if the estimated repair cost exceeds about 60% of the vehicle’s current private-party value (I check Kelley Blue Book or NADA guides), it’s usually not worth fixing. You’re pouring money into a depreciating asset with no long-term return. At that point, replacing the car—even with a good used one—often makes more financial sense. Of course, there are exceptions for classic cars, very low-mileage vehicles, or models with exceptional resale value. But for most daily drivers, the math speaks for itself.
How to Prevent This Headache in the Future
Prevention starts with proper cooling system maintenance. It’s not glamorous, but it’s critical.
- Use the Right Coolant: Always, always use the coolant specified in your owner’s manual. Whether it’s Honda Type 2, Ford Orange, or Dex-Cool for GM, these aren’t interchangeable. Each has a specific additive package designed to protect the metals in your engine. Mixing coolants or using a universal “one-size-fits-all” product can lead to silicate drop-out, where protective additives fall out of solution and form gel-like clumps. Worse, some universal coolants don’t protect aluminum adequately, significantly increasing the risk of corrosion.
- Gentle Flushes: When flushing the system, avoid harsh chemical cleaners. A mild detergent flush followed by multiple clean water rinses is much safer. The goal is to remove debris and old coolant—not to strip the protective scale from metal surfaces.
- Proactive Replacement: If you’ve opened the system for service (say, a new thermostat or water pump), consider replacing old hoses, the thermostat itself, or water pump seals if they’re nearing their end-of-life. It’s cheap insurance while you’re already in there.
- Regular Inspections: Every oil change, take 60 seconds to inspect the block. Look for white, pink, or green crust near freeze plugs, the oil pan rail, or where the block meets the transmission. That’s dried coolant—the first sign of trouble.
- Don’t Ignore Small Losses: Never ignore a slowly dropping coolant level. A pressure test at the first sign of loss can catch a failing water pump seal or hose before it leads to overheating, head warpage, or even engine misfires from thermal stress. Small problems fixed early save big headaches later.
