Can a misadjusted clutch cause slipping? Absolutely. And honestly, I see this misdiagnosis more often than I’d like to admit. Folks jump straight to “worn clutch” when a simple adjustment is often the real fix, especially when the slipping is just starting to show up.
Clutch Slipping: What It Feels Like and Why It Matters
A clutch is essentially a friction coupling. Think of it like this: the engine’s spinning, and the transmission needs to catch that spin to move the wheels. The clutch disc, sandwiched between the flywheel and the pressure plate, makes that connection. When everything’s right, the pressure plate clamps that disc tight, transferring all the engine’s power to the transmission. But if that clamping force isn’t there—say, because the release mechanism is holding the pressure plate slightly open—the disc can’t get a full grip. That’s when it slips under load.
You’ll notice it most under acceleration. You’re in 3rd or 4th gear, you hit the gas to pass someone or climb a hill, and the engine RPMs shoot up, but the car doesn’t pick up speed like it should. That’s the classic sign: engine making power, but it’s not getting to the wheels. The clutch disc is spinning faster than the flywheel, losing its bite. The harder you push, the more it slips.
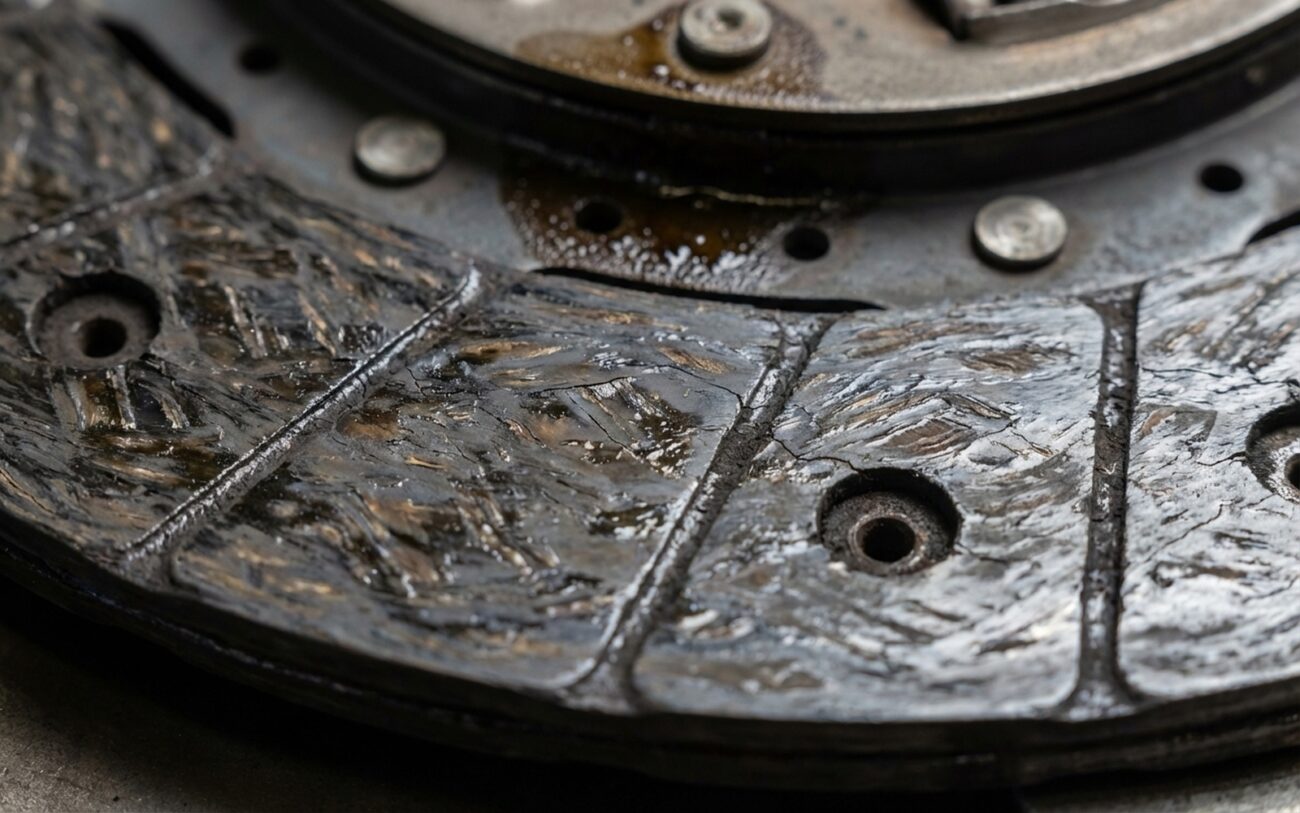
Keep pushing it, and you’ll eventually smell it. It’s a sharp, acrid odor, like hot brakes but more pungent. That’s the organic friction material on the clutch disc literally burning off. Each slip event grinds away a little more of that disc. And the heat? That heat can warp the flywheel, glaze the disc, and even crack the pressure plate’s diaphragm spring. At that point, you’re past a simple adjustment. You’re looking at a full clutch job, and probably a new flywheel too.
My First Diagnostic Step: Checking Clutch Pedal Free Play
Before I even think about pulling a transmission, I check the clutch pedal free play. This is absolutely critical. Free play is that small amount of travel at the very top of the clutch pedal before you feel any resistance—it’s the slack in the system before the release mechanism actually starts to move. If there’s no free play, or not enough, it means the release mechanism is always putting a little bit of pressure on the clutch. That prevents the pressure plate from fully clamping down, causing the slip.
I can’t stress this enough: measure it. Grab a ruler. Push the pedal gently until you feel resistance. The distance it moved freely? That’s your free play. Compare it to your vehicle’s service manual spec, which is usually somewhere between 10-25 mm (or about 0.5-1 inch). If it’s zero, or way too little, you’ve found your smoking gun for misadjustment. This simple check takes two minutes and costs nothing. It’s the difference between a $0 fix and a $1,500 repair. Always start here.
Beyond Adjustment: Other Causes of Clutch Slip
Now, not every slipping clutch is an adjustment issue. I’ve seen plenty of worn clutch discs, oil contamination from a leaking rear main seal, or even a fatigued pressure plate spring that just can’t hold tension anymore. These can all mimic the symptoms of a misadjusted clutch. That’s why diagnostics are so important. Jumping straight to a full clutch replacement without ruling out adjustment is a costly mistake I see far too often in my shop.
Here’s a quick rundown of what I look for and how I confirm it:
| Symptom | Indicative of Misadjustment | Common Mimics | Definitive Test to Confirm Source |
|---|---|---|---|
| Clutch slip under moderate to heavy load (e.g., uphill, hard acceleration) | Zero or insufficient clutch pedal free play (typically less than 10 mm) | Worn clutch disc, oil/grease contamination, failed pressure plate spring, warped flywheel |
Test A (Pedal Free-Play Check): As I mentioned, use a ruler to measure the free travel at the top of the pedal. Compare it to your vehicle’s factory spec. No free play is a strong indicator of misadjustment. Test B (Clutch Drag Test): Engine off, transmission in gear, clutch pedal fully depressed. Try to rotate a raised drive wheel with a breaker bar on the lug nuts. Significant resistance means the clutch isn’t fully disengaging. This could be adjustment or a hydraulic problem (like air in the line). |
Why Clutches Go Out of Adjustment
So, if it’s an adjustment issue, how does it happen? It really comes down to the type of clutch actuation your vehicle uses.
For older vehicles, or some light-duty trucks, you’ll find a cable-actuated clutch. Over time, those cables stretch. Pivot points in the pedal assembly or the release lever can also wear out, allowing the adjustment to drift. Some cables even have self-adjusting mechanisms—little ratchets that are supposed to take up slack automatically. But I’ve seen many of these seize or jam, especially on older European and Japanese models, locking the system in a pre-loaded state and eliminating that crucial free play.
Most modern vehicles use hydraulic clutches. Here, the problem often lies with the master cylinder pushrod. If it’s too long—either from improper adjustment during a previous repair or even minor damage—it can keep pressure on the hydraulic system even when your foot is off the pedal. That means the clutch never fully engages. I’ve also seen this happen if the pushrod gets bent or the pedal bracket itself shifts slightly.
But let’s be clear about what misadjustment isn’t. It’s not a clutch disc worn down to the rivets; that’s just plain wear. A leaking slave cylinder? That’s a hydraulic component failure. A disc contaminated with oil from a leaking rear main seal? That’s a seal issue. All these can cause slipping, but they’re not problems you fix with an adjustment. Diagnose correctly, or you’ll be fixing the wrong thing and wasting time and money.
My Approach to Fixing a Misadjusted Clutch
Once you’ve pinpointed misadjustment as the culprit, here’s how I typically approach the fix.
Cable-Actuated Clutch Adjustment DIY-FEASIBLE
Hydraulic Pushrod Adjustment DIY-FEASIBLE
Beyond Simple Adjustment: Hydraulic & Internal Component Service Professional Only
Confirming the Fix: Post-Repair Validation
After any adjustment or repair, you absolutely have to verify that it worked. Don’t skip this step.
First, re-measure that pedal free play. It has to be within factory specifications. If it’s not, you haven’t fixed it. Then, take the car for a controlled test drive. Find a quiet stretch of road where you can safely simulate real-world load. I typically go into 3rd gear at around 1500–2000 RPM and then press the throttle fully. The engine should accelerate smoothly with the vehicle—no sudden RPM spike, no hesitation. If the engine revs climb without the car speeding up, the clutch is still slipping.
You also need to check for full disengagement. With the engine running and the clutch pedal fully depressed, you should be able to shift into all gears smoothly, without any grinding or resistance. If you hear crunching, the clutch isn’t fully releasing. That could mean air in the hydraulic system (if you’ve been into that) or an incorrect adjustment that’s not allowing full disengagement.
If you’ve replaced hydraulic components or a full clutch kit, the validation is even more involved. The master and slave cylinders must be bled perfectly. I always recommend bench-bleeding a new master cylinder before installation—it saves a lot of headaches. After final assembly, the pedal should feel firm, with no sponginess. The engagement point—where the clutch starts to grab—should be in the middle third of the pedal travel, not right off the floor or way up at the top. Too high, and you likely still have air; too low, and you might have too much free play or another internal issue.
Making the Call: Cost, Risk, and Value
Understanding the potential costs helps you make an informed decision, especially if the repair starts to add up. I’ve seen too many people throw good money after bad.
| Repair Type | DIY Cost | Shop Cost | Success Rate | Secondary Risk if Fix Fails |
|---|---|---|---|---|
| Simple Cable/Pushrod Adjustment | $0 (basic tools) | $50–$100 | 95%+ | Underlying clutch wear remains undiagnosed, leading to failure within months. |
| Hydraulic Component Replacement | $100–$300 | $400–$800 | 90% | Misdiagnosis: the actual fault may be internal, requiring full clutch job after all. |
| Complete Clutch Kit Replacement | $400–$800 | $1200–$2000+ | 98% | Improper installation—such as failing to clean flywheel mating surface—can cause premature failure. |
Here’s my reality check for customers: if the diagnosis leads to a full clutch replacement, you need to weigh that cost against the vehicle’s current value. As a rule of thumb, if the repair exceeds 40% of the car’s market value in good running condition, it’s worth asking whether that money is better spent on a more reliable vehicle. I’ve seen too many people pour $1,800 into a $4,000 car, only to face another major repair a few months later. Sometimes, it’s just time to move on.
Keeping Your Clutch Healthy: Prevention & Monitoring
Preventing clutch issues starts with understanding your system and paying attention to the small changes.
-
For cable clutches, keep the cable and its pivot points lubricated. A dry or binding cable wears faster and can mess with proper self-adjustment. Clean and inspect it during routine maintenance.
-
For hydraulic systems, fluid maintenance is critical. Use only the type specified on the reservoir cap—usually DOT 3, 4, or 5.1. Brake fluid (which is what most clutch systems use) absorbs moisture over time, which lowers its boiling point and corrodes internal seals. I recommend flushing the clutch hydraulic fluid every 2–3 years, just like your brakes.
-
The best prevention, though, is simply awareness. You drive your car every day; you know how your clutch feels. If the engagement point starts moving—creeping higher or lower in the pedal travel—that’s your early warning. A rising engagement point often means wear; a dropping one can signal hydraulic issues or air in the system.
Address it early. A five-minute free-play check could save you a five-hour clutch job. Trust me on that one.
