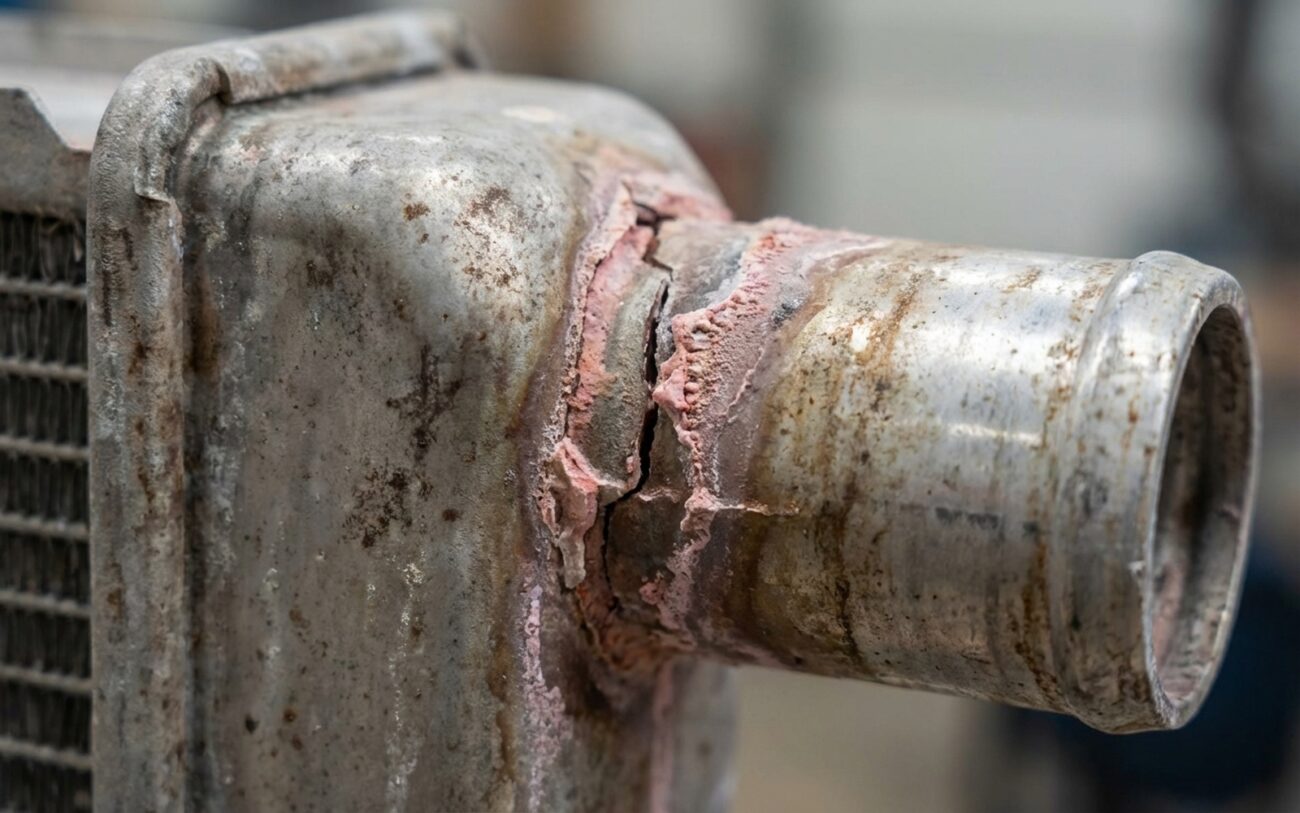
Alright, let’s talk auxiliary radiators in electric vehicles. If you’ve been in this game long enough, you know these aren’t just glorified engine radiators. They’re critical for keeping the battery and inverter cool, and when one goes bad, it can lead to some seriously expensive headaches if you don’t catch it early. I’ve seen too many folks ignore the subtle signs, so let’s get into how I approach these.
What You’ll See (and What It Means)
The auxiliary radiator, sometimes called the low-temperature loop radiator, is basically a dedicated heat exchanger for the EV’s high-voltage battery and inverter. It’s usually a pretty compact unit, tucked away lower than the main radiator—often behind the front bumper or even in a wheel well. Why so low? Well, it doesn’t need to deal with scorching engine heat, but that mounting position makes it a prime target for road debris. That’s a key piece of information right there.
The Drip Test: First Clue on the Ground
One of the first things I look for is a puddle. If you see coolant pooling in an unusual spot—say, near the front axle, just behind the lower grille, or dripping from an inner fender liner—your auxiliary radiator is a prime suspect. Now, this isn’t that green stuff from your grandpa’s old V8. EVs use specific glycol-based coolants, and they come in all sorts of colors: pink, blue, amber. If you’re seeing any of that under the front of your EV, especially after a drive, it’s time to investigate. Sure, a cracked hose or even the main radiator could leak in that area, but given its exposed, low-slung position, the auxiliary unit often takes the hit.
Dashboard Warnings: Don’t Ignore the Whispers
The car itself will usually try to tell you something’s wrong. You might see messages like “Battery Cooling Reduced,” “Inverter Over Temperature,” or “Charging Power Reduced.” These aren’t just random alerts; they’re the vehicle’s way of protecting itself. What I’ve found is these warnings don’t always pop up during normal city driving. They tend to show their face when the system is under high thermal load—think long highway runs, repeated hard acceleration, or, most commonly, during DC fast charging. That’s because rapid charging generates a huge amount of heat in the battery and inverter. If that auxiliary cooling loop can’t dissipate it, the car has no choice but to throttle performance or charging speed to prevent damage.
I’ve seen countless owners ignore these warnings until the car flat-out refuses to fast charge. That’s a major red flag. Sustained overheating doesn’t just slow you down; it accelerates lithium-ion battery degradation, which means permanently reduced capacity and range. And worse, it can damage the power electronics in the inverter or the Power Conversion System (PCS). We’re talking thermal runaway or transistor failure, and that can quickly turn into a six-figure repair. These aren’t like engine components you just swap out every 100k miles. So, take those early cooling warnings seriously—they’re your last chance to avoid a catastrophic failure.
My Diagnostic Approach: Ruling Out the Mimics
Just because the symptoms point to the auxiliary radiator doesn’t mean it’s the actual problem. In my shop, I see misdiagnoses all the time. Techs blame the radiator when the real issue is a failed pump, air in the loop, or a stuck valve. That’s why a methodical approach is critical. You’ve got to rule out the mimics before you start tearing into the cooling system.
| Symptom | Likely Cause (Auxiliary Radiator) | Common Mimics (Look Here First) | My Go-To Test to Confirm |
|---|---|---|---|
| Localized coolant leak in lower front end. | Crack in plastic end tank, corrosion in aluminum core, or seam failure from thermal cycling. | Leaking transmission oil cooler lines (if shared circuit), failed active air shutter actuator, or a leak from the main radiator’s lower hose. |
First, I isolate the low-temperature loop. You’ll need a manufacturer-specific adapter for this. Then, I pressure test it independently at 15 psi for at least 20 minutes. If the pressure drops and you don’t see an external leak, that points to an internal failure—could be the battery chiller or a hidden connection.
|
| BTMS/Inverter overheating under high load (fast charging, hard driving). | Fouled or blocked core from debris, bent fins restricting airflow, or internal corrosion buildup. | Failed auxiliary coolant pump, air pockets in the loop, degraded coolant, a stuck thermostat, or a non-operational radiator fan. |
I grab my infrared thermometer during fast charging or a high-load road test. Measure the inlet and outlet hose temperatures right at the radiator. If the temperature difference (the delta) is less than 5–10°C, that tells me there’s poor heat rejection—likely a blocked or damaged core. While I’m at it, I confirm pump operation via scan tool data (looking at pump speed and current draw).
|
| Visible physical damage to a cooler in the lower bumper area. | Impact damage to fins or tubes on the auxiliary radiator itself. | Damage to the AC condenser, the main radiator, or the charge air cooler (if the vehicle has one). |
This one’s usually pretty straightforward. I’m checking for coolant residue directly on the core. Then, I pull up the vehicle-specific service diagrams to confirm the cooler stack layout. Sometimes a borescope helps me get in there to read part numbers or labels to verify exactly which component is damaged.
|
A good scan tool is absolutely essential here. You need to monitor real-time data from battery temperature sensors, inverter coolant temp, and pump status. If the scan tool shows the pump is commanded to be active but I’m not seeing any flow or temperature change, the issue is likely electrical or mechanical in the pump itself—not the radiator. Don’t jump to conclusions.
Pro Tip:
While it’s rare, I’ve seen low 12V battery voltage mess with module communications, and that can absolutely affect cooling system operation. So, always verify the health of the 12V system before you dive deep into hardware repairs. It’s an easy check that can save you a lot of grief.
Why It Fails: Common Root Causes
Once I’ve confirmed the auxiliary radiator is indeed the problem, the next question is always: why did it fail? The causes are usually mechanical or environmental, not some deep systemic flaw in the car’s design.
-
Material Fatigue: This is a big one. These radiators typically use plastic end tanks bonded to an aluminum core. Over years of thermal cycling—coolant heating up to 40°C (104°F) and then dropping to ambient—that plastic gets brittle. I often see cracks starting at stress points near hose necks or mounting brackets. Sometimes, you’ll even find poor castings in the aluminum core that develop micro-porosity over time, leading to a slow, frustrating weep.
-
Corrosion: This is another major factor. Internally, using the wrong coolant or topping off with tap water introduces electrolytic corrosion, especially when you have dissimilar metals in the loop. That stuff eats away at the tube walls from the inside out. Externally, road salt and moisture are brutal on the fins and core—particularly in vehicles where the auxiliary radiator is exposed in a wheel well. I’ve pulled units from northern climates that looked like Swiss cheese, no joke.
-
Impact Damage: This is pretty straightforward: rocks, curbs, or general road debris get kicked up and puncture the core. Because these radiators sit low and are often exposed, they’re incredibly vulnerable. Even minor dents can crush internal passages, restricting flow without a visible leak.
-
Internal Blockage: This happens more than you’d think. Debris from manufacturing, degraded coolant, or even “solder bloom” from older brazed joints can break loose and clog those narrow tubes. Some manufacturers, like Tesla, have even issued service bulletins about debris accumulation in the low-temperature radiator affecting Supercharging performance on Model 3 and Y. It’s a known issue, especially in early production models.
But here’s a key point, and I can’t stress this enough: not every leak near the radiator means the radiator itself is toast. If coolant is just seeping from a hose connection, it’s likely a degraded O-ring or a loose clamp. If a quick-connect fitting is dripping, replace the seal, not the entire unit. I’ve seen shops replace a $700 radiator when a $10 O-ring was the real fix. Always, always inspect those connections first.
Your Repair Options: What Works, What Doesn’t
So, you’ve narrowed it down to the auxiliary radiator. Now what? Here are the options, from what I’ve seen work in the bay.
Cleaning & Fin Straightening DIY-Feasible
Service Point Seal Repair Professional Only
Full Radiator Replacement Non-Repairable
Temporary Sealants Last Resort (Seriously, Don’t)
Post-Repair Validation: Prove It Works
Just putting everything back together and calling it a day isn’t enough. You have to prove the repair worked under real-world conditions. This is where a lot of DIYers, and even some inexperienced shops, fall short.
-
For Cleaning/Fin Straightening: The validation is functional. I use a scan tool to command the auxiliary coolant pump to high speed, or I take the car for a drive that includes some fast charging. Then, I measure the temperature difference between the inlet and outlet hoses at the radiator with my infrared thermometer. You should see at least a 10°C (18°F) drop. If not, airflow or flow rate is still compromised, and you’re not done yet.
-
For a Full Replacement: This needs a more rigorous validation. First, I always check for leaks. I add UV dye to the coolant and inspect with a black light after three full thermal cycles (that means heating up and cooling down completely, three times). Second, I test vacuum integrity. After filling, I pull a vacuum of at least 25 inHg and hold it for 15 minutes. If it drops more than 1 inHg in 5 minutes, you’ve got a small leak or an incomplete seal somewhere. Finally, I monitor system performance with the scan tool. I read battery and inverter coolant temperatures. They should track closely—within 5°C of each other. A larger gap suggests an airlock or improper bleeding, which means more work.
The tools you need for this aren’t luxuries—they’re necessities for any serious EV work: a quality scan tool, an IR thermometer or thermal camera, a UV light, and a cooling system vacuum/pressure tester. Don’t cheap out here.
Cost, Risk, and When to Walk Away
Let’s be realistic: fixing an auxiliary radiator isn’t cheap, and the consequences of getting it wrong are severe. Here’s a quick breakdown of what you’re looking at:
| Repair Type | DIY Cost | Shop Cost | My Success Rate (if done right) | Secondary Risk if It Fails Again |
|---|---|---|---|---|
| Fin straightening/debris cleaning. | $0–$50 (tools and your time). | $100–$200 (labor for inspection and cleaning). | High, assuming the core wasn’t already damaged. | Minimal; if it doesn’t work, you just move on to replacement. |
| Auxiliary radiator replacement. | $300–$800 (part) + $200 (coolant, seals, vacuum kit). | $1,200–$2,500 (this is labor-intensive, often requiring bumper removal). | High, but only if you follow the proper procedure and use the correct fluids. | Improper bleeding or using the wrong coolant can cause airlocks, pump failure, or severe thermal damage to the battery or inverter. That’s a huge risk. |
Here’s a rule I follow in my shop: if the repair cost exceeds 40% of the car’s current market value, you need to pause and think hard. An EV with a history of overheating may already have degraded battery capacity. That loss of range isn’t always visible on a scan tool; it shows up in daily use. You could spend $2,500 to fix the cooling system, only to find the battery won’t hold a charge like it used to. At that point, the economic case for repair weakens significantly. Sometimes, the smarter move is to cut your losses and consider a different vehicle. It’s tough, but it’s a reality.
Prevention & What to Monitor
How I Keep These Systems Healthy
-
Preventing auxiliary radiator failure starts with using the correct coolant. EVs use dielectric coolants—like GM Dex-Cool Hybrid/EV or Ford Motorcraft Yellow—specifically formulated to resist electrical conductivity. That’s not just for corrosion protection; it’s a safety feature. This coolant flows through metal plates in direct contact with high-voltage battery cells. Using standard coolant could create galvanic corrosion or, in extreme cases, an electrical short across cells. Seriously, don’t mess this up.
-
Make visual inspections part of your routine maintenance. Every time you rotate tires or have any front-end work done, shine a flashlight into the wheel well and check the auxiliary radiator fins. Look for damage, mud buildup, or insect clogs. Many manufacturers, including Ford for the Mustang Mach-E, explicitly recommend inspecting all heat exchangers at every tire rotation. They don’t put that in the manual just for fun.
-
Also, keep an eye on your energy efficiency. If you notice your Wh/mile is gradually creeping up on your regular routes, it could mean the cooling system is working harder to manage temperatures. That extra load pulls power from the battery, reducing your overall efficiency. It’s a subtle clue, but often one of the first signs of reduced cooling performance before a warning light even comes on.
-
Finally, stick to the maintenance schedule. Some EVs don’t require frequent service, but coolant condition matters. Over time, even sealed systems can degrade. If your vehicle allows coolant testing, do it. And if you’re driving in areas with salted roads in winter, rinse the undercarriage regularly. A little prevention goes a long, long way in protecting the heart of your EV’s thermal management system.
