Your Battery’s Dead Overnight? It’s Probably a Parasitic Drain.
I’ve been turning wrenches for over 25 years, and if there’s one electrical problem that consistently frustrates folks, it’s a dead battery after the car sat overnight. You know the drill: everything was fine when you parked it, but come morning, nothing. No crank, no lights, just silence. More often than not, what you’re dealing with is a parasitic drain.
So, what is it? Simply put, it’s when something in your vehicle keeps drawing power from the battery even after you’ve turned the ignition off and the car should be “asleep.” Now, don’t get me wrong, modern cars always have a small “dark current” draw. That’s normal. It keeps things like your alarm, keyless entry, and clock memory alive. We’re talking usually under 30-50 milliamps (mA) – barely a trickle. But when a component or circuit fails to shut down properly, that trickle turns into a steady leak, and it can flat-out kill a perfectly healthy battery in a matter of hours.
The classic symptom I see in the shop is this: you jump-start the car, it fires right up, runs fine, and the alternator charges the battery during your drive. You think you’re good. But leave it parked overnight again, and boom – dead battery. Repeat that cycle a few times, and you’re not just dealing with an inconvenience; you’re actively ruining your battery. Those repeated deep discharges cause sulfation, where hard lead sulfate crystals build up on the battery plates, choking its capacity. Worse yet, it can corrupt the memory in your vehicle’s electronic modules, leading to all sorts of weird warning lights, rough idling, or even sending the car into limp mode. It’s a real headache, and it’s not just about a dead battery.
First Things First: Rule Out the Simple Stuff
Before you dive into chasing down a parasitic drain, which can be time-consuming, you’ve got to rule out the simpler, more common issues. I’ve seen too many people jump straight to complex diagnostics when the problem was staring them in the face.
-
The Battery Itself: A weak battery, especially one that’s 3-5 years old, can just die on its own. It might have an internal short or simply not hold a charge anymore. Always start with a proper battery test.
-
Alternator Issues: A failing alternator, specifically one with a bad diode, can actually backfeed current and drain your battery even when the engine is off. It essentially becomes a load instead of a charger.
-
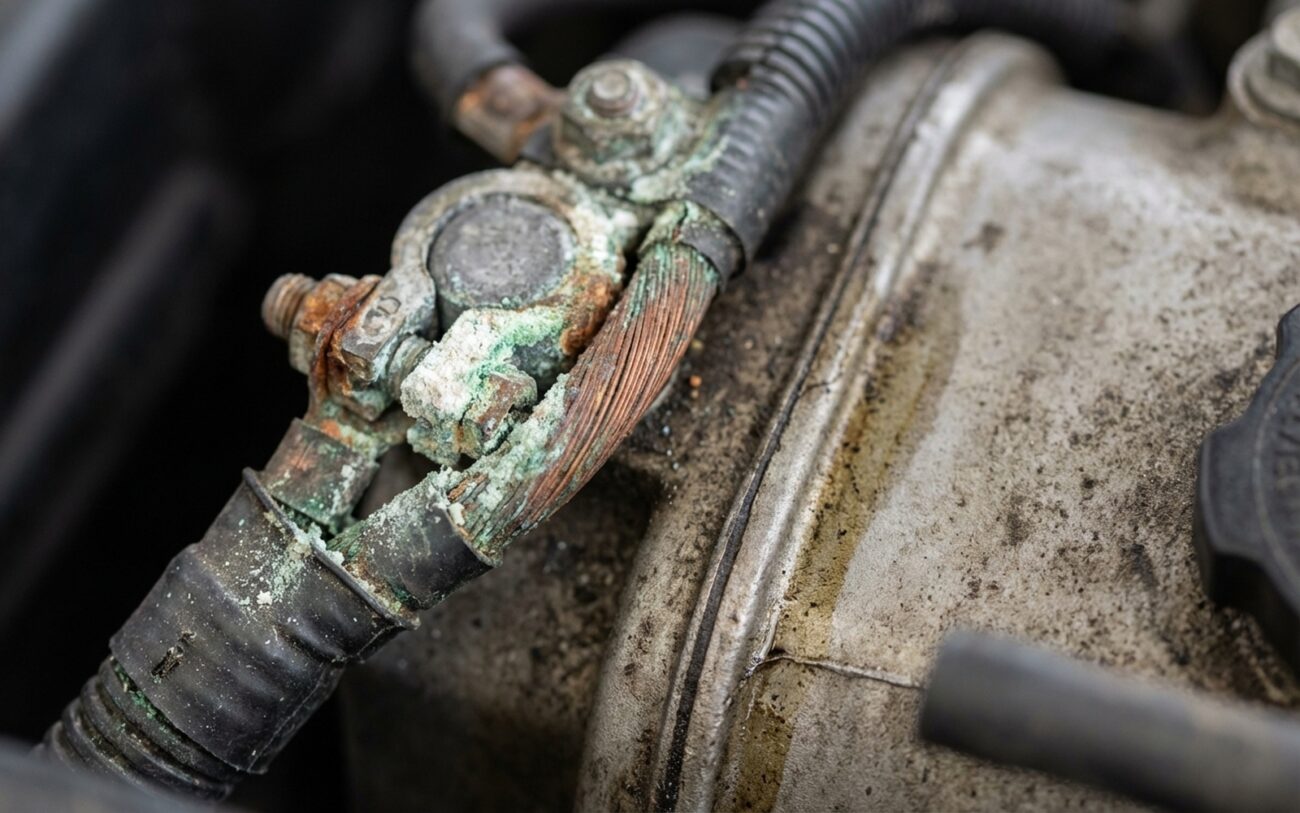
Connections: Corroded, loose, or dirty battery terminals and cables can mimic a dead battery or no-crank condition. Always clean and tighten them. And don’t forget the ground connections – a bad ground can cause all sorts of electrical gremlins.
If your battery tests good, holds a charge, and your alternator output is solid (around 13.8-14.5 volts with the engine running), then, and only then, do we start looking for a parasitic draw. This is where your digital multimeter (DMM) becomes your best friend.
The Parasitic Draw Test: Your Go-To Diagnostic
This is the definitive test, and while it requires patience, it’s not rocket science. You’re essentially measuring how much current your car is drawing when it should be completely off. Here’s the process I follow:
What You’ll Need:
-
A fully charged battery.
-
A Digital Multimeter (DMM) capable of measuring DC current up to 10 amps (A). Make sure your DMM’s leads are plugged into the correct ports for current measurement (usually “mA” or “10A” and “COM”).
-
Patience. Seriously, this isn’t a quick test.
Step-by-Step:
- Prep the Vehicle: Make sure the battery is fully charged. Turn off everything – all lights (interior, trunk, glove box), radio, aftermarket accessories, cell phone chargers, etc. Close all doors, the trunk, and the hood (you might need to manually latch the hood switch or tape it down to simulate closure). Remove the key from the ignition.
- Set Up the DMM: Set your multimeter to measure DC current, typically on the 10A scale first (this is important to avoid blowing the fuse in your DMM if the draw is high).
- Connect in Series: This is critical. Disconnect the negative battery cable from the negative battery post. Connect one lead of your DMM to the negative battery post and the other lead to the disconnected negative battery cable. You’re essentially making the multimeter part of the circuit, forcing all current to flow through it.
- Simulate “Off”: Lock the car using the remote or door button. This tells all the modules to start their shutdown sequence. Then, walk away.
- Wait for Sleep: Modern vehicles take time to “go to sleep.” This can be anywhere from 20 minutes to over an hour, depending on the make and model. During this time, you’ll see the current reading on your DMM drop in stages as different modules power down. Don’t touch anything, and don’t open any doors or the trunk – that will wake the car up and you’ll have to start the waiting game all over again.
- Read the Draw: Once the current reading stabilizes and stops dropping, that’s your true parasitic draw. On most modern cars, anything over 50mA (0.05A) indicates a problem. If you’re seeing 200mA or more, you’ve got a serious drain that’s going to kill your battery quickly.
Pro Tip: Don’t Break Your Meter! If you suspect a very high draw (like if the battery dies in a couple of hours), start your DMM on the highest amperage setting (usually 10A or 20A). If the draw is low, then you can switch to a lower mA setting for a more precise reading. Connecting directly to a high draw on a low mA setting will blow the internal fuse of your multimeter, and trust me, that’s annoying.
Tracking Down the Culprit: What’s Stealing Your Power?
Once you’ve confirmed an excessive draw, the real detective work begins. Remember, the battery isn’t the problem; it’s the victim. The root cause is always a downstream electrical issue. Here’s what I typically find:
-
Stuck or Failed Relays: This is a common one. A relay with welded contacts can keep a circuit energized when it shouldn’t be. Think cooling fans running constantly, a fuel pump staying on, or interior lights that never quite turn off. I’ve seen this on older Fords with a stuck accessory delay relay, for example.
-
Control Modules That Won’t Sleep: Modern cars are packed with computers (modules). If one of them – like the Body Control Module (BCM), infotainment system, or a telematics unit – doesn’t enter its low-power sleep mode, it’ll keep drawing current. This can be due to a software glitch, a faulty wake-up signal from another component, or an internal failure of the module itself. On some GM models, I’ve seen the radio amplifier module fail to shut down due to a corrupted data bus signal.
-
Alternator Diode Failure: I mentioned this earlier, but it’s worth repeating. If a diode inside the alternator goes bad, it can create a path for current to flow backward from the battery, essentially turning the alternator into a load even when the engine is off.
-
Aftermarket Accessories: Dash cams, GPS units, remote starters, stereo amplifiers – if these are wired directly to a constant battery power source and draw more than they should when the car is off, they’re prime suspects. I always ask about recent accessory installs first.
-
Wiring Damage or Shorts: A chafed wire rubbing against a metal part of the chassis can create a short to ground, causing a constant or intermittent draw. Door harnesses (where wires flex constantly) or wiring near sharp edges are common places to find this.
-
Simple Switches: Don’t overlook the obvious. A glove box light that stays on, a trunk light with a faulty switch, or even a vanity mirror light that doesn’t turn off can drain a battery over time.
Pro Insight: The Fuse Voltage Drop Test
Once you’ve confirmed a draw with your DMM, the next step in the shop is often a fuse voltage drop test. Instead of pulling fuses (which can wake up modules and restart the sleep cycle), you measure millivolts (mV) across the top of each fuse with the DMM set to mV DC. Any voltage drop indicates current flowing through that fuse. The higher the mV, the higher the current. This lets you pinpoint the problematic circuit without interrupting the system. It’s a real time-saver, especially on those high-draw situations that kill a battery in a few hours.
And just a quick note on hybrids and EVs: sometimes what looks like a parasitic drain in these vehicles is actually a high-voltage system fault keeping components active. Those systems are a whole different beast, and if you’re unsure, it’s always best to consult a specialist or refer to specific hybrid diagnostic procedures.
Fixing the Drain: DIY or Call the Shop?
Once you’ve identified the problematic circuit (or even the specific component), your repair options open up. Some fixes are definitely DIY-friendly, while others require specialized tools and knowledge.
Aftermarket Accessories DIY Feasible
Simple OEM Component Faults DIY to Pro
Control Module or Network Issues Professional Only
The Battery Disconnect Switch Workaround
Always Verify the Fix. Always.
This is a rule I live by: never assume the problem is fixed just because you replaced a part. You absolutely have to re-test. Reconnect your multimeter the same way you did for the initial diagnosis. Let the vehicle go through its full sleep cycle again (yes, that means waiting another 20-60 minutes). The current draw must stabilize under 50mA (or whatever your manufacturer’s specific spec is) to be considered a successful repair. If it doesn’t, you either didn’t fully address the original fault, or there’s a second, smaller drain hiding in there.
For those complex module-related issues, a professional won’t just rely on the DMM. They’ll also use a scan tool to confirm that all control modules are reporting a “sleep” status. Some modules take longer than others, so don’t rush it. A thorough validation ensures the repair truly lasts and prevents you from coming back with the same dead battery problem a week later, not to mention avoiding further battery damage.
What’s This Going to Cost Me?
Costs can vary wildly depending on what’s causing the drain and whether you tackle it yourself or bring it to a shop. Diagnosis itself can be time-consuming, and labor rates add up. Here’s a general idea:
| Repair Type | DIY Cost (Parts Only) | Shop Cost (Parts & Labor) | Success Rate | Secondary Risk |
|---|---|---|---|---|
| Aftermarket Accessory Removal/Rewire | $0 – $20 (for new wiring) | $0 – $150 | Very High | None |
| Simple OEM Component (e.g., light switch, relay) | $20–$200 | $150–$500 | High | Misdiagnosis (replacing the wrong part) |
| Control Module Repair/Replacement | N/A (requires specialized tools) | $300–$1500+ (can be much higher for luxury/EVs) | Medium/High | Programming issues, needing further diagnosis |
| Wiring Harness Repair | $50–$300 (for tools/materials) | $500–$2000 (often labor-intensive) | High | Intermittent return if not properly repaired/insulated |
| Diagnostic Labor (if no repair is done) | $0 (your time) | $100 – $300 (typically 1-3 hours of diagnostic time) | N/A | None |
Keeping Your Electrical System Healthy: Prevention is Key
My Best Advice for Avoiding Future Drains
-
Wire Aftermarket Gear Smartly: Always, always, always use a switched ignition source for aftermarket accessories (like dash cams or radar detectors) so they only draw power when the car is on. And fuse the circuit properly! Don’t just tap into constant power unless you know exactly what you’re doing and the device is designed for it.
-
Use the Right Battery: Modern vehicles, especially those with start-stop systems, are designed for specific battery types like AGM (Absorbent Glass Mat) or EFB (Enhanced Flooded Battery). Putting a cheap, standard lead-acid battery in a car that needs an AGM can throw off the power management system and even lead to premature battery failure or strange electrical issues.
-
Monitor Battery Health: If your battery is less than five years old and can’t hold a charge for 48 hours without dying, don’t wait. Get it tested, and if it’s good, test for a parasitic draw immediately. Catching it early saves you money and headaches.
-
Use a Battery Maintainer for Storage: If you’re storing your vehicle for weeks or months (like a classic car or an RV), invest in a good quality battery maintainer (not just a trickle charger). It’ll keep the battery topped off and prevent sulfation, drastically extending its life.
