Alright, let’s talk about no heat. After 25 years turning wrenches, I’ve seen more clogged and leaking heater cores than I care to count. It’s a common problem, but often misdiagnosed, and that can cost you a lot of time and money. This isn’t just about being comfortable; it’s about keeping your engine healthy and your windshield clear. So, let’s get into how I approach this in the shop.
The “No Heat” Symptom: Where to Start
You’ve got the dial cranked to full hot, the fan’s on high, and all you’re getting is lukewarm air, or maybe even just cold air. Meanwhile, your engine temperature gauge looks perfectly normal—no overheating, no warning lights. That combination right there—a hot engine, but no heat from the vents—is the classic sign that points to a heater core issue. It’s usually the first thing that pops into my head when a customer describes that.
The heater core is basically a tiny radiator tucked deep inside your dashboard. Hot coolant from the engine flows through it, and the HVAC blower fan pushes air across those hot tubes to warm up the cabin. When that core gets clogged or starts leaking, that heat transfer stops. Simple as that.
But before we jump to conclusions, we need to make sure the engine is actually getting hot enough. I’ve seen plenty of cases where a thermostat stuck open prevents the coolant from reaching full operating temperature. That’ll mimic a heater core failure perfectly. The best way to rule that out? Hook up a scan tool and read the live coolant temperature data. If that sensor shows your engine is hitting at least 185°F (85°C) and you still have no heat, then we know the problem is almost certainly downstream, likely in the heater core itself or somewhere else in the HVAC system.
Beyond just the lack of heat, there are other telltale signs that scream “heater core.” One of the most common is a sweet, syrupy odor inside the cabin, especially when you first turn on the heat. That’s the smell of evaporating coolant, which uses glycol. You might also notice a greasy, persistent film on the inside of your windshield that’s a real pain to wipe away. In more advanced cases, you’ll find the passenger side floor mat damp, not with water, but with a slimy, colored fluid. That’s coolant leaking directly from the core into the HVAC case and dripping onto the floor. And if you’re constantly losing coolant with no visible external leak—no puddles under the car, no drips from hoses—that’s another strong clue the core is leaking internally.
My Diagnostic Process: Confirming the Real Culprit
Look, not every “no heat” complaint means the heater core is toast. There are several other issues that can mimic the exact same symptoms, and misdiagnosis is pretty common. I’ve seen folks replace a core only to find out it was a stuck blend door, or a bad HVAC control module. That’s why I always stress testing, not guessing. Here’s how I break it down in the shop to pinpoint the real problem.
Symptom: No Heat, Engine at Operating Temperature
This is the most common one. If the engine’s hot but the air isn’t, it’s usually internal clogging in the core, an air pocket trapped inside it, or some physical blockage in the coolant passages. But it could also be a blend door that’s stuck, a failed HVAC control head, low coolant (even if the engine temp looks okay), or that thermostat I mentioned earlier. An air pocket in the cooling system can also cause this, which is a simpler fix.
The definitive test I use is simple: grab an infrared thermometer. With the engine fully warmed up and the heater on max, measure the temperature of both heater hoses where they go through the firewall. If the inlet hose is hot (within 20°F or 11°C of the engine’s coolant outlet temp) but the outlet hose is cool, that tells you there’s no flow through the core. It’s clogged. While you’re there, quickly verify the blend door is actually moving. Some cars have an actuator self-test you can run with a scan tool, or you might be able to visually inspect it.
Symptom: Sweet Smell or Fog on the Windshield
This almost always means a small leak from the core itself or degraded O-ring seals where the hoses connect. Now, sometimes people confuse this with evaporator condensate (which is usually odorless) or spilled coolant near the reservoir. But that sweet, syrupy smell is pretty unmistakable.
My go-to test here is adding UV dye to the coolant. Run the HVAC on max heat for about 20 minutes to circulate everything. Then, grab a UV light and inspect the windshield, the dashboard crevices, and especially the HVAC drain points under the car. If you see that telltale UV glow on the glass or dripping from the drain, you’ve got a leak.
Symptom: Coolant on the Passenger Floor
This is a dead giveaway for a leaking heater core or a crack in its housing. However, don’t just assume. I’ve seen clogged A/C evaporator drains, windshield seal leaks, or even sunroof drain clogs cause water on the floor, and sometimes it can look similar. But water is clear; coolant is usually colored and feels slimy.
To confirm, I’ll first test the fluid with coolant test strips—they’ll detect the nitrites and phosphates specific to antifreeze. Then, I’ll perform a cooling system pressure test. With the system pressurized and the blower fan on, if you see fluid seeping from the HVAC case or dripping onto the floor, you’ve found your leak. If the test strips are negative and there are no drips under pressure, you’re looking at a water leak, not coolant.
Symptom: Coolant Loss with No Visible External Leak
This is another strong indicator that the core is leaking internally into the HVAC housing, where it evaporates or drains away without you seeing it. Of course, it could also be a leaking intake manifold gasket, a head gasket breach (into the oil or combustion chamber), or even a small leak from a throttle body heater. Those are all more serious, but we need to rule out the core first.
My test here involves a thorough pressure test. I’ll pressurize the system to the radiator cap’s rating (usually 16–18 psi) and let it sit for at least 20 minutes. If the pressure drops, and you’ve already ruled out external leaks, then it’s time to get a borescope. I’ll snake it in through the blower motor opening to inspect the heater core and the drain area inside the HVAC case. If I see any wetness or signs of coolant there, that’s our culprit. If the pressure holds steady and there’s no internal moisture, we start looking at those other, more serious engine leaks.
A quick word of caution: if you’re dealing with electrical gremlins elsewhere—like a body control module (BCM) not registering a door as open, which can affect HVAC operation on some vehicles—it’s always worth checking if a deeper network issue is at play. Sometimes a seemingly unrelated electrical fault can mess with your climate control.
Why Heater Cores Fail: Root Causes I See
If your diagnostic tests point squarely to the heater core itself, the next logical question is, “Why?” We’re talking about failures that originate inside the core here, not just a leaky hose or a bad O-ring at the firewall (which is a much simpler fix, by the way—we’ll get to that).
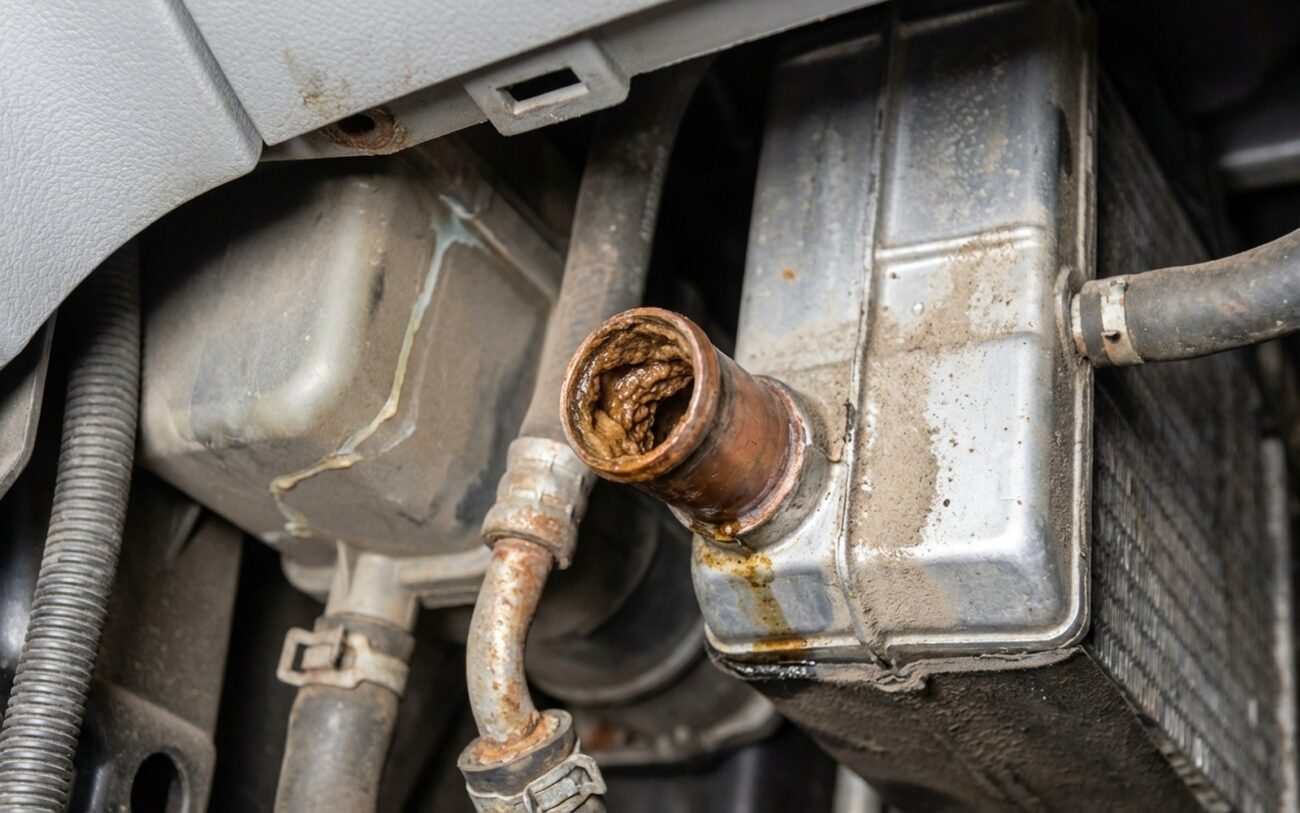
The number one cause of heater core failure, in my experience, is internal clogging. This almost always starts with neglected coolant maintenance. Over time, the corrosion inhibitors in your antifreeze break down. It’s a process called silicate dropout, and it’s accelerated if you use the wrong type of coolant or, even worse, mix different coolant chemistries. What happens then? You get a thick, sludgy buildup that blocks those narrow passages inside the core. I’ve seen this countless times in vehicles where owners just topped off with whatever coolant was on sale, not realizing they were slowly killing their entire cooling system from the inside out.
Another major contributor is electrolysis. This is stray electrical current in the cooling system that causes galvanic corrosion. It literally eats away at the metal from the inside, thinning the tubes and creating pinholes or restricting flow. It’s often tied to poor engine grounding or a failing electrical component that’s trying to ground itself through the coolant. You often won’t see any obvious signs until the damage is done.
Natural aging plays a role too, of course. After years of thermal cycling—heating up and cooling down—the aluminum or brass tubes can just corrode and develop leaks. And yes, manufacturing defects do happen. I’ve seen certain model years or specific engines that have documented issues, like casting sand left in cooling passages from the factory. These aren’t random failures; they’re patterns we see in the shop, and they’re usually known issues within the industry.
Critical point:
A failed heater control valve, a clogged heater hose, or a leaking O-ring at the firewall is NOT a heater core failure. Those are separate, external issues. A bad O-ring is a $10 fix; a core replacement can be a $1,500 job. That’s why getting the diagnosis right is so important.
Resolution Pathways: From Flush to Full Replacement
Your repair path really depends on what’s wrong and how far gone the core is. We’ve got options, from simple fixes to the dreaded full dashboard tear-down.
Chemical Flush
Heater Core Bypass Temporary Fix
Heater Core Replacement: This is Shop Territory
If the core is leaking, replacement is the only real fix. And nine times out of ten, this is a job for a professional shop. Accessing the heater core usually means removing the entire steering column, the instrument panel (that’s your whole dashboard), and often multiple airbag modules. The HVAC case itself has to be opened, the old core extracted, and the case meticulously resealed—which often requires new gaskets or RTV sealant. One mistake in reassembly, and you could end up with HVAC leaks, electrical faults, or even airbag warning lights. I’ve seen countless DIYers cause more problems than they solve trying to tackle this one. It’s a 10-hour job minimum on many vehicles, and it’s not for the faint of heart.
O-Ring Replacement (Firewall)
Post-Repair Validation: Don’t Just Assume It’s Fixed
Never, ever assume the job is done until you’ve thoroughly tested it. If you just flushed the core, the test is pretty straightforward: with the engine fully warmed up and the heater on max, use your infrared thermometer on both heater hoses at the firewall. Both should be hot—ideally within 20–30°F of each other. If that outlet hose is still cool, the blockage is still there, or you’ve got an air pocket you need to bleed out.
If you’ve gone through the trouble of replacing the core or fixing a leak, validation is more involved, and you can’t skip steps. First, pressure test the entire cooling system. It absolutely must hold the radiator cap’s rated pressure (typically 16–18 psi) for at least 30 minutes with no drop whatsoever. If you used UV dye for diagnosis, inspect all connections again, especially those firewall fittings and the HVAC case, under a black light.
Then, you need to verify full operation. Drive the car through at least three full heat cycles—that means cold start to operating temperature and back down. Check for any new dampness, that sweet odor, or fogging on the windshield. Finally, with the engine at about 1,500 RPM and the heater on max, measure the airflow temperature at the center vent. It should read above 100°F (around 38°C). Most professional shops use a digital probe thermometer for this. If it’s not blowing hot, something’s still wrong—maybe a trapped air pocket, a blend door issue you didn’t catch, or even a problem with the new core.
Cost, Risk & When to Walk Away
Let’s talk real numbers and trade-offs. The cost for a heater core fix varies dramatically based on the approach and, especially, the labor involved. Here’s a quick breakdown of what I typically see:
A simple chemical flush? If you DIY, you’re looking at $20–$50 for the kit and coolant. A shop might charge $100–$200. Success rate for severe clogs is only about 30–50%. The big risk if it fails? You could dislodge debris that then clogs your radiator or engine passages, leading to overheating—which is a much bigger headache.
Heater core replacement is where it gets expensive. The part itself might be $100–$400. But the labor? That’s typically $800–$2,000+, depending on the vehicle. I’ve seen some European cars push $3,000 for this job. If done correctly, the success rate is 95%. But the risks of a botched DIY job are huge: dash damage, airbag faults, HVAC leaks from improper case sealing, or electrical issues from disturbed connectors. It’s a minefield.
And then there’s cooling system sealant, those “stop leak” products. They’re $10–$30. They might work 40–60% of the time for tiny pinhole leaks. But the secondary risk is massive: they can block not just your heater core, but also your radiator or crucial engine coolant galleries, essentially requiring a full system replacement. I generally advise against them unless you’re truly desperate to squeeze a few more miles out of a vehicle that’s already on its last legs.
Here’s how I advise customers when they’re facing a big repair like this: if the estimated repair cost exceeds 50% of the car’s private-party value (check Kelley Blue Book or similar), you need to seriously consider your options. Putting $1,800 into a $3,000 car rarely makes financial sense. In those cases, a temporary bypass or a careful flush attempt might be the most practical move—even if it’s not ideal. Or, frankly, it might be time to start looking for a replacement vehicle. Be honest with yourself about the car’s role in your life and its true value.
Prevention & Monitoring: Keep That Heat Flowing
The best heater core repair is always the one you never need. And nearly all heater core failures I see stem from neglected cooling system maintenance. It’s not just about changing your coolant; it’s about using the right type. Always use OEM-specified coolant: Honda Type 2, GM DEX-COOL, Toyota Red, or whatever your manufacturer recommends. Mixing types can cause chemical reactions that form sludge, and that’s exactly what clogs these cores. And always mix it with distilled water at a 50/50 ratio—tap water introduces minerals that accelerate corrosion and buildup.
My Advice for Preventing Recurrence:
-
Change your coolant on schedule, not when it just “looks dirty.” Some long-life coolants can last 100,000 miles or more, but only if the system stays sealed and contamination-free. Don’t push it past the manufacturer’s recommendation.
-
Practice early detection. Before winter hits, always test your heater. Turn it on full hot and verify the airflow is genuinely hot. If you catch a whiff of coolant, see any fogging on the windshield, or notice a greasy film, investigate it immediately. A small leak caught early can save you thousands in interior damage and labor.
-
Make it a habit to check your coolant level monthly in the overflow tank. If you’re topping it off regularly with no visible external leak, it’s time for a cooling system pressure test. That missing coolant is likely going somewhere, and often, it’s inside your HVAC case. Catching it early could mean you’re dealing with a $100 O-ring replacement, not a $1,500 dash-out job.
