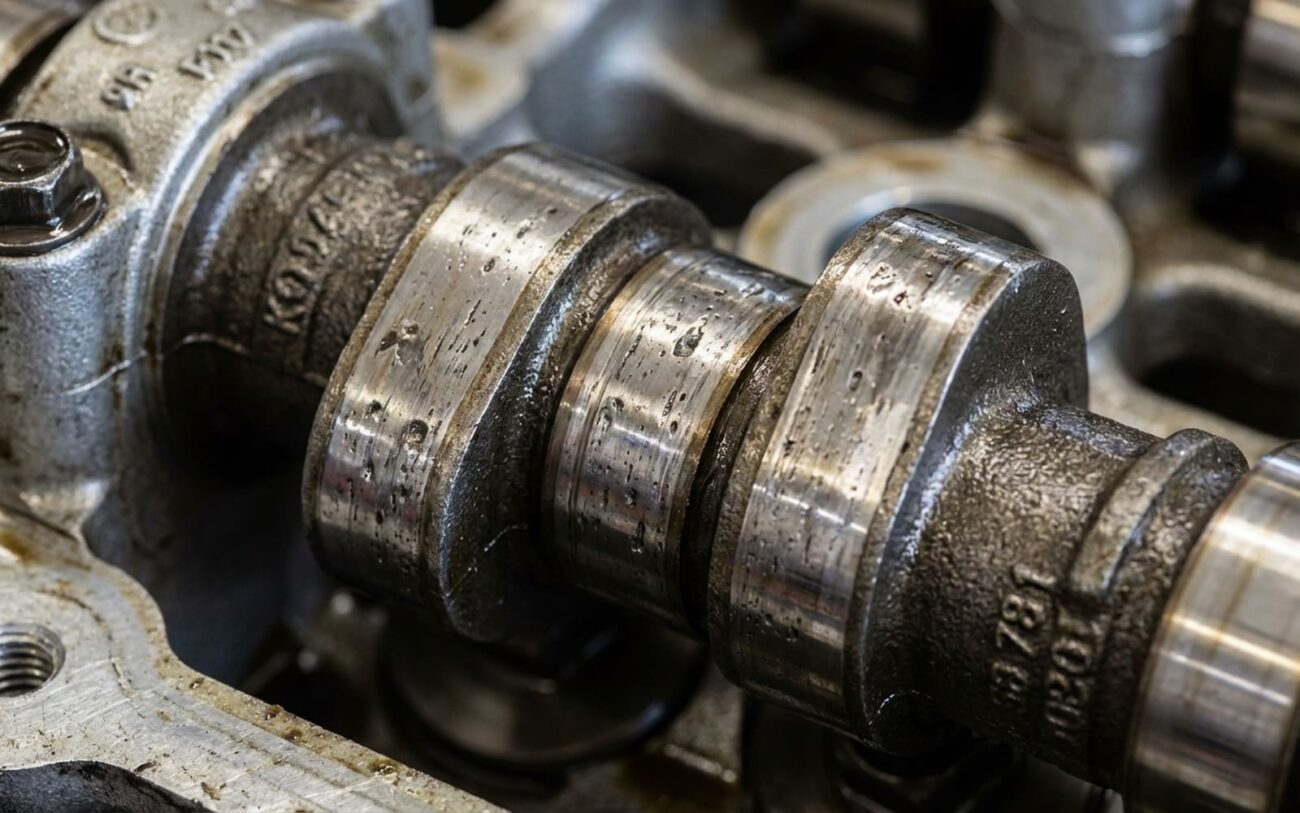
Alright, let’s talk about something I’ve seen way too many times in my 25+ years turning wrenches: camshaft lobe wear. It’s one of those sneaky problems that can make you chase your tail, replacing coil packs, spark plugs, and injectors, only to have that check engine light pop right back on with the same old misfire codes. If you’re dealing with a persistent misfire, especially one that just won’t clear, you might be looking at something deeper than a simple ignition or fuel issue. We’re talking mechanical failure in the valvetrain.
What It Feels Like When a Cam Lobe Goes Flat
The most common symptom I see is a cylinder-specific misfire. You’ll get a P030X code—say, P0301 or P0304—and it just won’t go away, no matter what you throw at it. The camshaft lobe is what tells your valve how far and how long to open. When that lobe wears down, it loses its proper profile, which means less valve lift and duration. That cylinder can’t breathe right, simple as that. Combustion suffers, and you’ll feel it as a stumble or vibration at idle, and definitely poor performance when you try to accelerate.
This often mimics low compression, but here’s the kicker: if your cranking compression test reads normal, it’s usually not your piston rings or a burned valve. It’s a valve timing issue, and that points a big finger straight at the camshaft. I’ve had countless customers come in convinced they need an engine rebuild, only to find a flat cam lobe was the culprit.
Along with the misfire, you’ll feel a noticeable power loss. The engine might putter around town okay, but try to merge onto the highway or climb a hill, and it just feels gutless. No boost, no responsiveness—just a flat, lifeless top end. Often, there are no fuel or airflow codes, just those persistent misfires. While a clogged catalytic converter or a failing fuel pump can feel similar, worn cam lobes are a common culprit on high-mileage engines, especially if maintenance has been spotty.
And then there’s the noise. Listen carefully. A rhythmic, sharp ticking from the valve cover area is a huge red flag. This isn’t the soft tick of fuel injectors or the rattle of a loose heat shield. This is a hard, mechanical click that increases with engine speed. That noise comes from the lifter or follower smacking down on a flattened lobe because there’s too much clearance. On hydraulic lifters, you might even hear a slight lifter tick at startup that never goes away. That’s not just annoying; it means the lifter can’t maintain zero lash because the cam profile is gone, and it’s just hammering away.
On modern engines with variable valve timing (VVT), lobe wear can cause even more headaches. You might see codes like P0010, P0011, or P0014, indicating camshaft position correlation issues. The engine’s computer tells the phaser to adjust timing, but if that worn lobe creates abnormal resistance, the cam won’t respond correctly. Even with good oil pressure and a clean solenoid, the system can’t hit its target timing. I’ve diagnosed several VVT-equipped 4-cylinders where the actual problem wasn’t a faulty solenoid, but a cam lobe so worn it was physically binding the phaser, preventing it from rotating freely.
How I Figure Out If It’s Really the Camshaft
Before you start tearing into an engine, you’ve got to rule out the easy stuff. Many issues can mimic cam lobe wear, and unnecessarily pulling a valve cover is a waste of time and money. Here’s my diagnostic process:
1. Confirm the Misfire and Check Compression
You’ve got a P030X code. First thing I do is swap the coil and plug from the misfiring cylinder to a known good one. If the misfire moves, you found your problem. If it stays put, then it’s time for a compression test. I always do both a cranking compression test and a running compression test.
- Cranking Compression: If this is low, you might have a burned valve, worn rings, or a head gasket issue. But if it’s normal (within 10-15% of other cylinders), that tells me the cylinder is sealing fine when it’s just spinning over.
- Running Compression: This is the definitive test for cam lobe wear. With the engine idling, a worn cam lobe will show significantly lower running compression—I’m talking 20-35 PSI, sometimes even less. Why? Because the valve isn’t opening enough or staying open long enough to draw in a full charge of air. If cranking compression is good but running compression is low, the valves aren’t opening enough, and that points straight to the valvetrain.
2. Listen and Inspect for Valvetrain Noise
If you’ve got that rhythmic ticking, grab your mechanic’s stethoscope. Pinpoint the noise. Is it coming directly from the valve cover above a specific cylinder? If it’s localized and sharp, that’s a strong indicator. Once you’ve narrowed it down, you’re going to have to pull that valve cover.
With the valve cover off, visually inspect the cam lobes. You’re looking for any signs of wear: a dull, flattened appearance on the peak of the lobe, pitting, or scoring. Compare it to the lobes on adjacent cylinders. You can also use a dial indicator to measure the actual lift, or a set of feeler gauges to check the clearance between the lobe and the lifter/follower. If there’s excessive clearance, or the lobe looks visibly worn, you’ve found your culprit.
3. Diagnose VVT Correlation Codes
If you’re seeing P0010, P0011, P0014, or similar VVT codes, it’s not always the solenoid or the phaser itself. While those are common, a worn cam lobe can increase the rotational drag on the camshaft, preventing the phaser from achieving its commanded position. I use a bidirectional scan tool to command camshaft movement while monitoring the actual vs. desired position. If the actual position consistently lags or can’t reach the desired position, even with good oil pressure and a new solenoid, then that worn lobe is often the issue. It’s physically resisting the phaser’s efforts to rotate the cam.
Don’t overlook other mechanical issues, of course. A warped cylinder block or cracked cylinder head can cause compression loss, but those usually come with coolant in the oil, external leaks, or overheating. If your cranking compression is solid but running compression is low, the valves aren’t opening enough—that’s a valvetrain issue, not a sealing one.
Why Camshaft Lobes Wear Out in the First Place
Cam lobe wear isn’t random. It’s almost always the result of lubrication failure, contamination, or, in rarer cases, a material defect. Understanding the root cause is critical, because if you just replace the camshaft without fixing the underlying problem, you’ll be doing this job again sooner than you think.
One less common but very real cause is a material or heat-treating defect from the factory. If the cam wasn’t properly hardened or has a subsurface flaw, the surface can start to spall—tiny pits or flakes breaking loose under load. This is rare, but I’ve seen it documented in certain engine families, like some 2.4L four-cylinder engines where the exhaust cam lobes showed premature wear due to a known manufacturing variation. If it’s a known issue for your engine, that’s something to consider.
The most frequent cause I see, hands down, is abrasive wear. Contaminated oil—loaded with dirt, soot, or metallic debris—acts like grinding paste between the lobe and the follower. Even fine particles from a failed air filter or internal engine wear can accelerate lobe flattening. That’s why regular oil changes with a quality filter are non-negotiable. Skipping maintenance or using low-grade oil is a fast track to valvetrain failure, plain and simple.
Scuffing, or adhesive wear, happens when the oil film breaks down under high pressure. The metal surfaces momentarily weld together and then tear apart, leaving behind scored or scratched lobes. This is more common in engines with high spring pressure, aggressive cam profiles, or when the incorrect oil viscosity is used. For example, using a 0W-20 in an engine that really needs a 5W-30 can lead to insufficient film strength, especially under heavy load or at high temperatures. Always use the manufacturer’s recommended oil spec.
Finally, there’s fatigue wear, which just happens over time. After hundreds of thousands of cycles, the hardened surface of the lobe can develop micro-cracks that propagate and cause spalling. This is normal wear at high mileage, but it’s significantly accelerated by poor lubrication or extended oil change intervals. It’s why I always tell people that maintenance is cheaper than repair.
It’s important to distinguish lobe wear from other failures. Worn camshaft bearings cause low oil pressure and a low-pitched rumble, but they don’t flatten lobes. A broken valve spring, however, can allow the lifter to bounce at high RPM, hammering the lobe and causing damage. In that case, the cam is the victim, not the cause. Always inspect springs, retainers, and followers during teardown—replace them all as a set if you find any damage.
Your Repair Options: From Band-Aids to Full Replacements
Professional Territory Only
Let me be crystal clear: there is no halfway fix for camshaft wear that actually lasts. This is not a DIY job for the average home mechanic. Camshaft wear must be addressed thoroughly by someone who knows what they’re doing. Your repair path depends on the extent of the damage, the engine design, and your budget.
Reprofiling Professional Only
Camshaft & Lifter Replacement Professional Only
Cylinder Head Replacement
Temporary Fixes (ZDDP Additives)
Making Sure The Repair Actually Worked
After a camshaft replacement or repair, validation is absolutely critical. Don’t assume it’s fixed just because the engine starts up. Here’s how I verify the job was done right:
First, the engine should start smoothly and idle without any misfires. I use a scan tool to monitor for P030X codes over several drive cycles, paying close attention to performance under load. Second, that valvetrain noise should be gone. I use my stethoscope to check near the suspect cylinder. You’ll still hear injectors and normal lifter operation, but that rhythmic tapping from a worn lobe should be completely absent. Third, I perform another running compression test on the previously affected cylinder. It should now read within 10% of the others—typically 50–75 PSI at idle, depending on the engine.
If the engine has VVT, I always check the camshaft position data with a scan tool. At key RPM points (like 1500 and 2500 RPM), the “actual” cam position should closely match the “desired” position, usually within 2–5 degrees. The VVT-related codes should remain off for at least 50 miles of mixed driving. If the phaser still struggles to respond, I’d recheck oil flow, solenoid operation, or suspect debris in the oil control valve. Sometimes, even after a cam replacement, a partially clogged OCV can cause issues.
Finally, I tell customers to monitor their oil for metal particles in the first few hundred miles. A quick dipstick check for a silver or gray metallic sheen, or even an oil analysis, can reveal signs of ongoing wear. If you see that metallic sheen, stop driving immediately—there might be an assembly issue or a compatibility problem with the new components.
What This Is Going to Cost You
Let’s not sugarcoat it: this repair is expensive. The costs vary widely depending on the engine type and local labor rates. You’re paying for precision labor, often specialty tools, and multiple critical components. This isn’t a job for the faint of heart or light wallet.
Pushrod V8 Repair
This typically includes a single camshaft and a full lifter set. Parts alone usually run $400 – $800. In my experience, the success rate is high, around 95%, because these are generally simpler designs.
DOHC V6/I4 Repair
This covers dual overhead camshafts and a full follower/lifter set. Parts alone can be $900 – $1,600. The complexity of timing multiple cams means the labor is higher, and the success rate is closer to 90% due to more potential points of failure if not done meticulously.
The high labor cost reflects the precision required, especially on interference engines. A timing belt or chain installed even one tooth off can destroy the engine instantly. There’s no room for error here.
Before committing to this, you have to ask yourself the hard question: is the car worth it? As a rule of thumb, if the repair exceeds 50% of the vehicle’s fair market value (check KBB or Edmunds), you should seriously consider alternatives. A used long-block or a complete engine swap might be more economical, believe it or not. Putting a $4,000 repair into a $5,000 car can make sense if the rest of the vehicle is in great shape and you plan to keep it. But on a $2,000 car, it’s often better to cut your losses and move on. I’ve seen too many people sink good money after bad.
How to Prevent This From Happening Again
My Maintenance Advice
-
Follow your manufacturer’s severe service schedule. That often means oil changes every 5,000 miles or 8,000 kilometers, not the 10,000+ some people try to stretch it to. Modern engines run hotter and have tighter tolerances, making oil quality and interval even more critical.
-
Always use the exact oil viscosity and specification (API, ACEA, or OEM standard like BMW LL-01 or GM dexos) listed in your owner’s manual. Don’t cheap out on oil; it’s the lifeblood of your engine.
-
Consider oil analysis every 10,000 to 15,000 miles. Labs can detect rising levels of iron and chromium—indicators of internal engine wear—long before any symptoms appear. It’s a cheap way to get an early warning.
-
Don’t ignore new noises. A consistent tapping from the top end is not normal. If you hear it, pull the valve cover and inspect those lobes early. A borescope can sometimes give you a peek without full disassembly.
